I would go with the new water pump Steve. Unless your going for big power I can't see it making much difference. I would imagine the flow rate to still be adequate.


I would go with the new water pump Steve. Unless your going for big power I can't see it making much difference. I would imagine the flow rate to still be adequate.
 Lowiepete liked this post

...and a one-off buy, forever!Originally Posted by Woznaldo

Regards,
Steve
Well, I'm hoping that I can clean up the Valeo pump. I've bought some stuff that
might help me achieve that. Watch this space...
Regards,
Steve
Hello Folks,
I've just collected a pile of photos taken by Karl during and after the process
of engine removal. They aren't in any particular order, but they were mostly
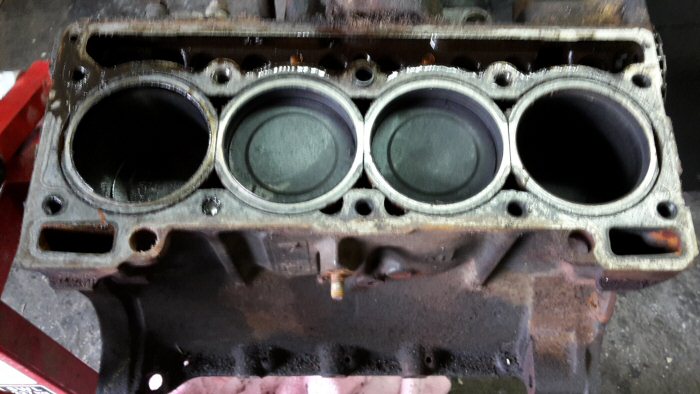
taken as an aide memoire of the re-assembly process. Quite apart from
finding the engine in very good condition, especially the water-ways in the
head, along with tight pistons and clean bores, there were nearly 50 pieces
that were sent to Aerocoat for powder coating.
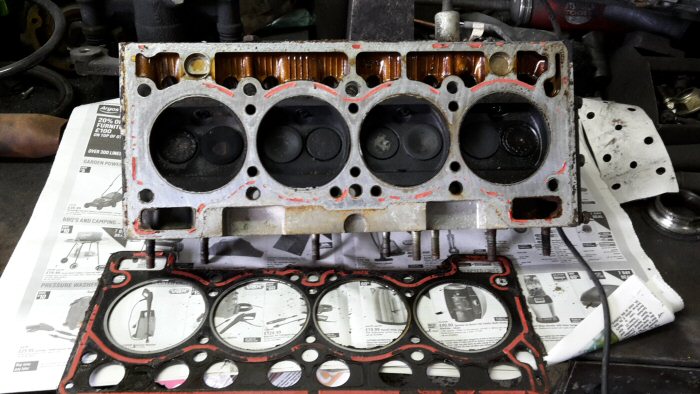
The condition of the head, and even the original head gasket, were just a
source of sheer joy! This is bearing in mind the muck that was drained from
the cooling system last year. It looks like the several flushes, including 2
involving dishwasher tablets, have done their work marvellously...
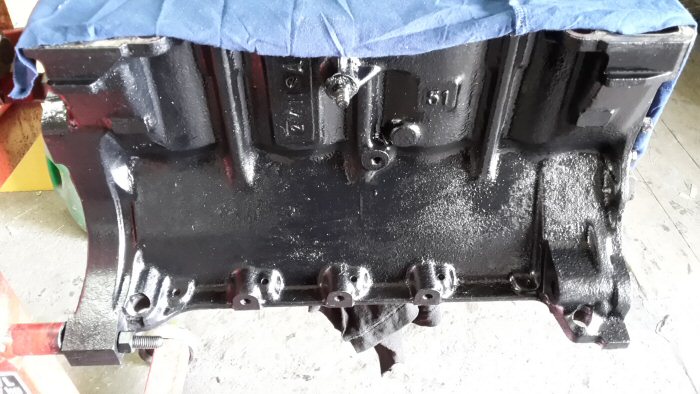
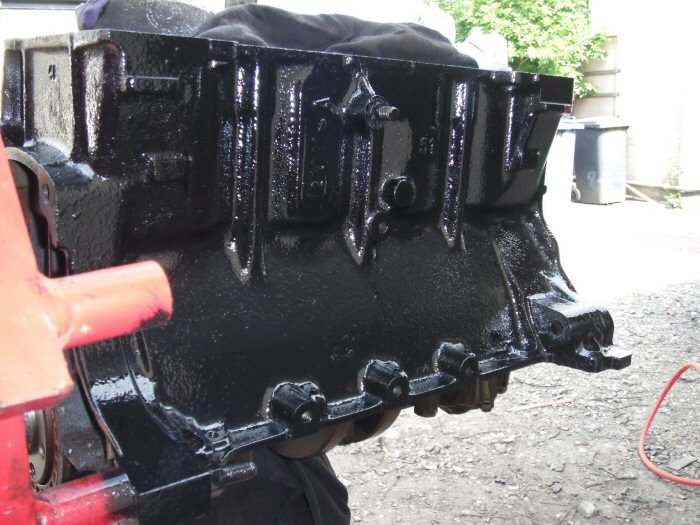
The block in its undercoat...
Sadly, it looks like no pictures of the removed engine sub-frame were taken
before also going to Aerocoat. Hopefully, the bits will be returned next week.
Regards,
Steve

Good stuff Steve, that is a clean head, dishwasher tablet does the job. Original headgasket still fitted must be somewhat of a rarity!

Regards
Karl.
Lowiepete liked this post
Hi Karl,
What the photo doesn't show, and I find amazing, is that it looks almost in good
enough condition to put back in place! There's been so many pleasant surprises
with this car...
BTW, I've pulled out of the retro-kings day. There's been a couple of unplanned bits
and bobs pop up recently, including Tia being poorly
There's a small possibility that I will make the Hexham Show on the 16th, fingers Xd.
Regards,
Steve
Hello Folks,
Despite my being away for nearly two weeks, there's been a bit more progress
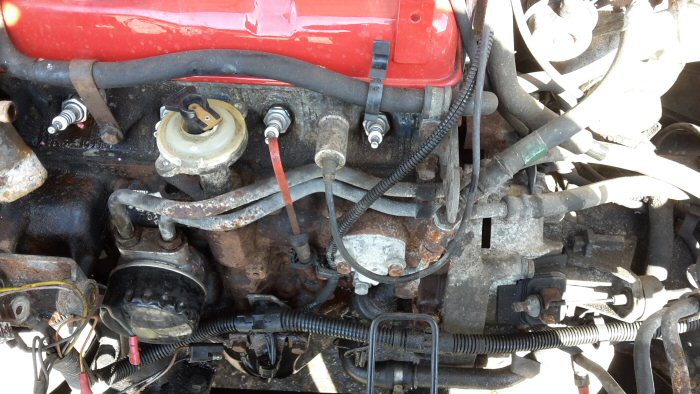
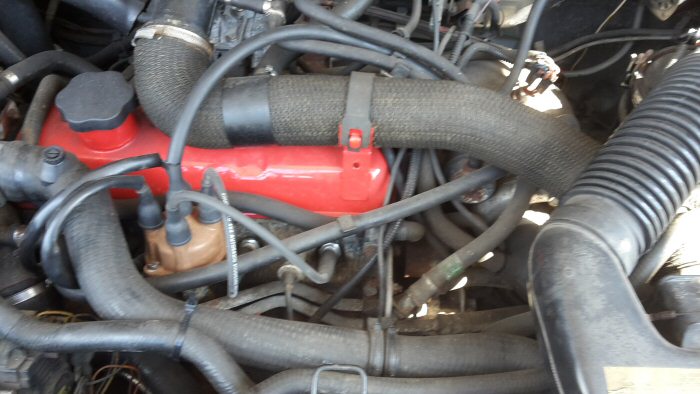
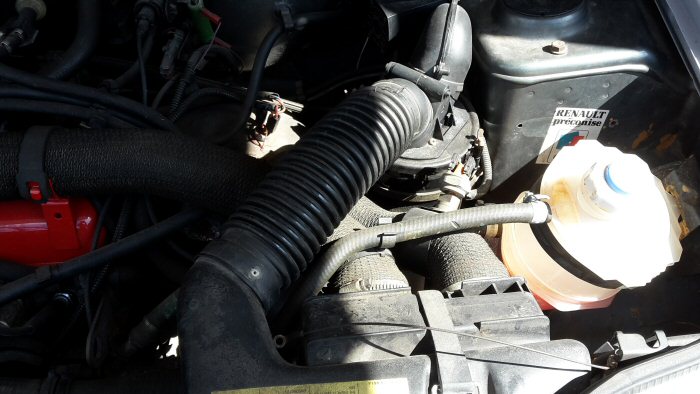
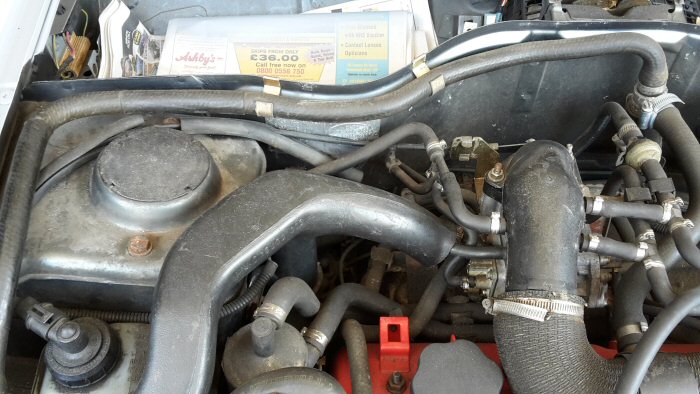
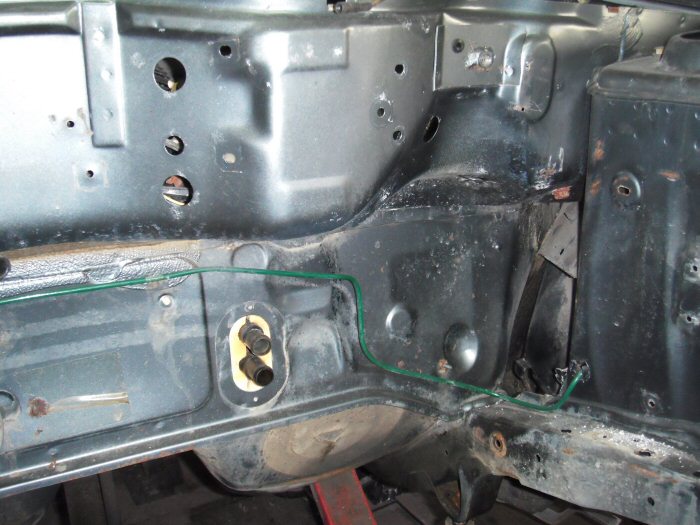
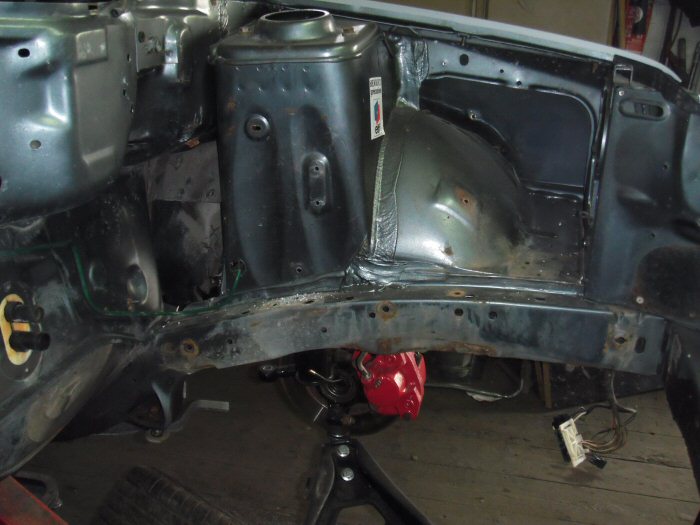
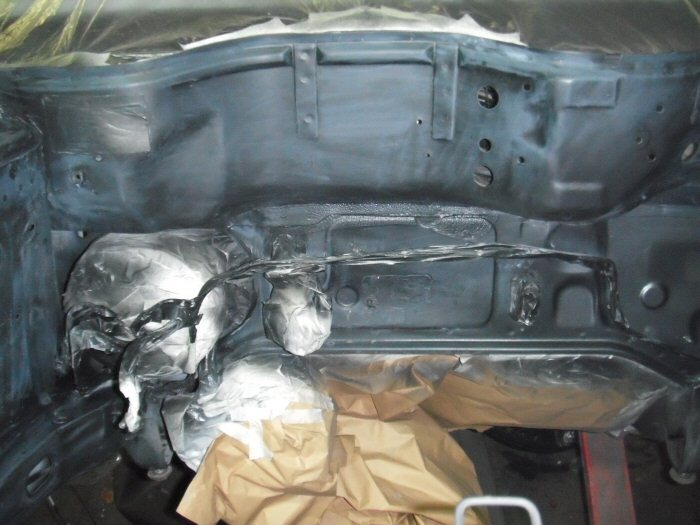
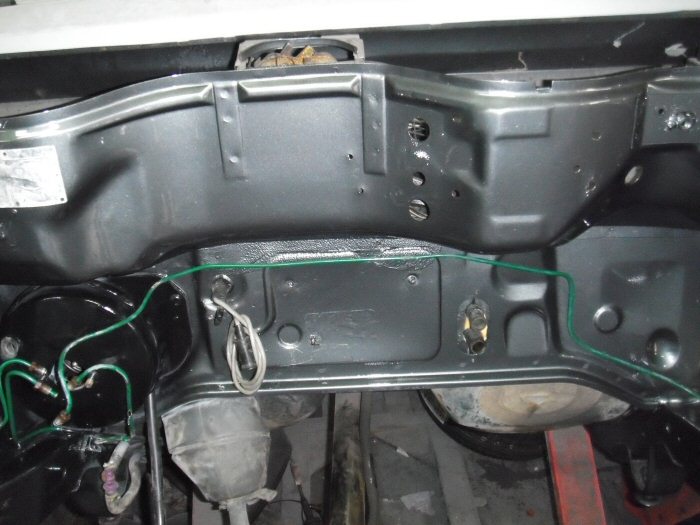
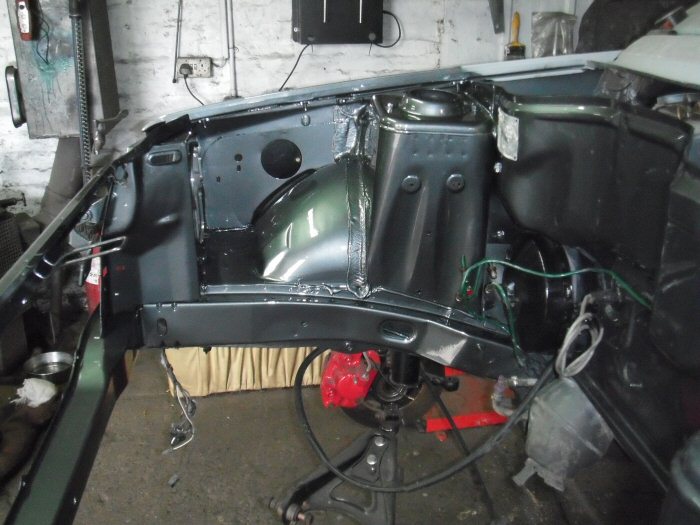
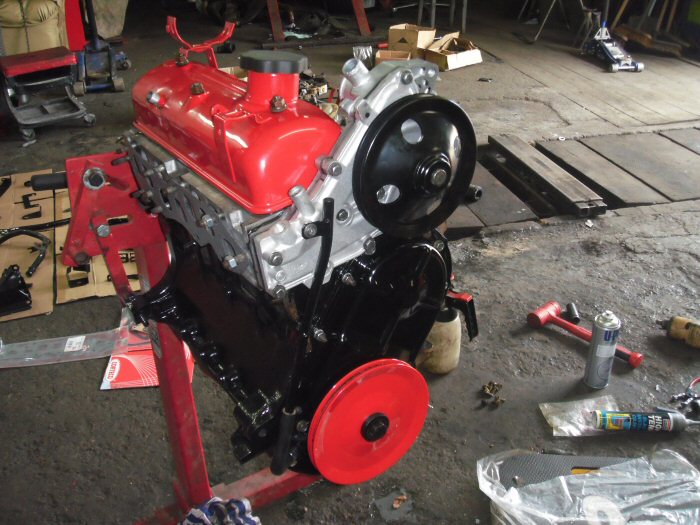
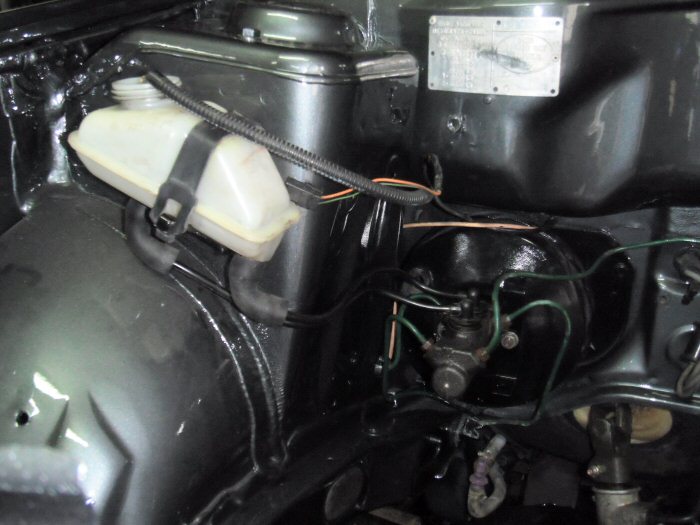
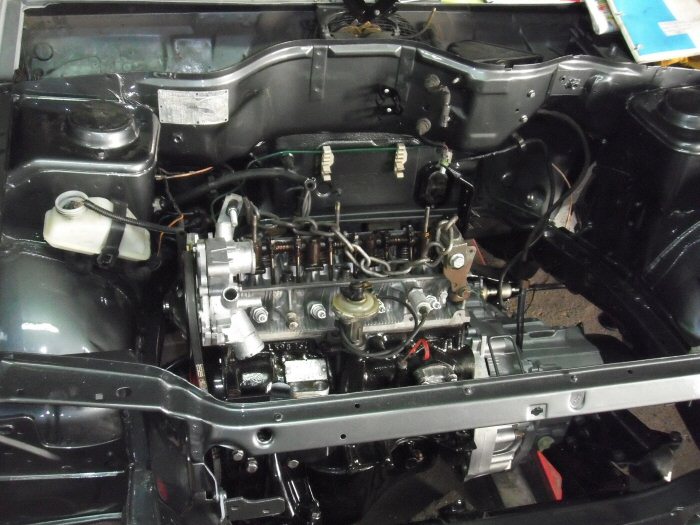
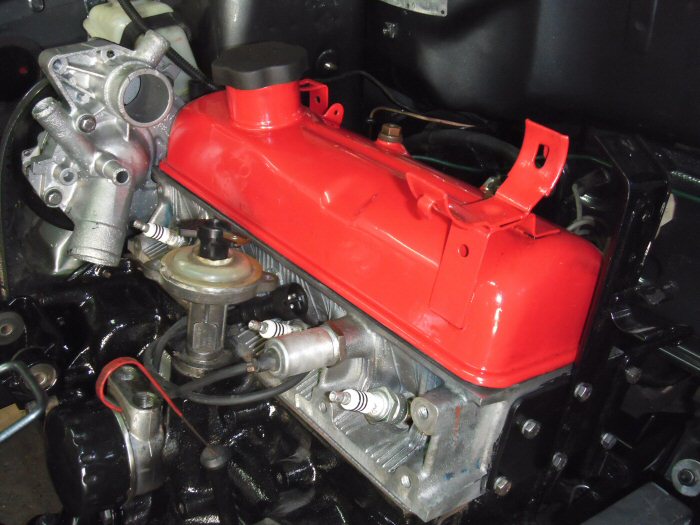
on the car's restoration. Next up will be the engine bay, and this is how it
looks at the moment...
The question came up: Should we stick with black for the brake servo
reservoir?
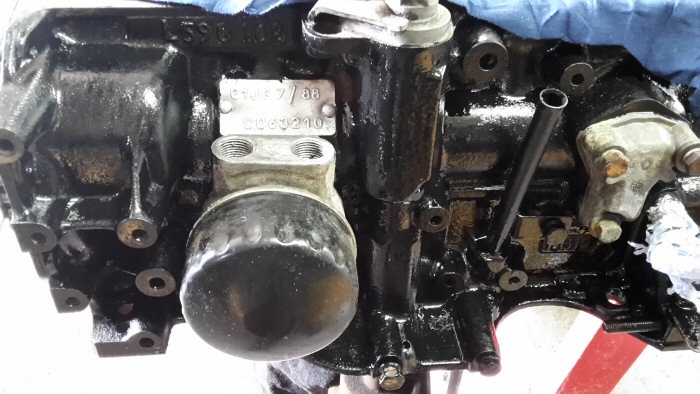
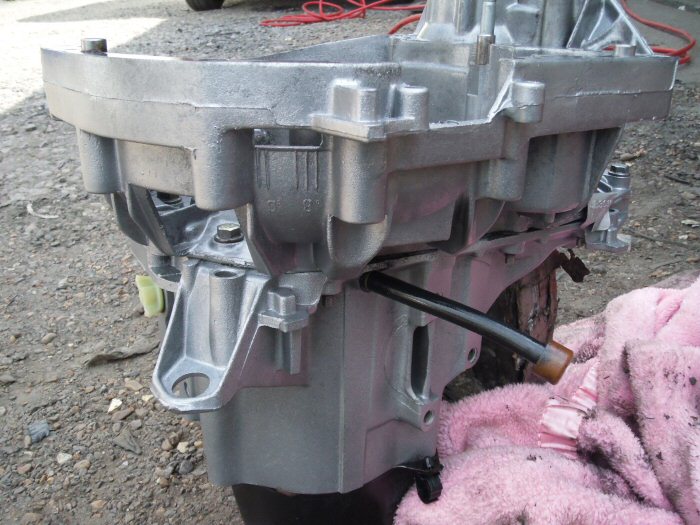
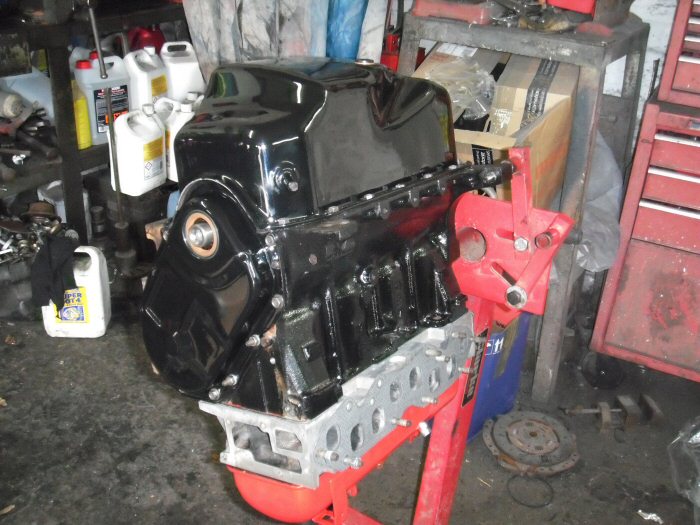
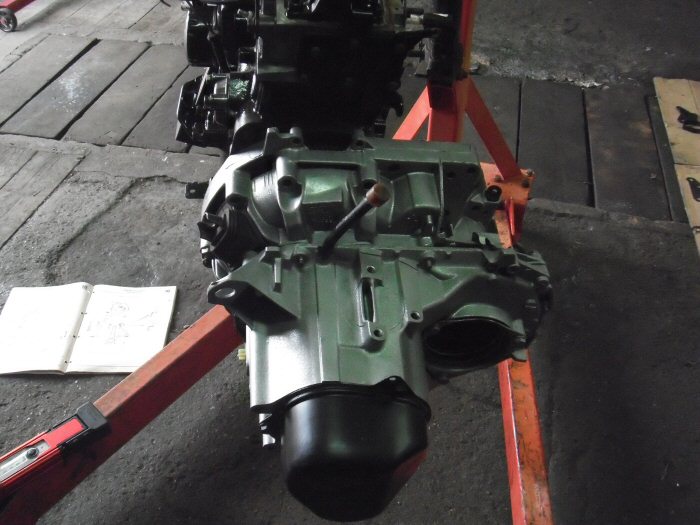
Here's the engine block in its new paint...
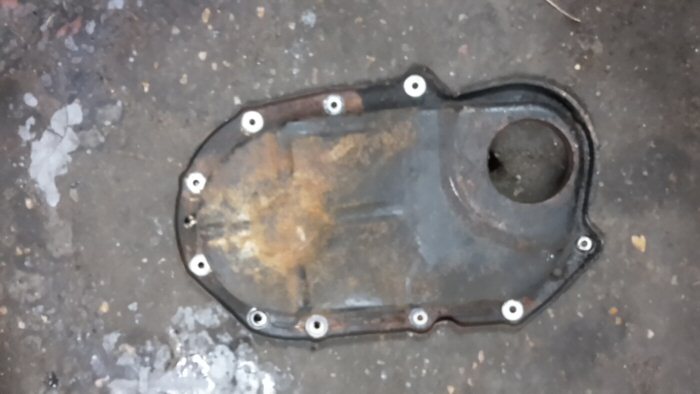
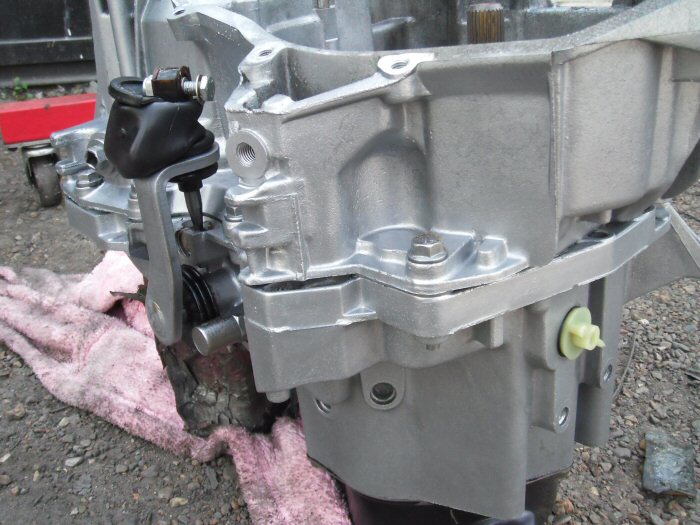
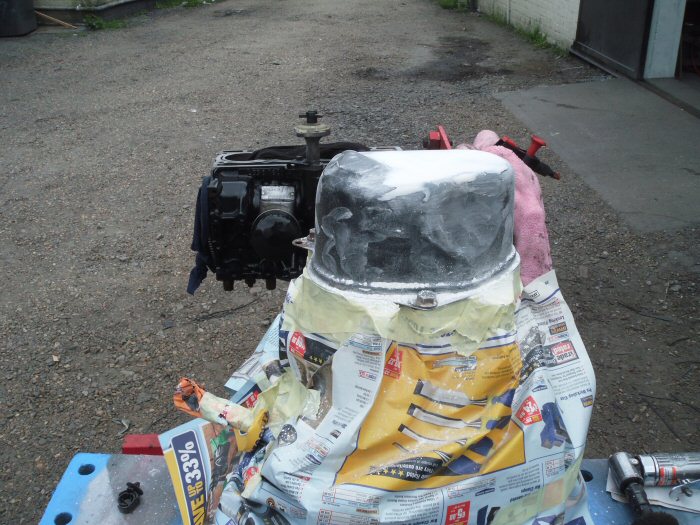
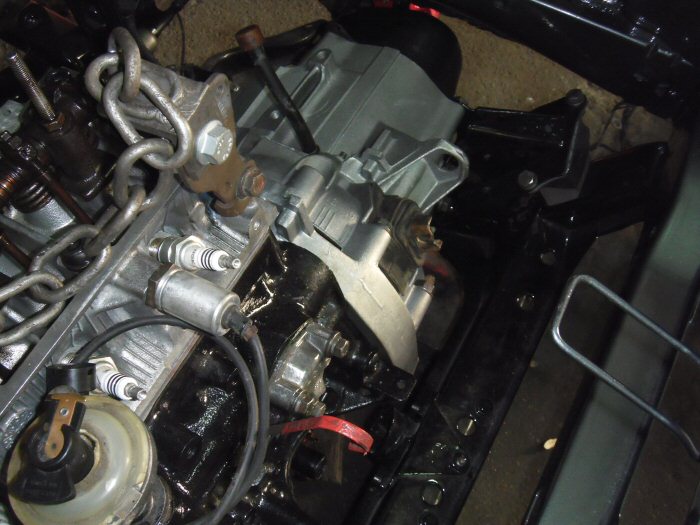
The gearbox body has been given a quick coat of egg-shell laquer...
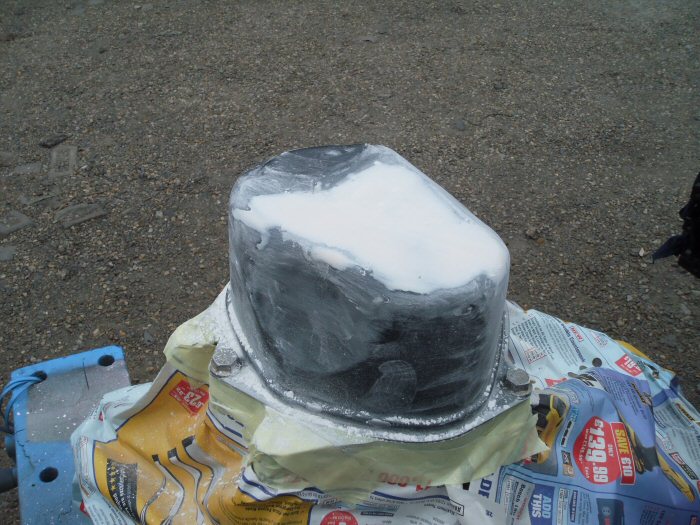
...and the end cap smoothed over ready for a repaint too...
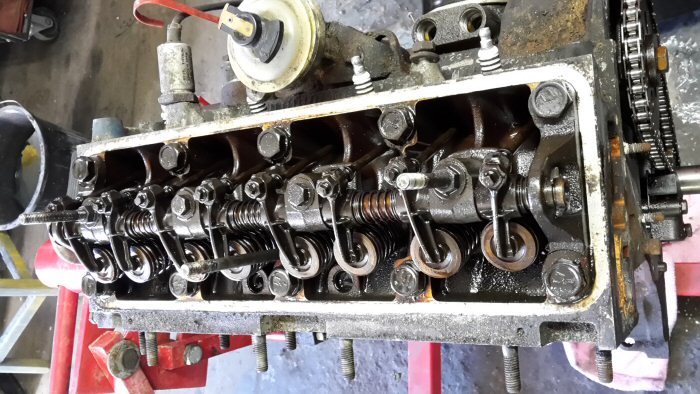
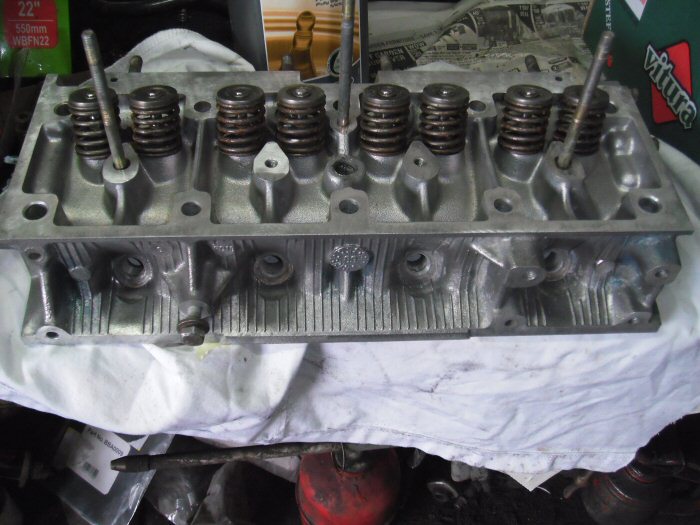
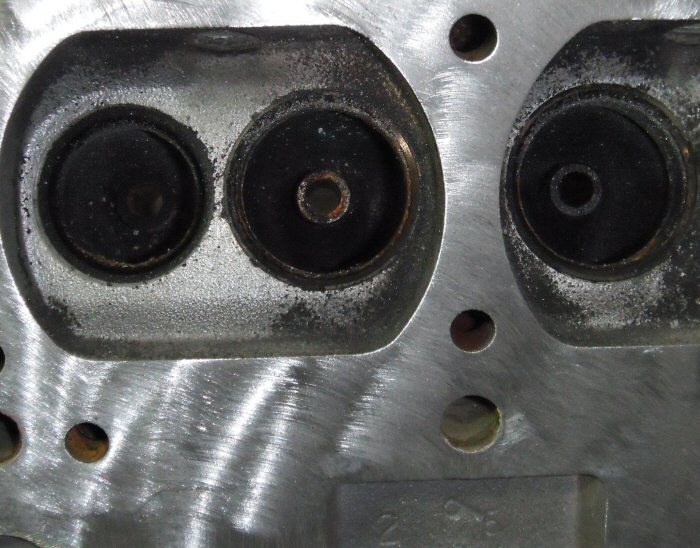
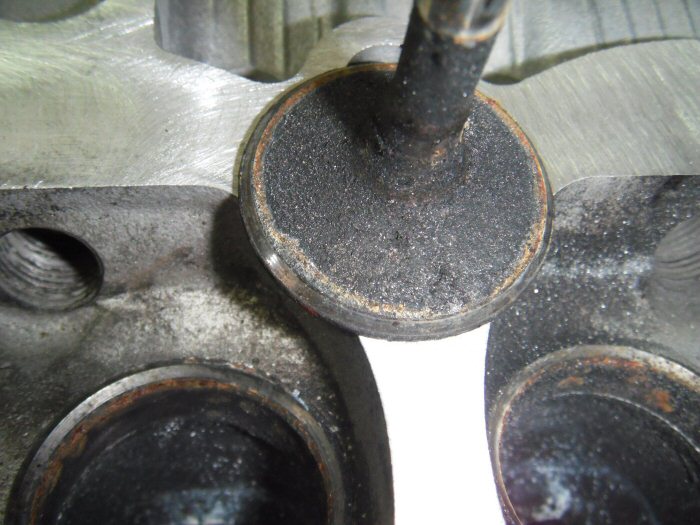
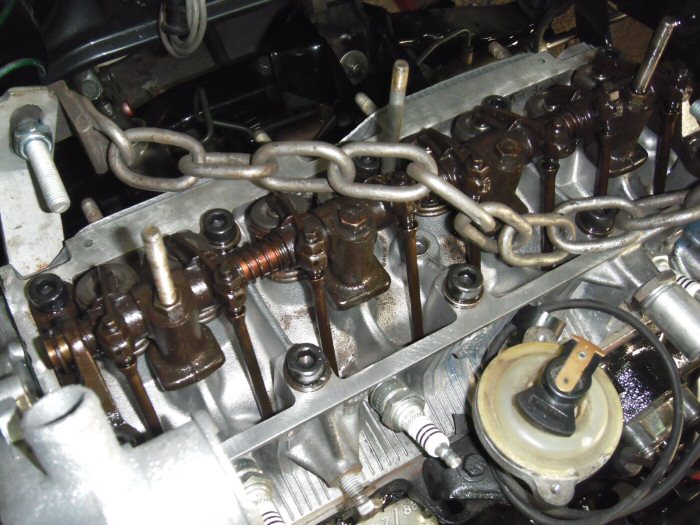
Now we come to the cylinder head. This has been partly cleaned ready for
removal of the valves...
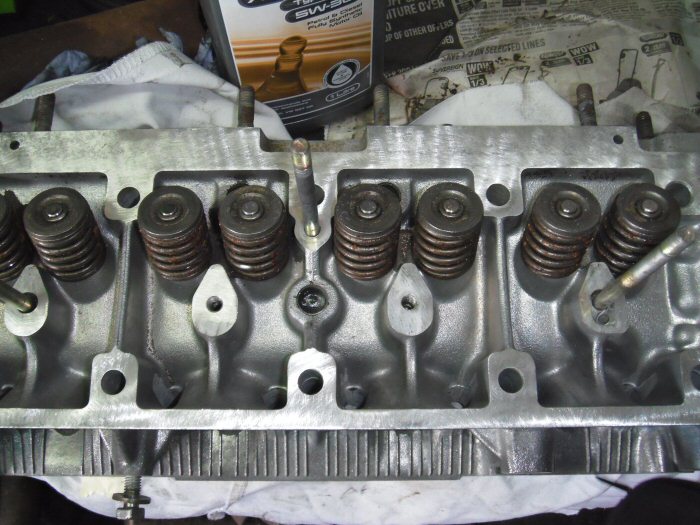
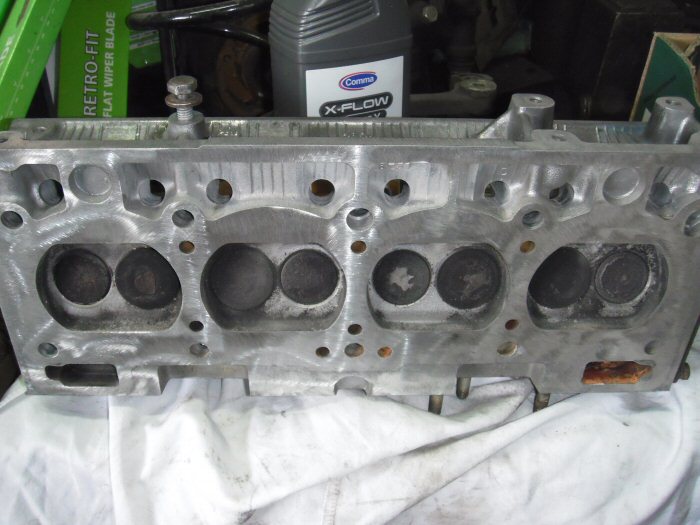
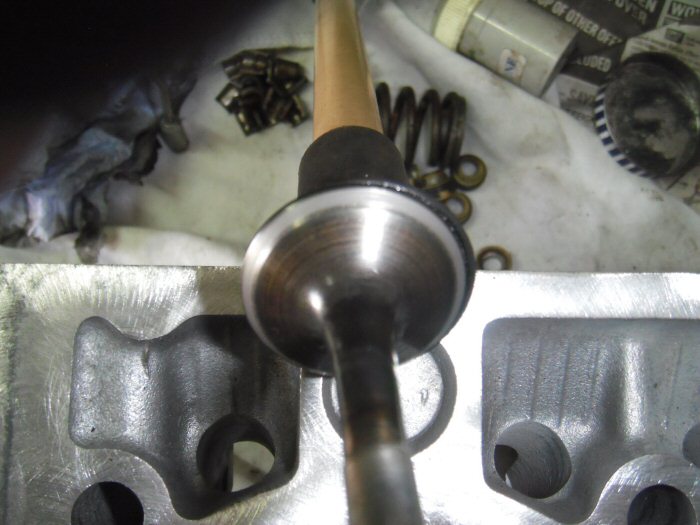
Valves removed, showing the starting condition before re-grinding...
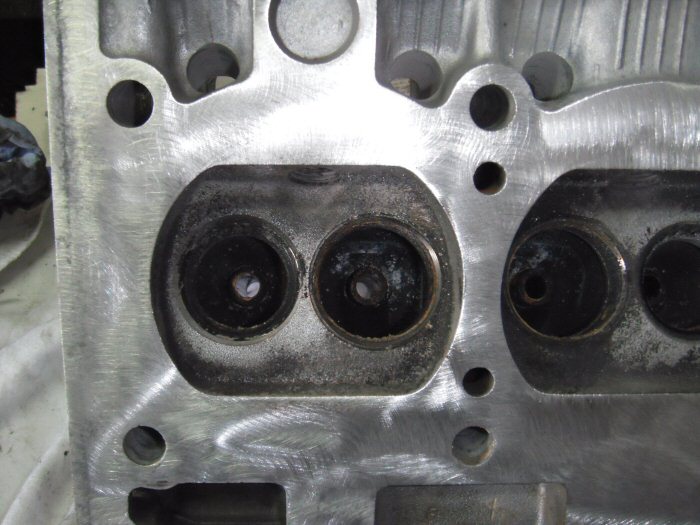
...and in close-up...
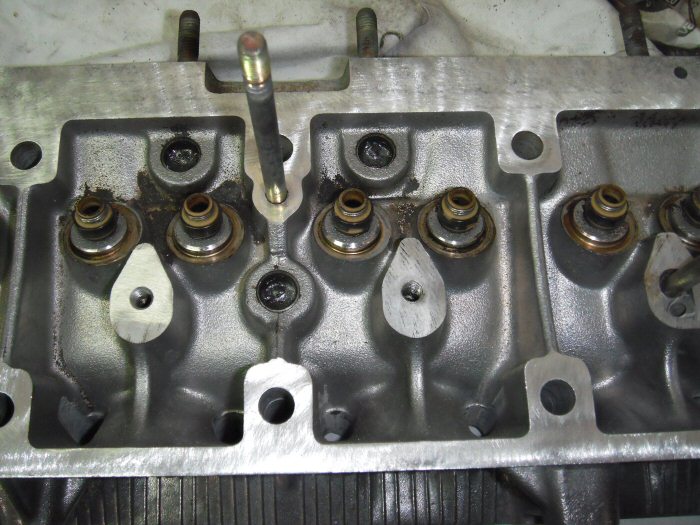
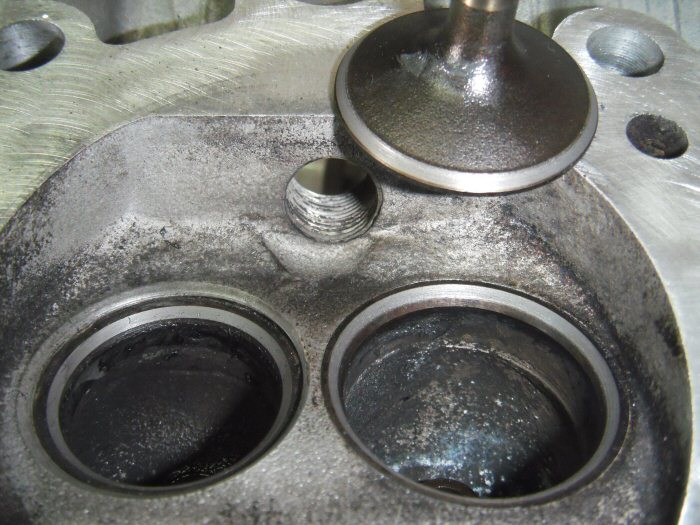
The original stem seals look to be in good condition...
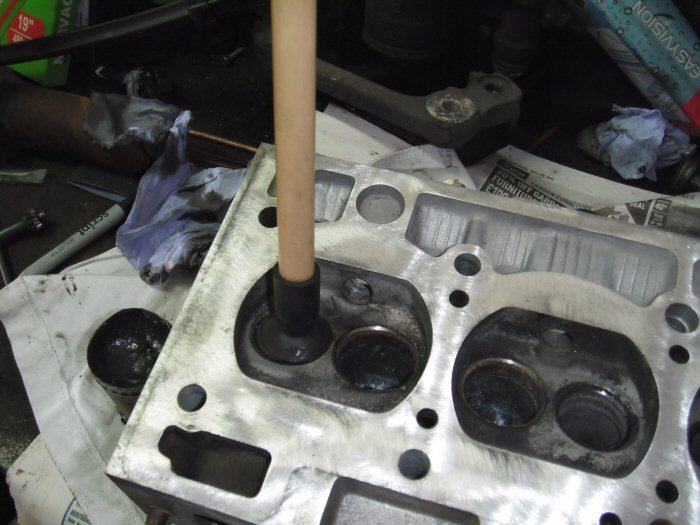
The re-grinding process begins...
New stem seals fitted...
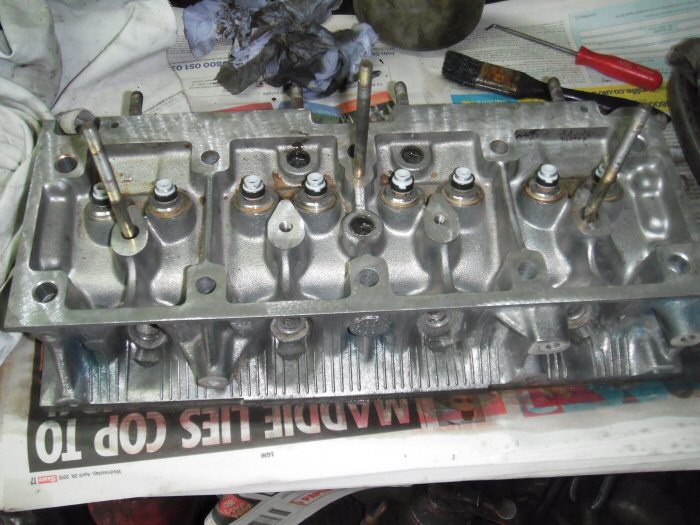
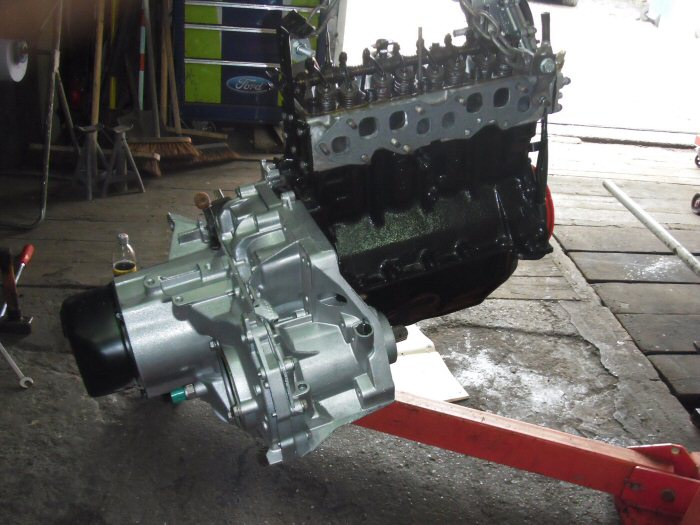
The head has now been refitted to the block and tappets all set. Next will
be the refitting of the newly powder-coated sump.
Regards,
Steve
Great work & progress Steve.
Lowiepete liked this post
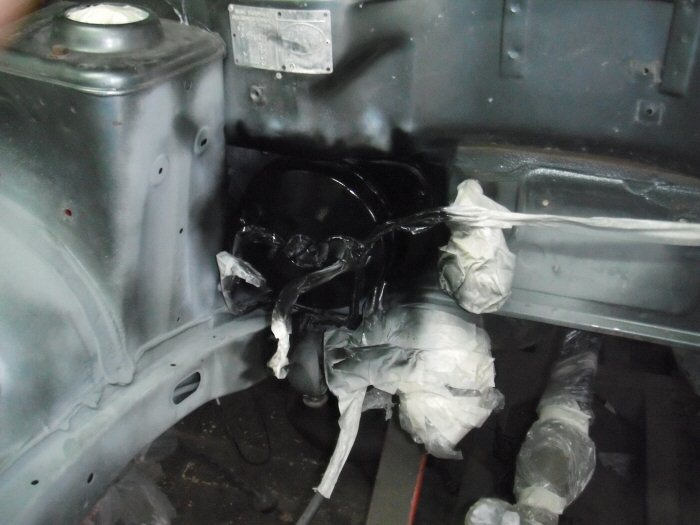
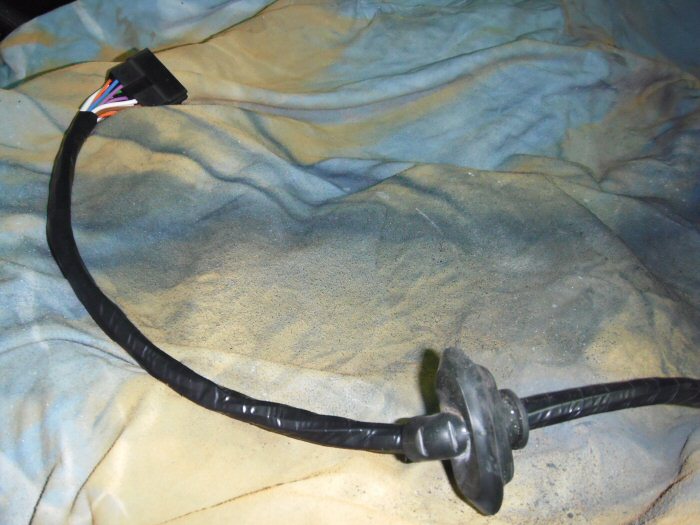
Hello Folks,
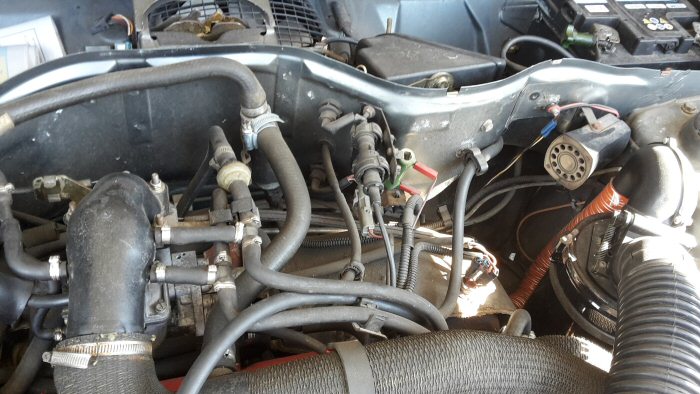
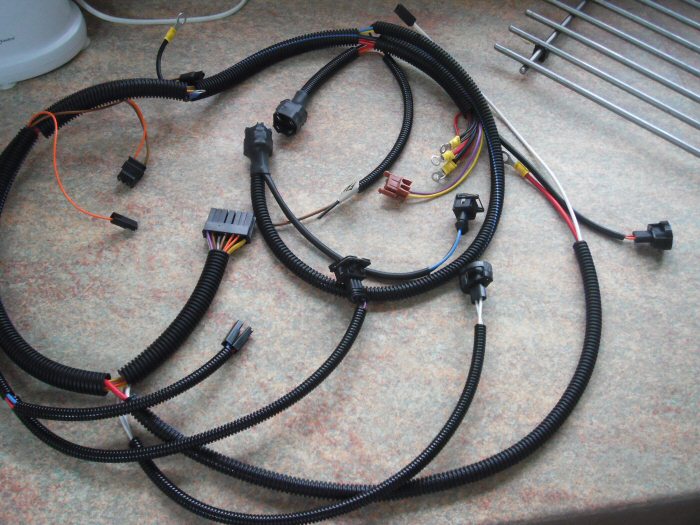
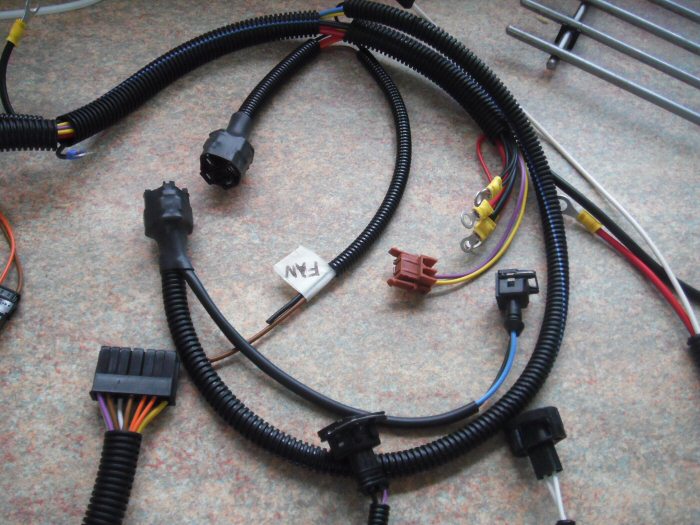
Finally, I've managed to secure a new engine bay wiring loom. This is another
of my rare French imports, considering where the car was built...
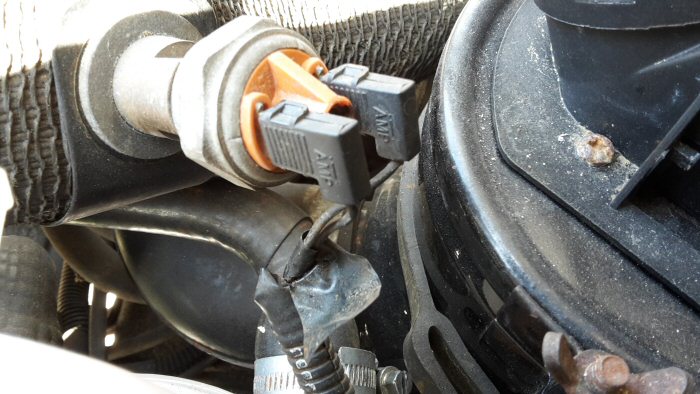
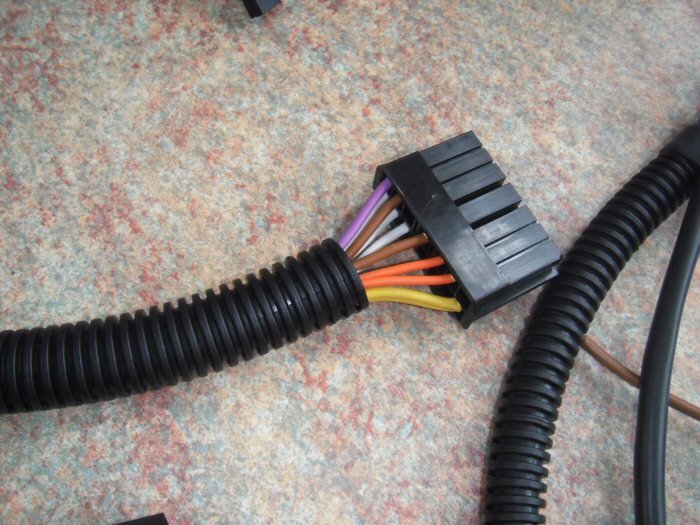
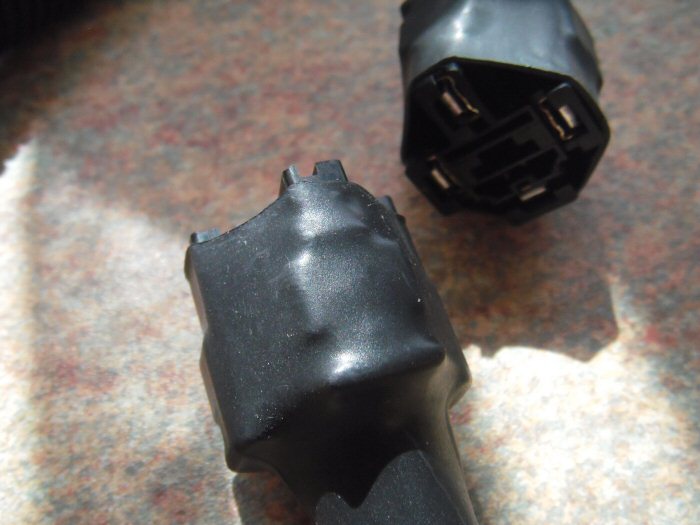
The dreaded "connector of doom!". At least if there are electrical issues when
the car is re-assembled, it'll be easier to track down which side of this
connector it is.
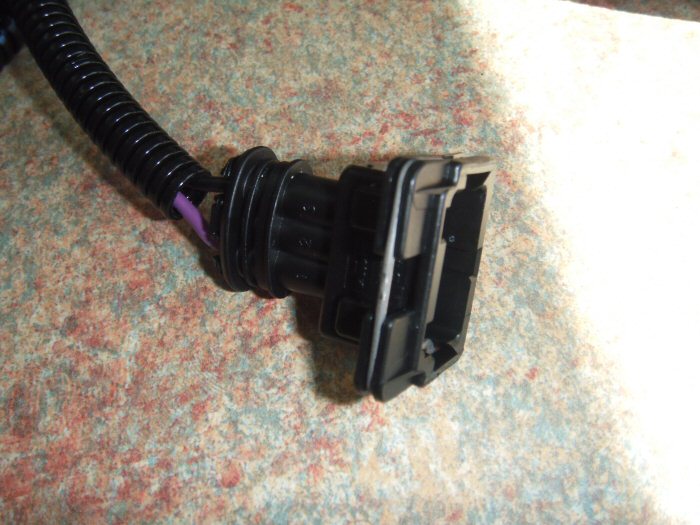
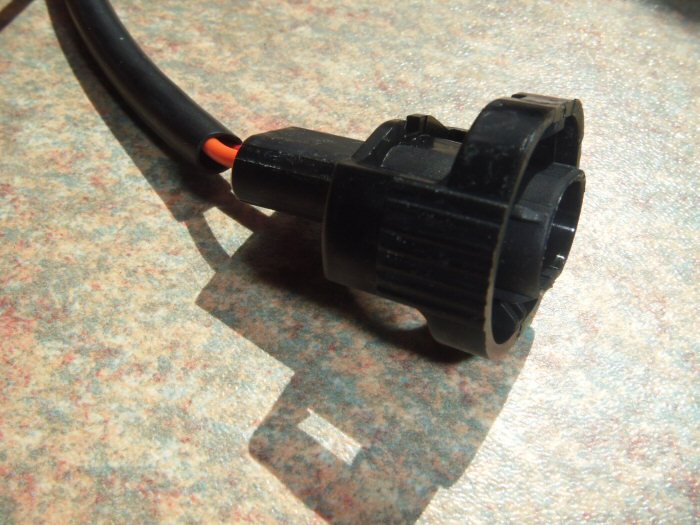
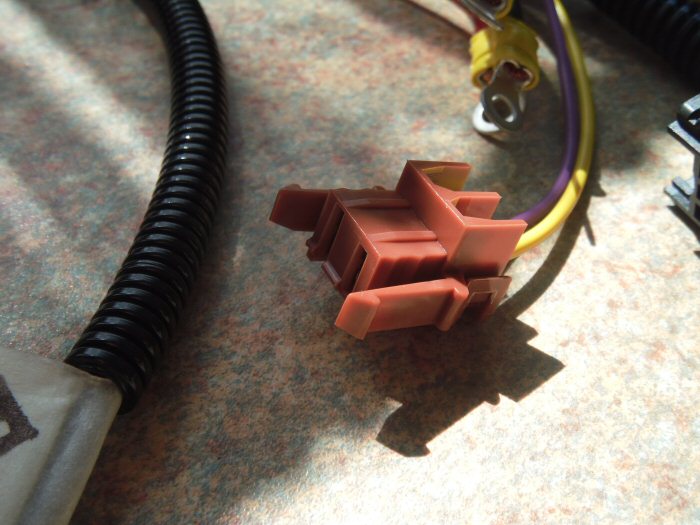
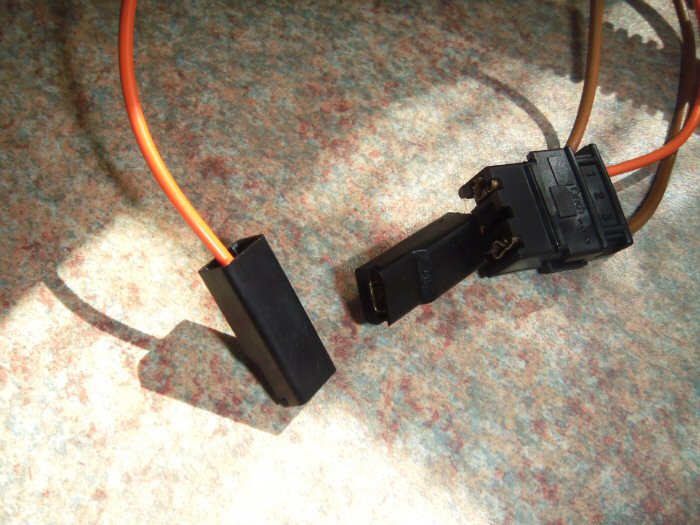
Now, a variety of 1980's style electrical connectors. I guess this made for
easier identification of where each plug and socket went at original assembly...
The engine bay will be repainted this week. Getting it back to a rolling shell
will be for next week, then a final push to get paint onto the body. It's time,
as we're way behind schedule...
Regards,
Steve
Last edited by Lowiepete; 10-06-2015 at 23:33.
Lowiepete liked this post

Is the loom one of the 'remade' one that I've seem recently, which I thought looked excellent as well btw.
Lowiepete liked this post
Yes, this is one that Julien was offering us via the RTOC Facebook group.
I think he also occasionally sells them on eBay.fr. I saw one there at a
similar price, but missed the "buy it now" by just a couple of seconds.
It should save Karl a few hours of wiring-up...
Regards,
Steve
Hello Folks,
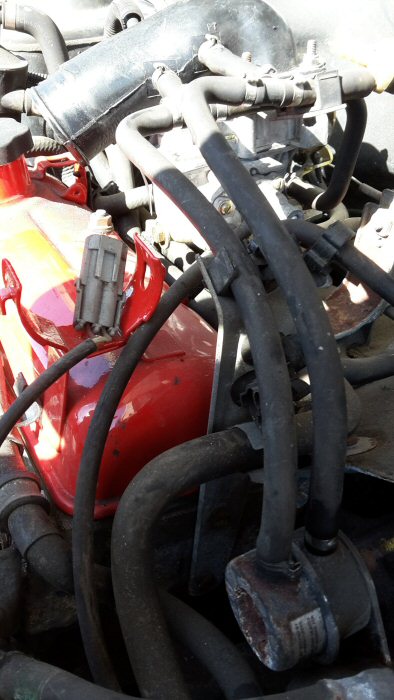
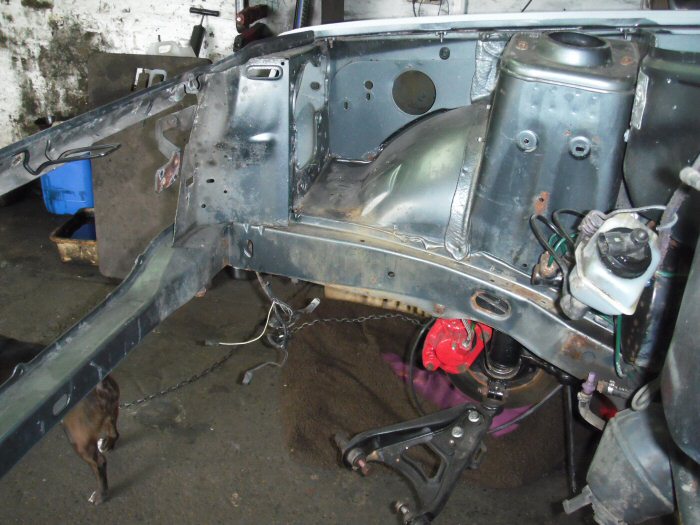
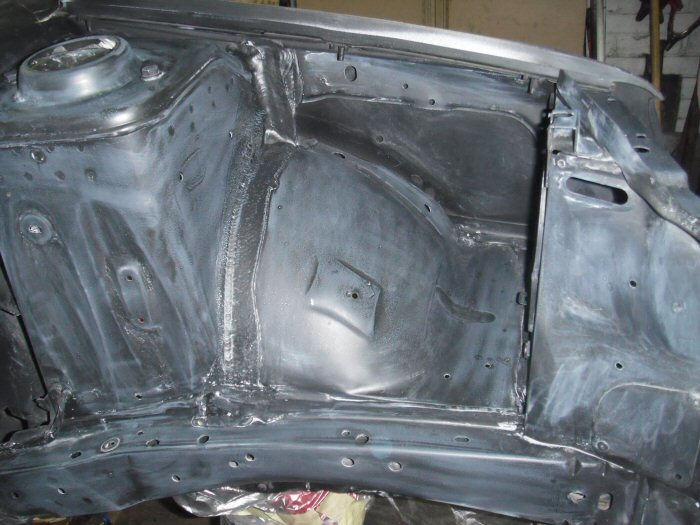
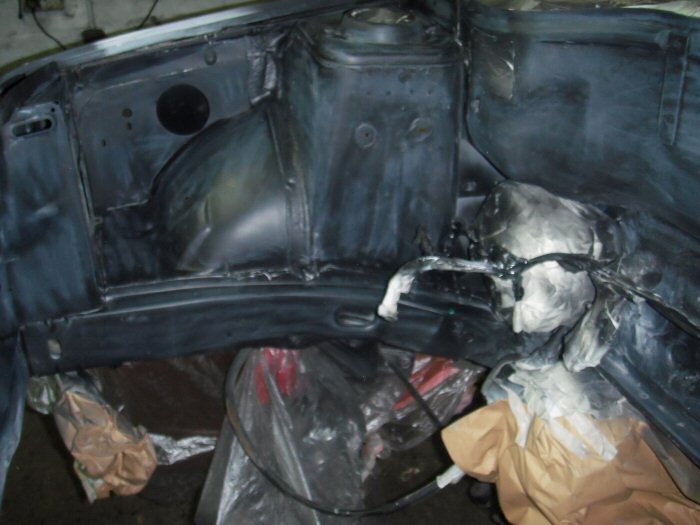
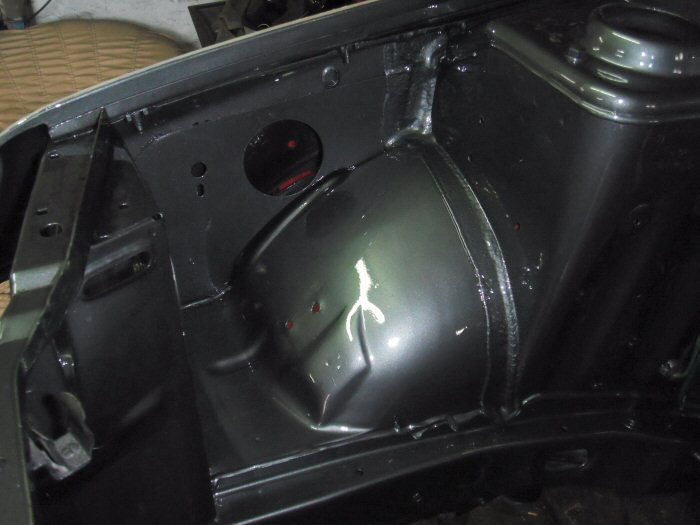
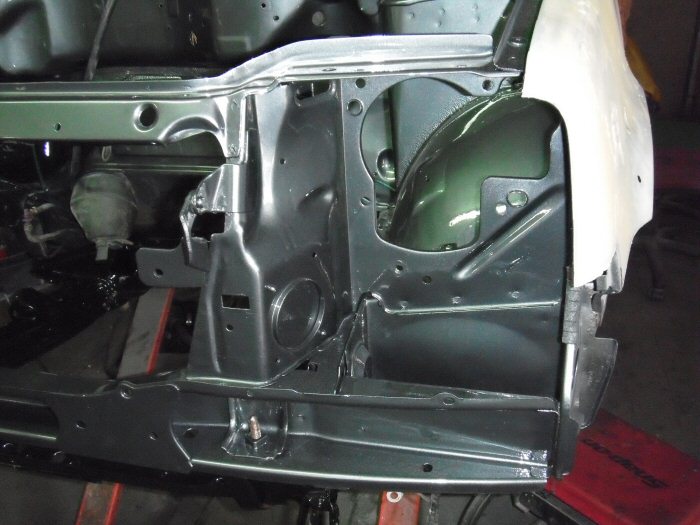
After a bit of an hiatus in progress, finally the engine bay and front have been
repainted. I'll let the photos tell their own story...
This photo doesn't quite do justice to the actual finish, so some more will be taken...
A quick before and after comparison...
Regards,
Steve
I've missed updates on this.
Lowiepete liked this post
Looks fantastic, mmm fresh tungy paint!
Lowiepete liked this post
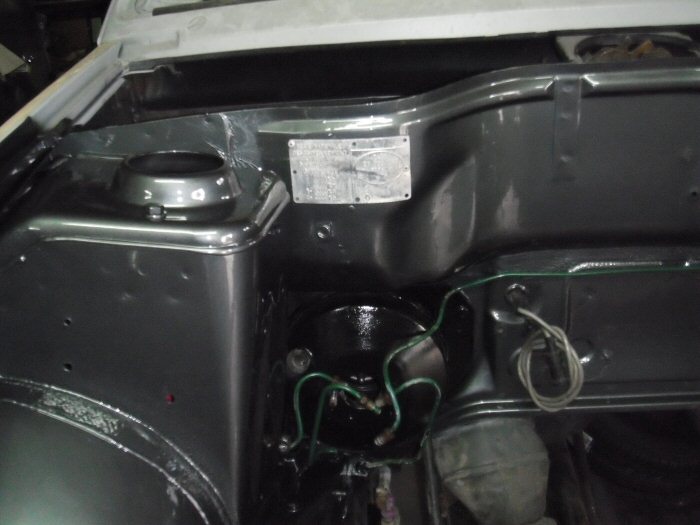
Hello Folks,
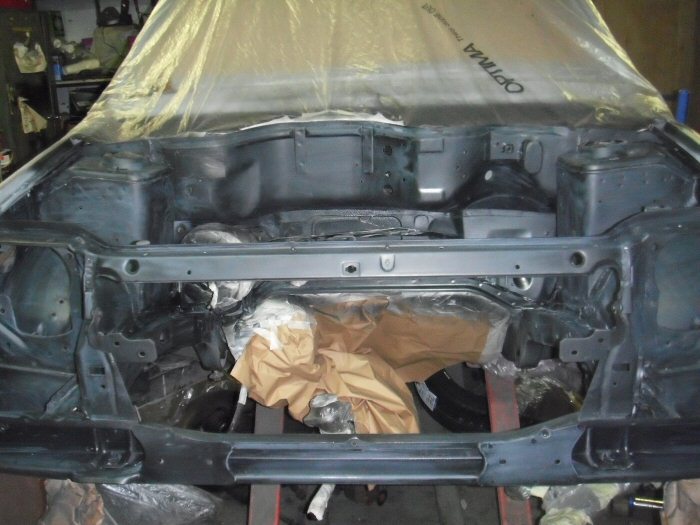
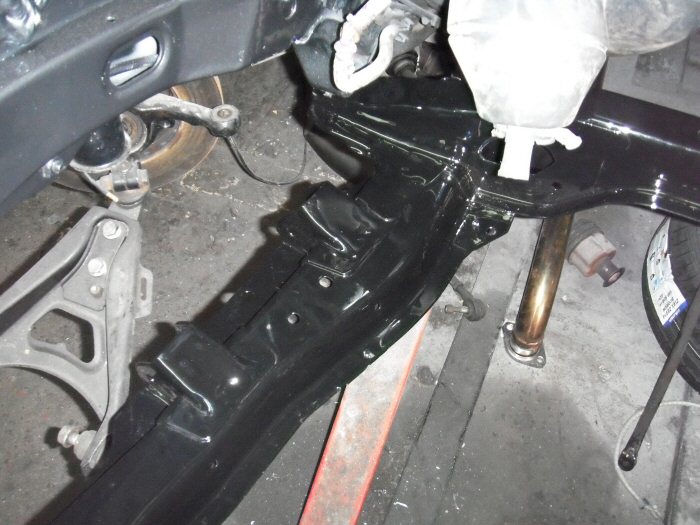
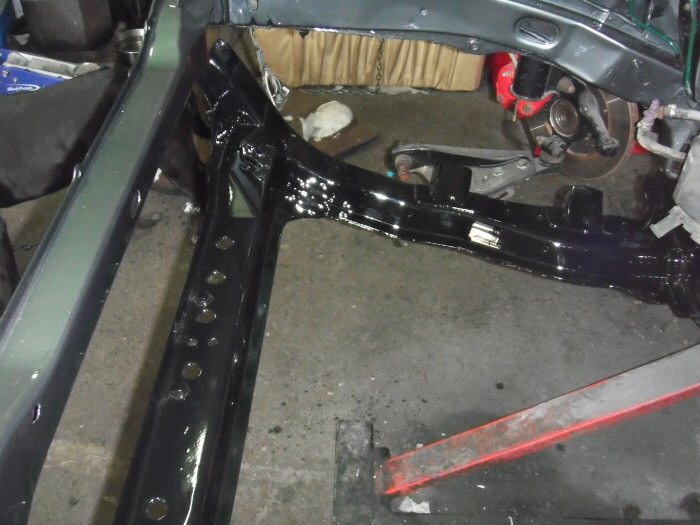
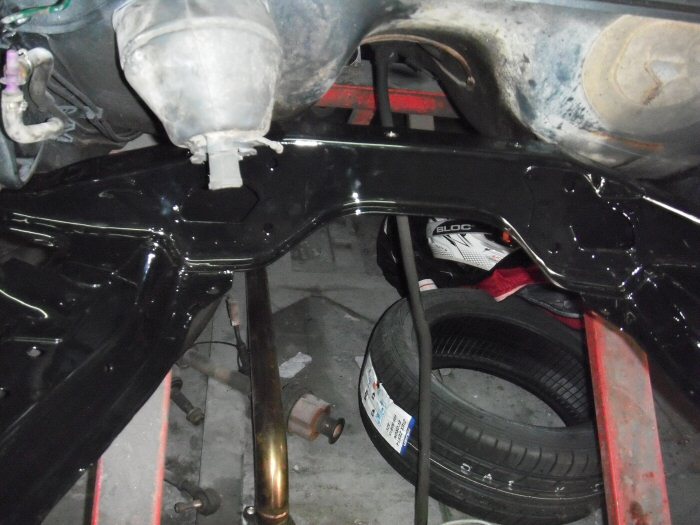
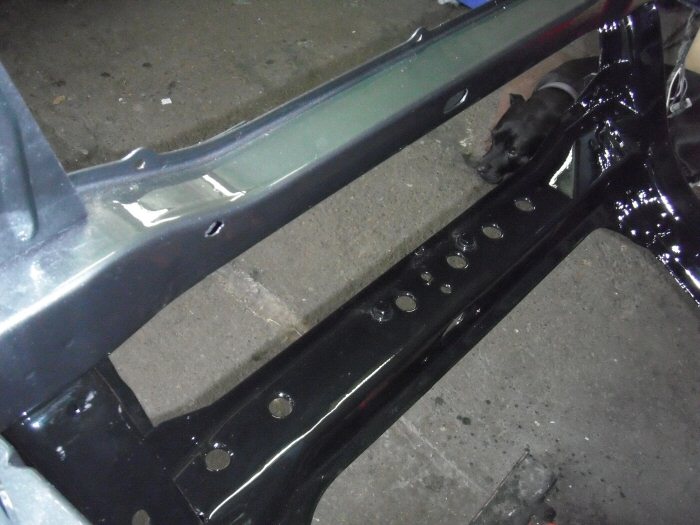
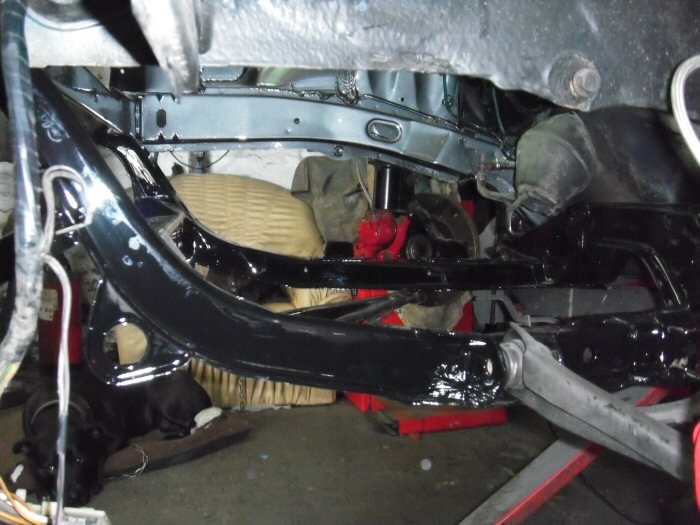
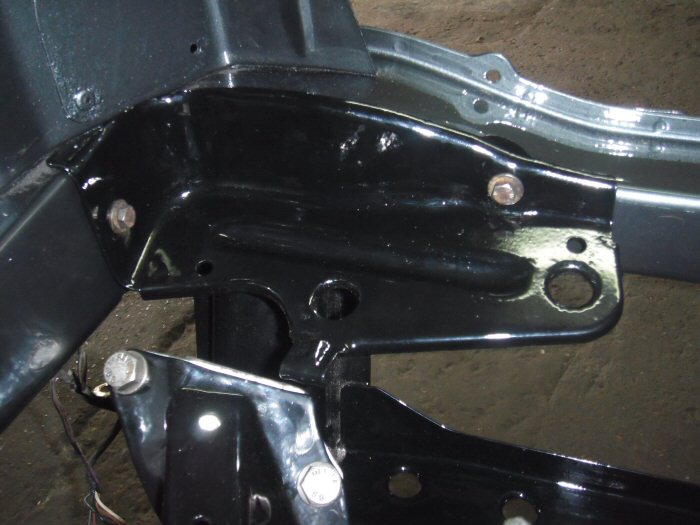
As promised, some closer views of the front, including fully painted bonnet hinges.
There's a clue in the first picture as to what's coming next...
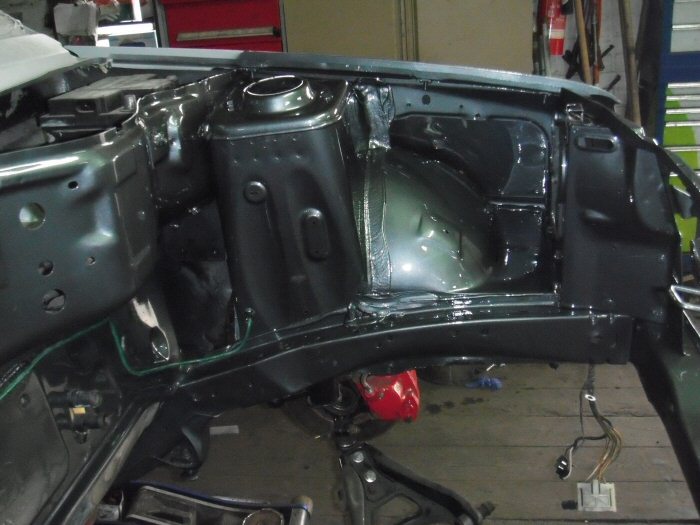
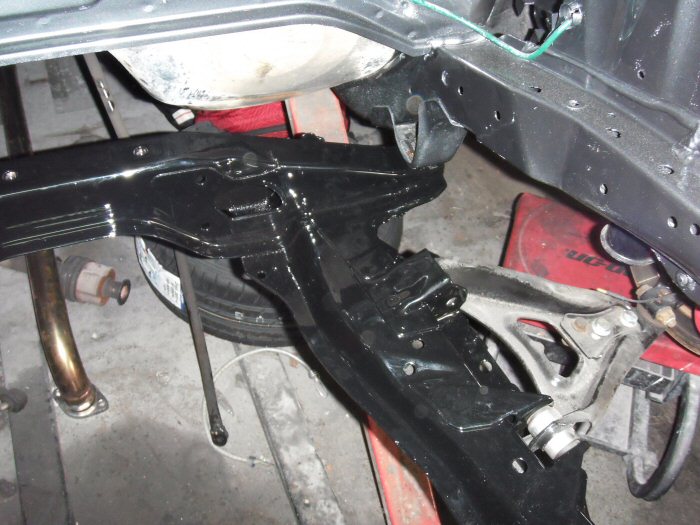
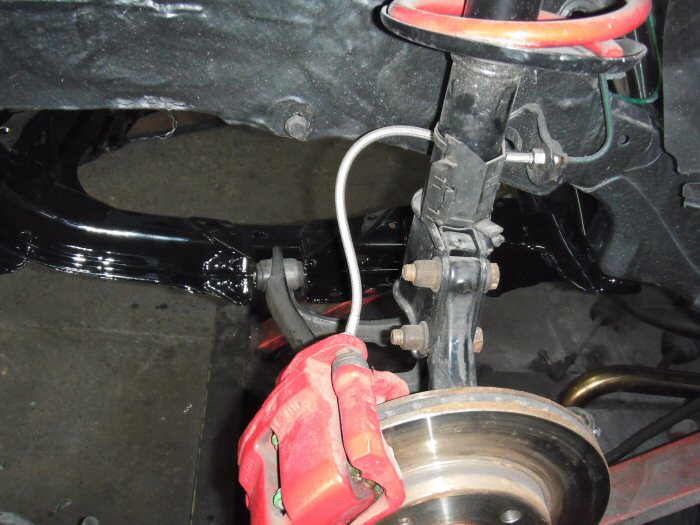
The subframe is being fitted, with the wishbone already attached on one side...
Now, having the engine bay lacquered makes sense. The shine on the tungy paint
matches that of the subframe. Thankfully, whatever rust was on that was only
surface grot, so it's looking superb. We won't be shining up the wishbone tops,
they've got a coat of anti-rust treatment which won't be removed.
Regards,
Steve

It's looking great. Top job. I love reading this thread!
Can see the green tint in the tungy on some of the pics. Love that!
Lowiepete liked this post
Hello Folks,
Progress is very slow at the moment, although I'm assured that the engine will be going
back in this week. That is if we can resolve the power steering fitment issues.
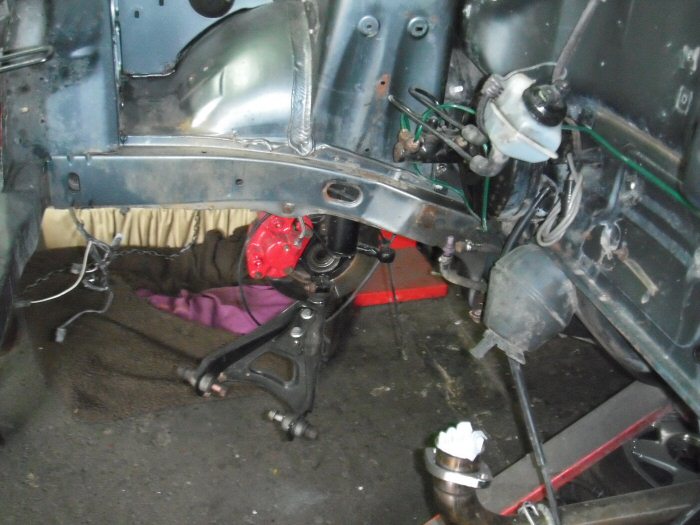
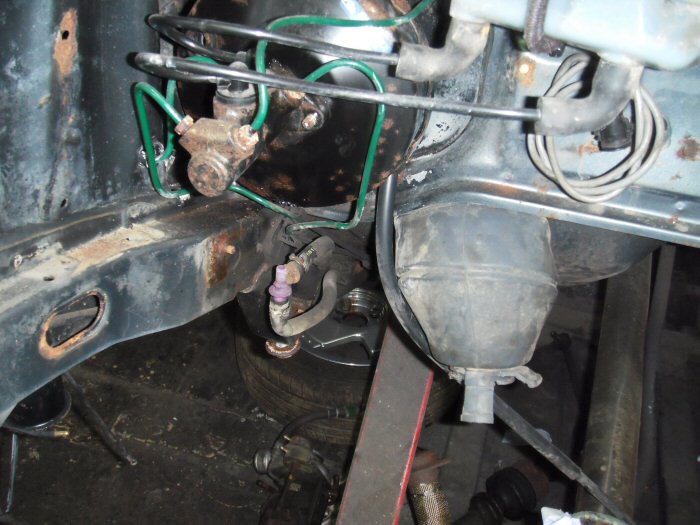
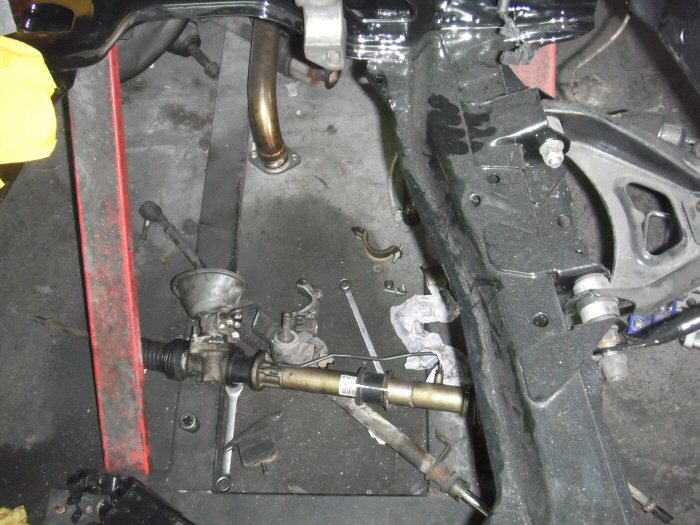
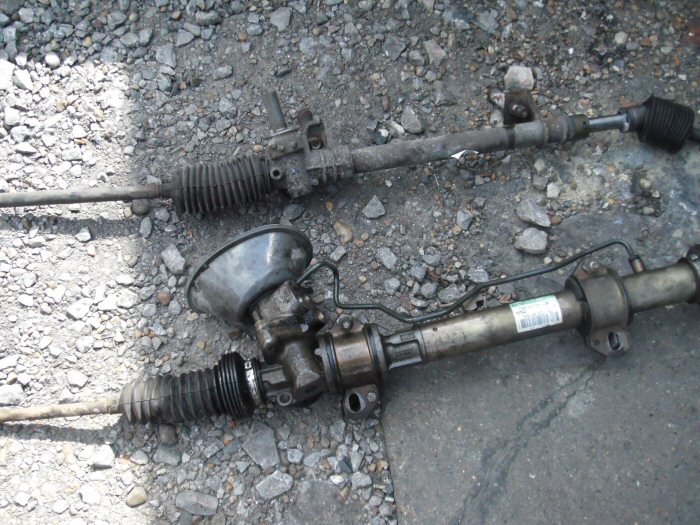
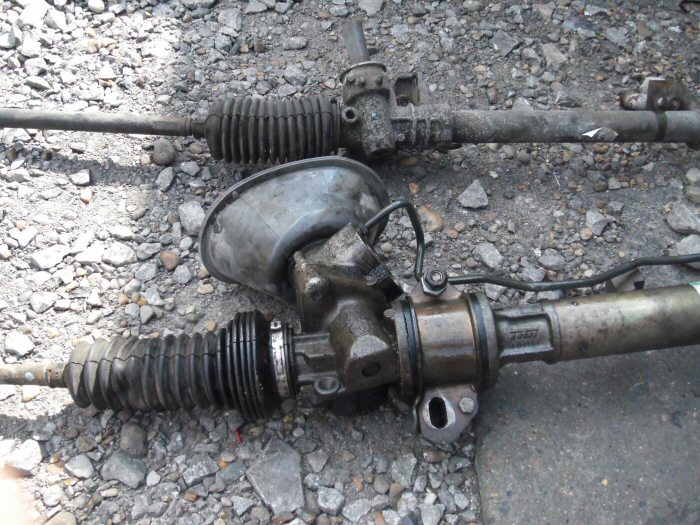
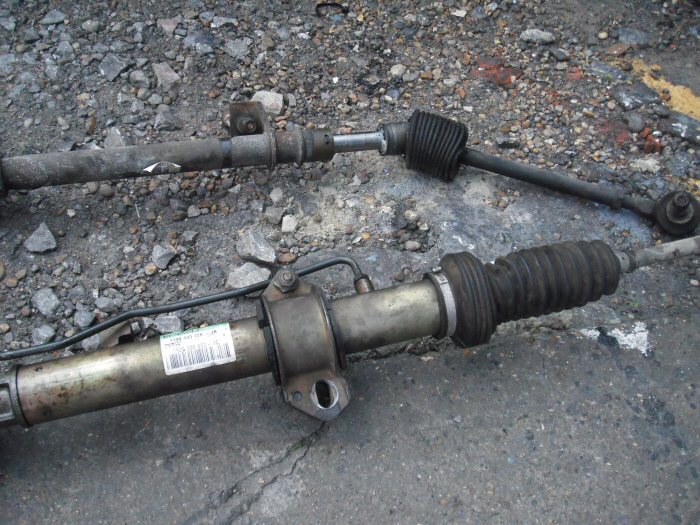
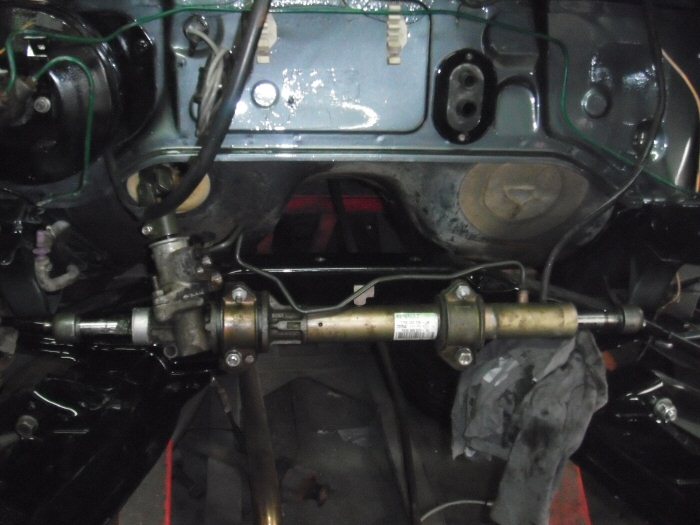
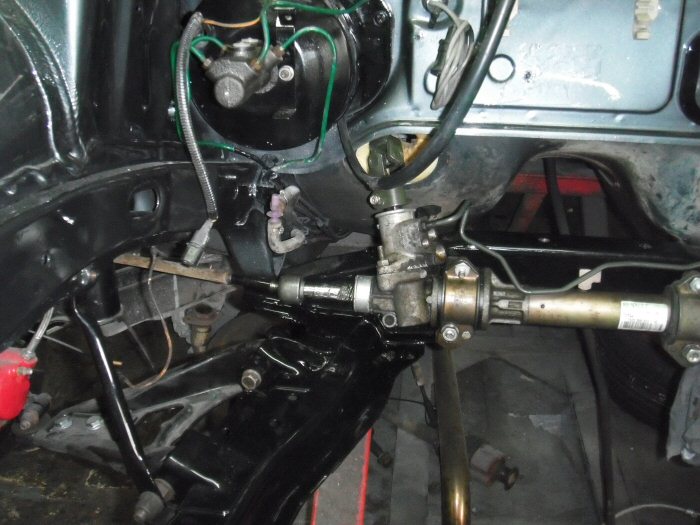
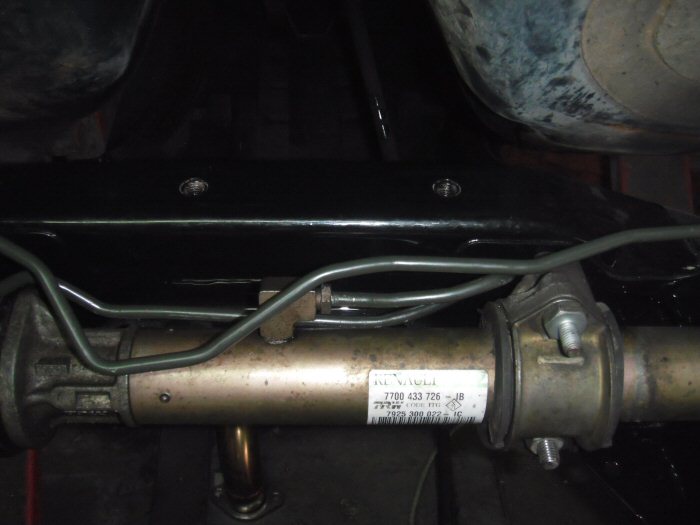
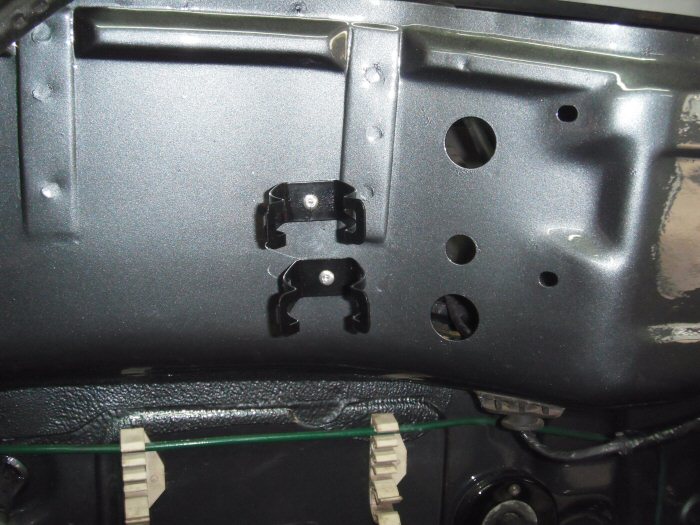
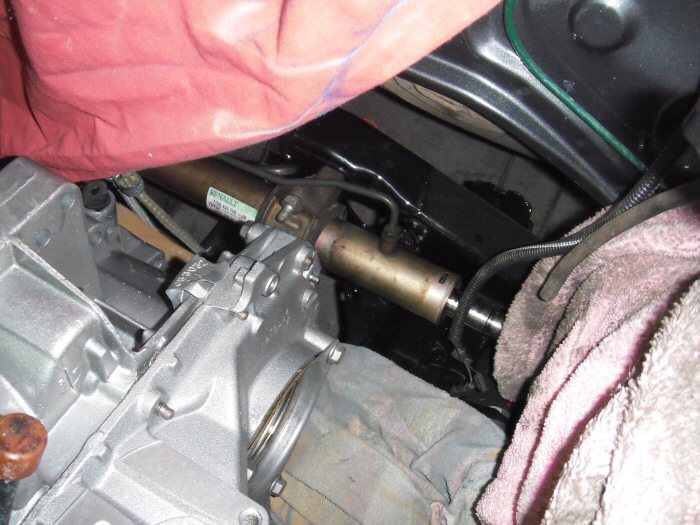
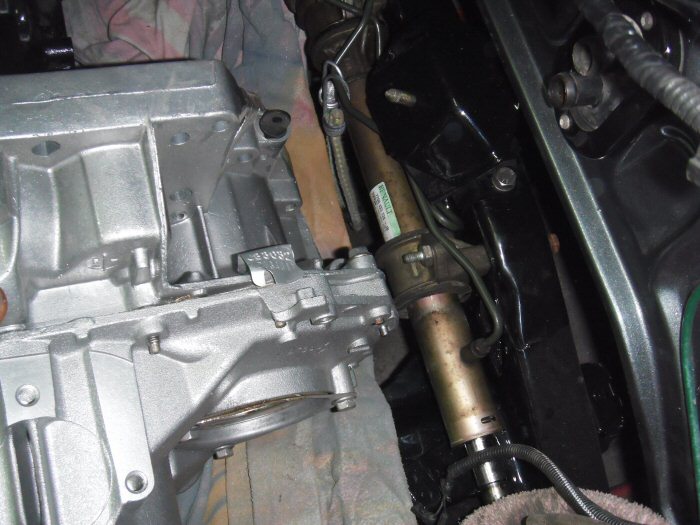
Here we can see the new power steering rack beside the manual one...
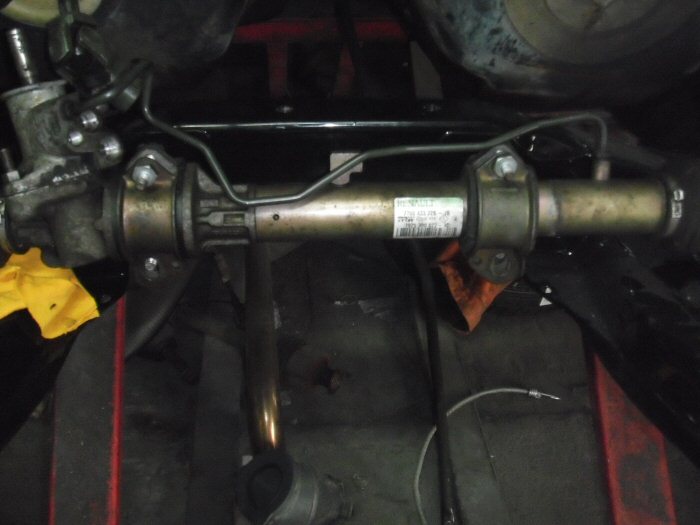
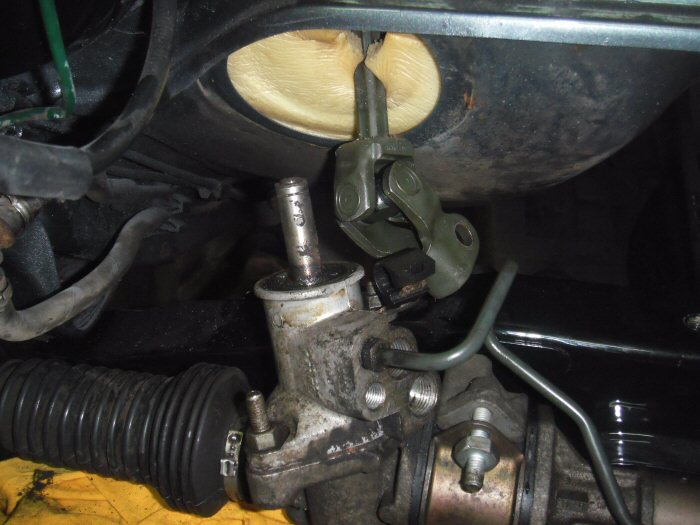
At the bottom of this picture, one of the new steering rack bearings / clamps
is seen fitted. This required a quick drop of the subframe to get the bolt to
thread through from the back
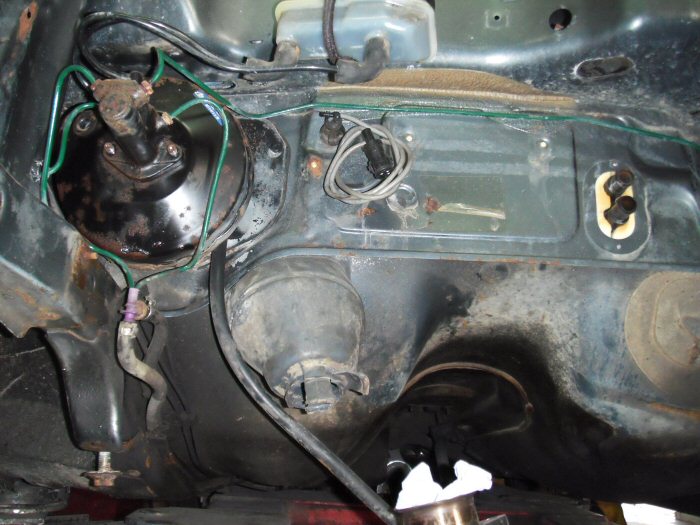
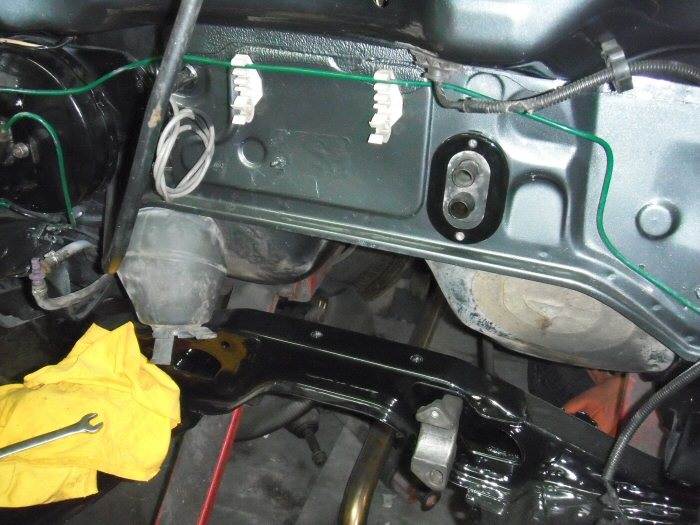
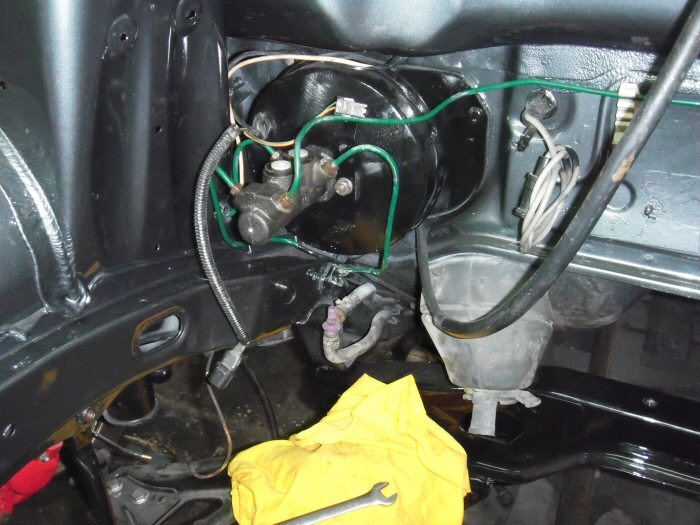
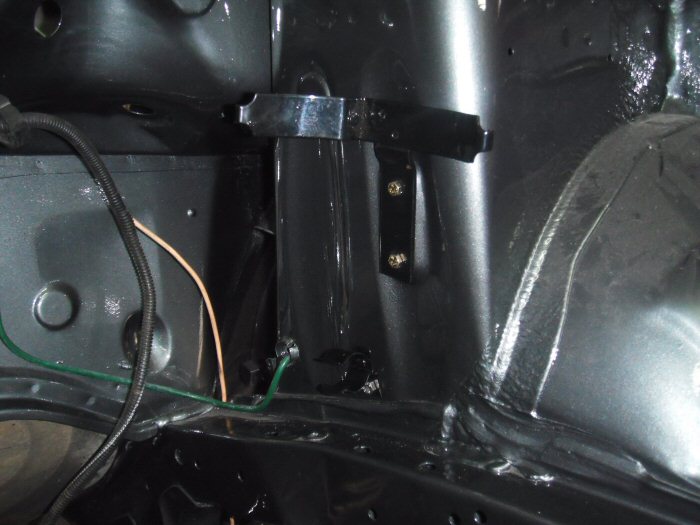
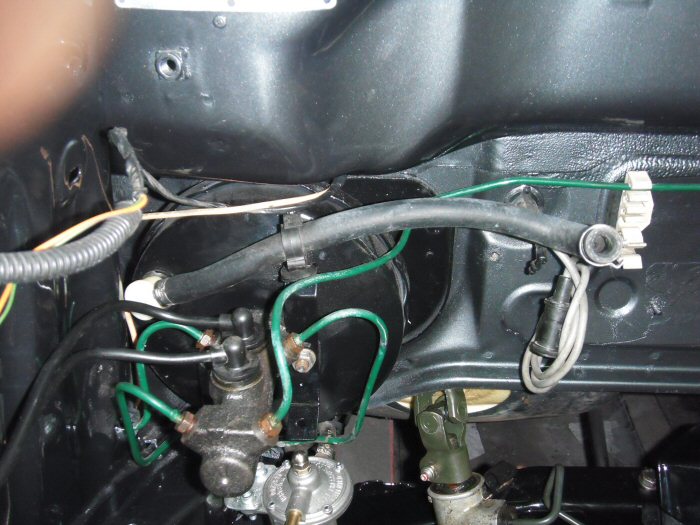
The new brake master cylinder now fitted, with brake lines replaced, along
with some wiring...
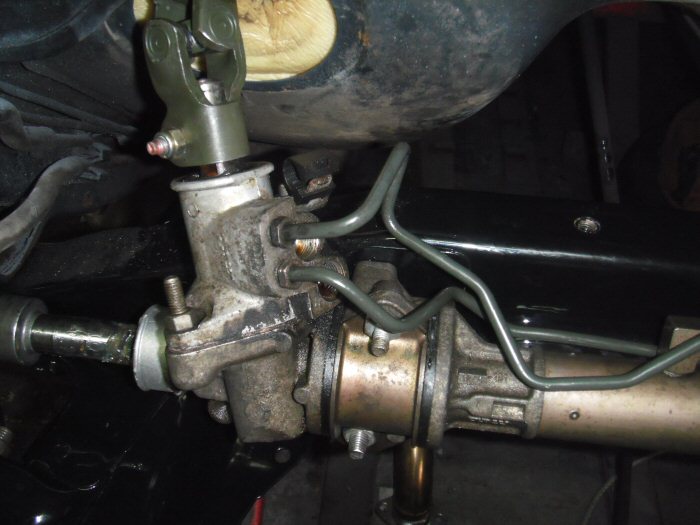
3 photos that are slightly out of chrono order. The 2 steering racks compared, just after
arrival of the power rack from a Megane Coupé...
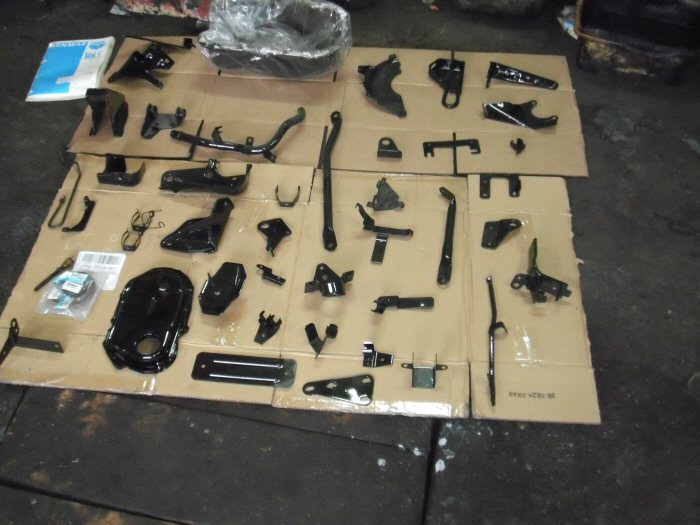
The various brackets and mounts from the powder coaters, all laid out...
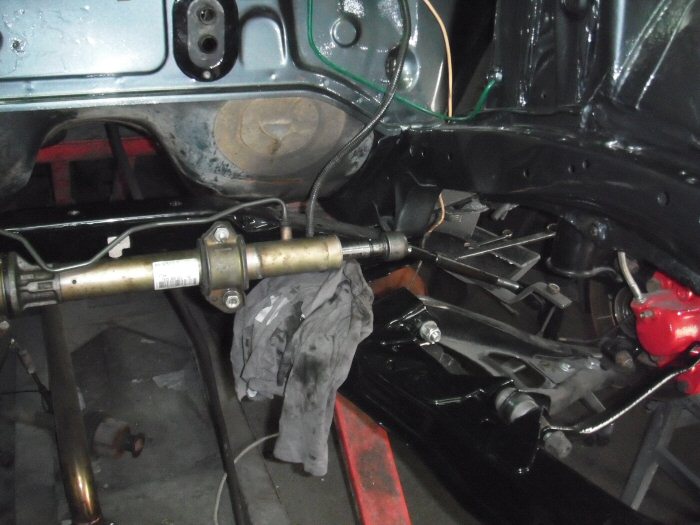
More progress with the rack. Some steps forward, and a few back, though
so far, so good. The track rods on the new rack are too long and they have
a different thread on the ball joint fitting, so the existing parts from the
original cannot be transferred. Some different track rod ends will need to
sought as one has male threading and the originals have female sleeving
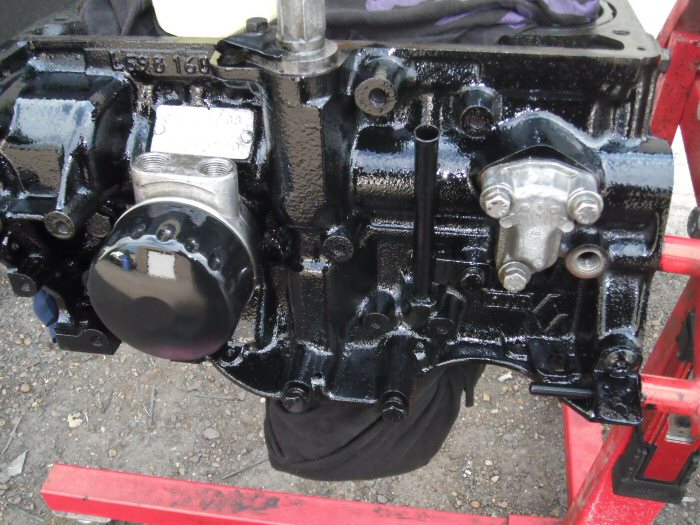
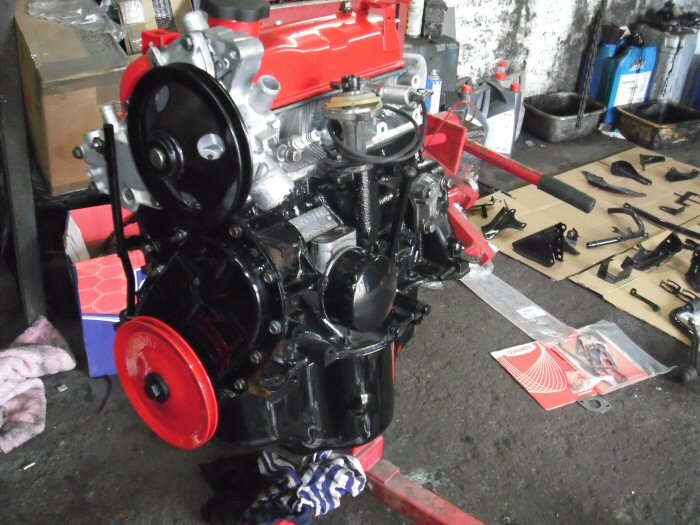
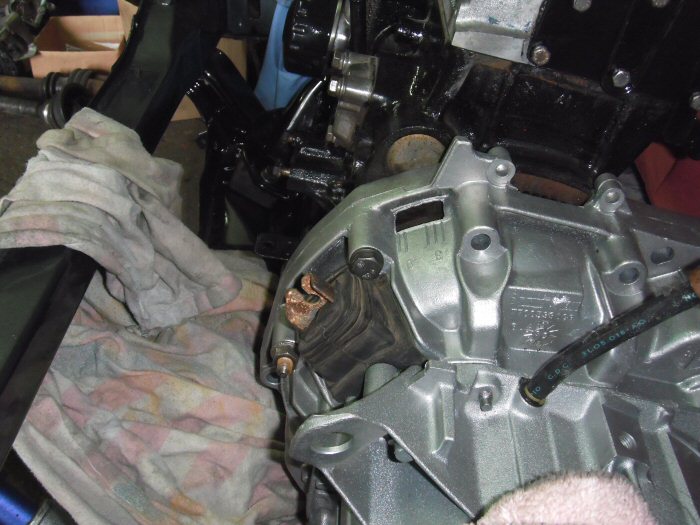
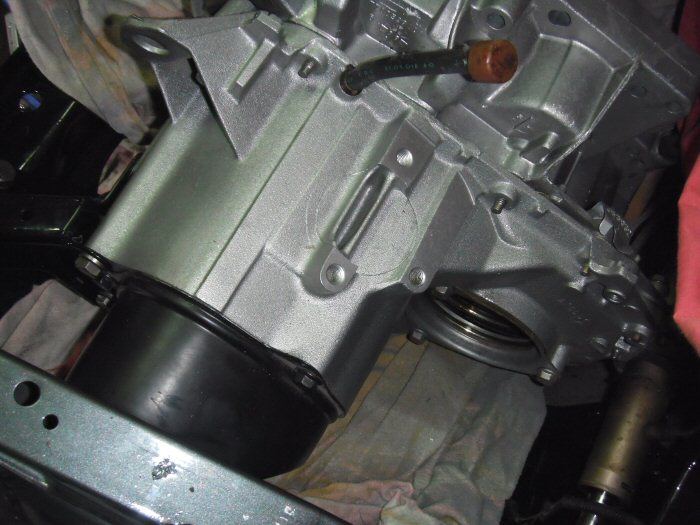
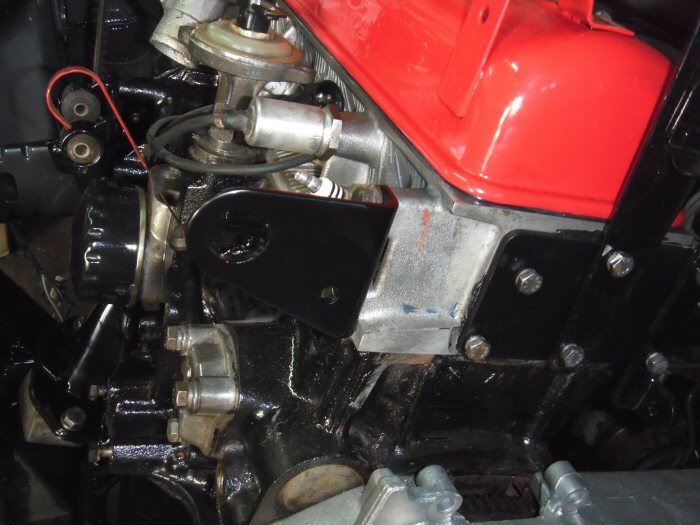
More bits are refitted to the engine block. Timing chain cover and sump...
Water pump and pulley wheel...
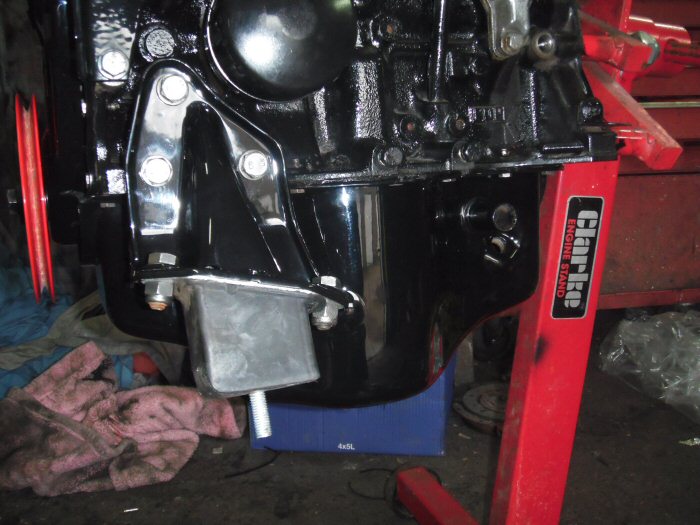
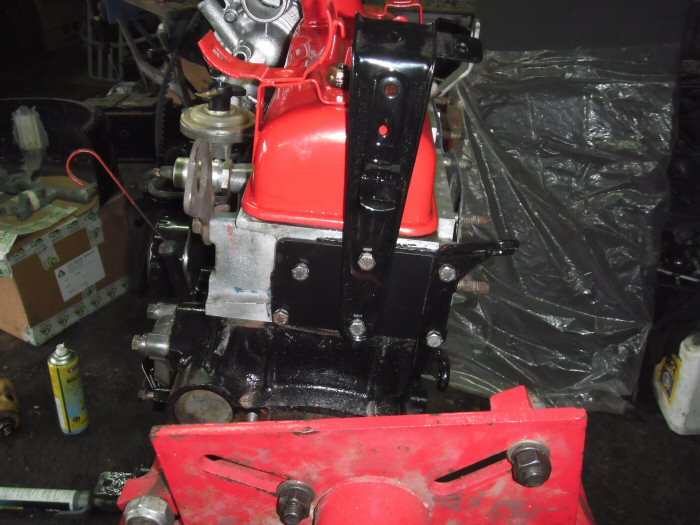
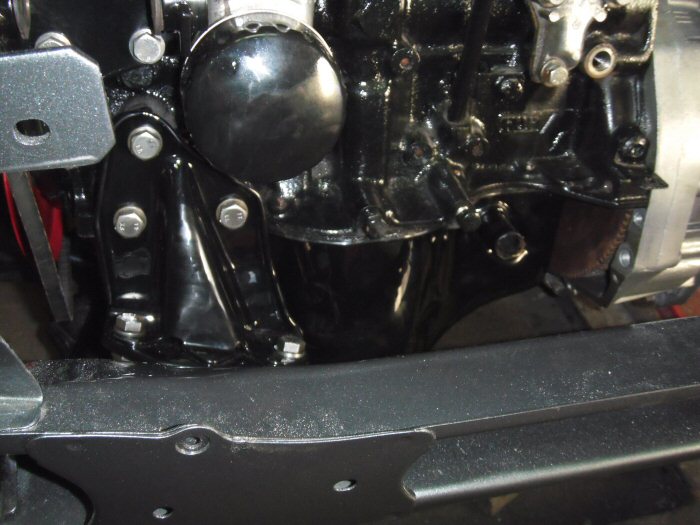
Engine mount bracket...
...with mount bearing attached...
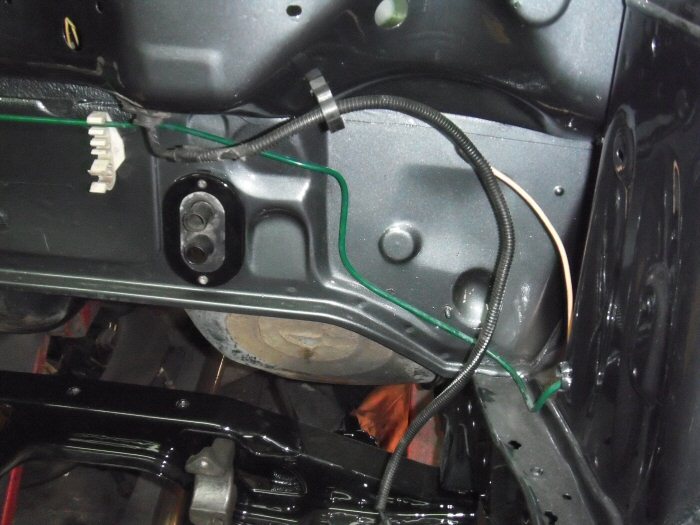
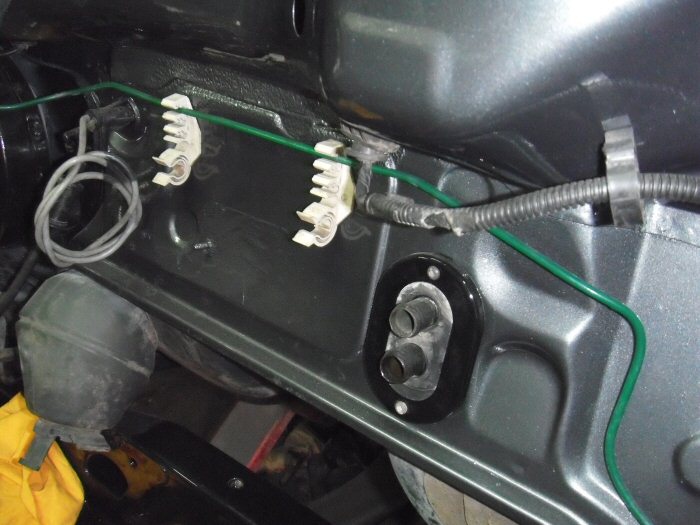
More fittings replaced within the engine bay...
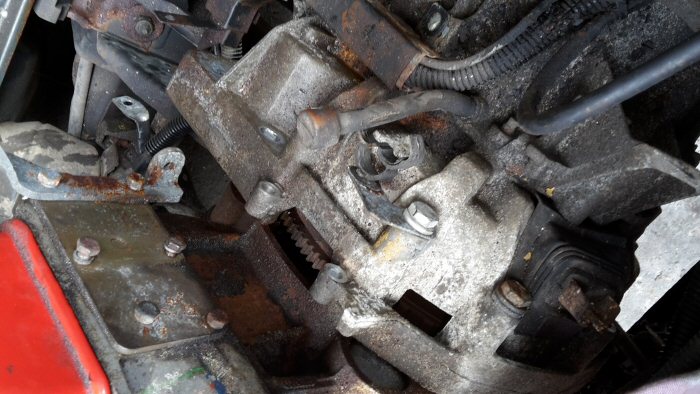
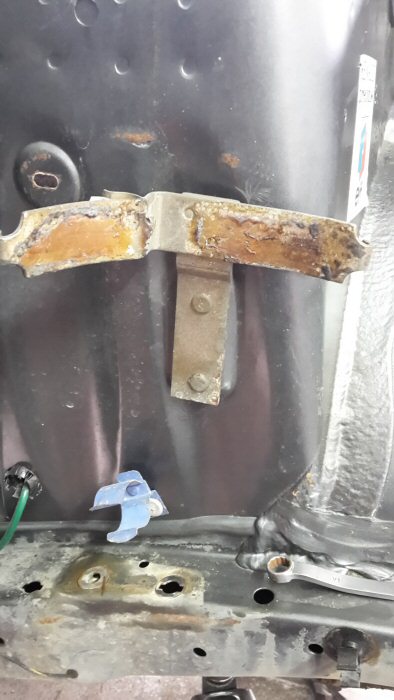
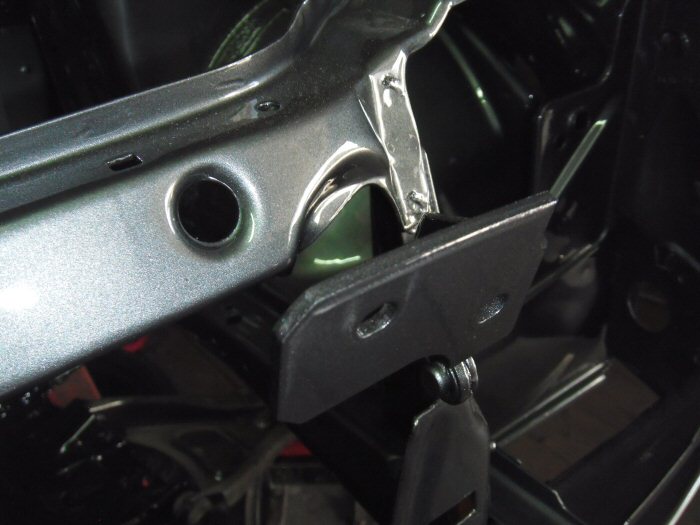
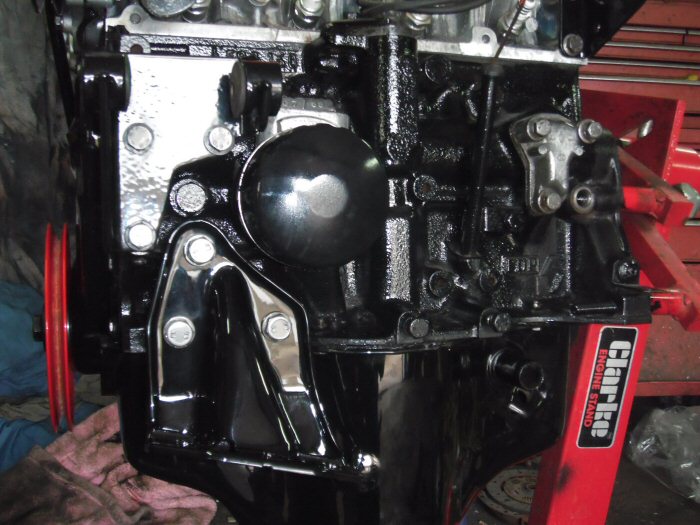
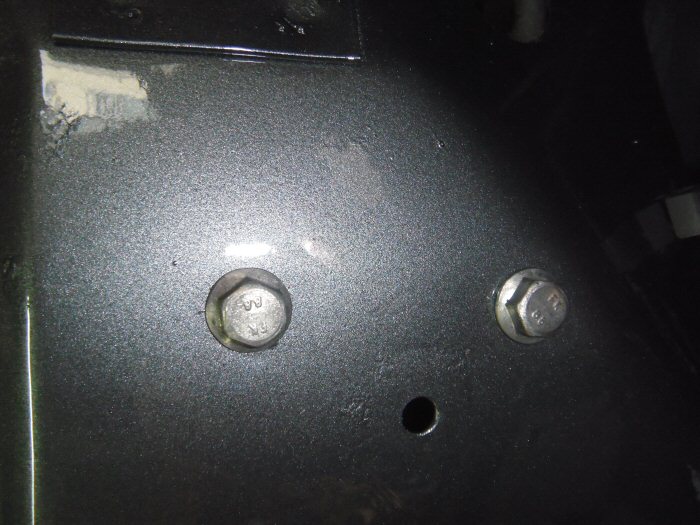
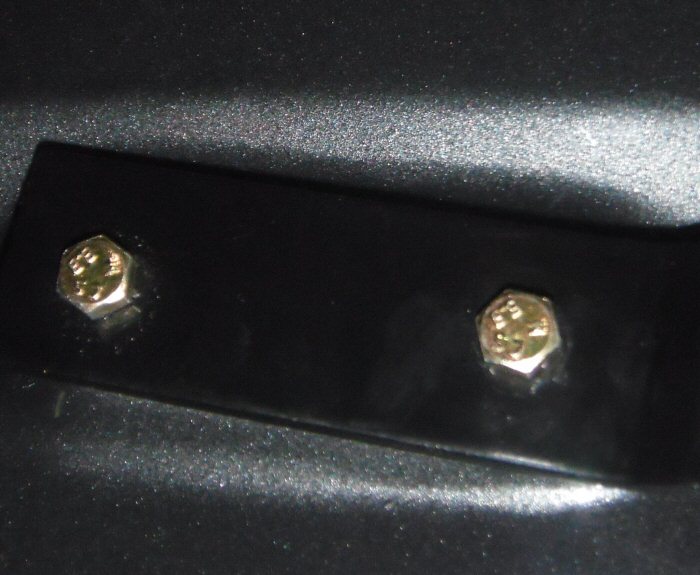
Now, have you been paying attention to the detail in these photos? Here's
two close-up clues for you...
This picture is deliberately rotated 90 degrees...
Now go back up and look at all the other bolts. If that's not a lovingly restored
piece of work I don't know what is. I thoroughly appreciate that level of
attention and care!
Regards,
Steve
Great work Steve, please PM me the contact no. of the guy involved as I mentioned last Wednesday night my raider needs abit of work soon so keen to pop down and have a chat.
Lowiepete liked this post
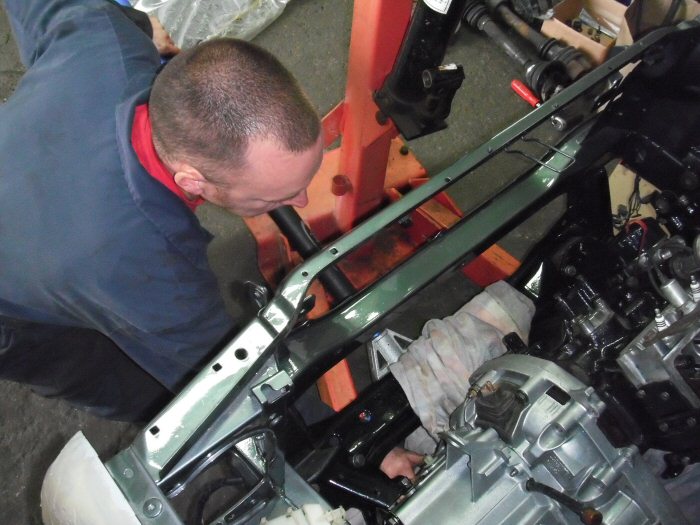
Hello Folks,
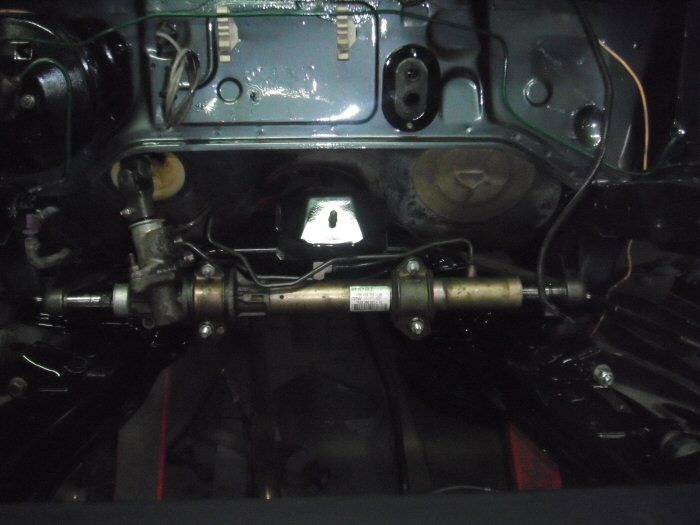
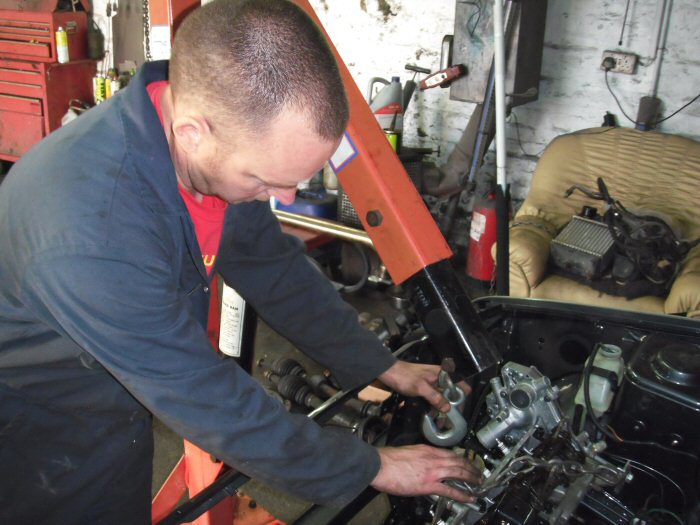
Well, the engine is back in and from initial observations, it looks like there
will be plenty of space to accommodate the power steering rack. I'll let the
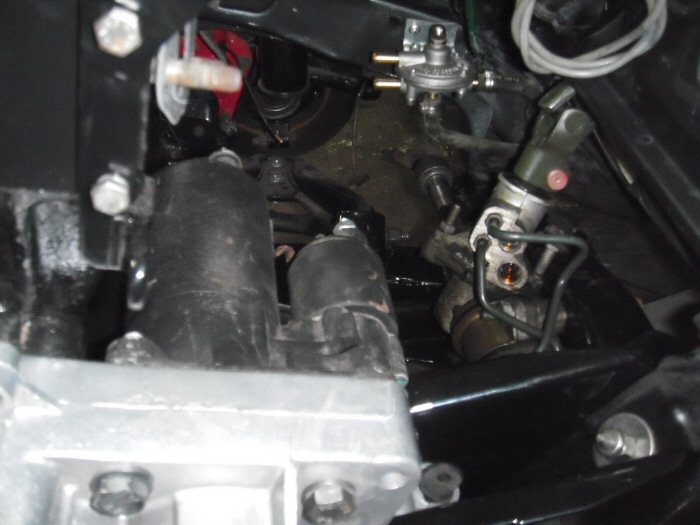
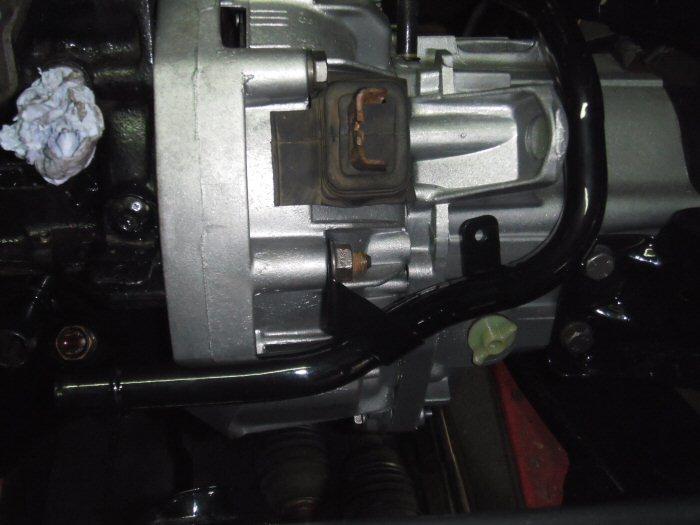
photos do the talking, with some occasional commentary.
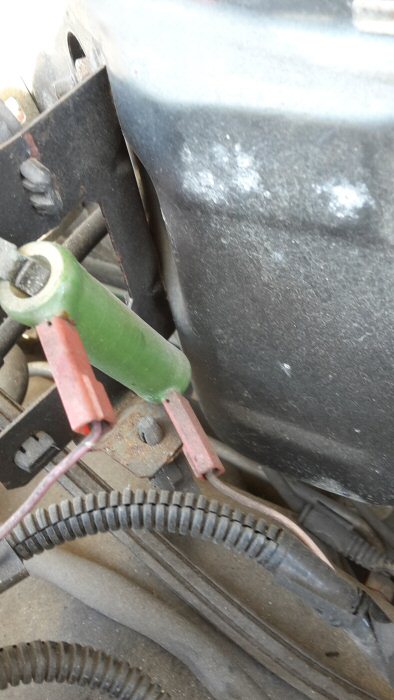
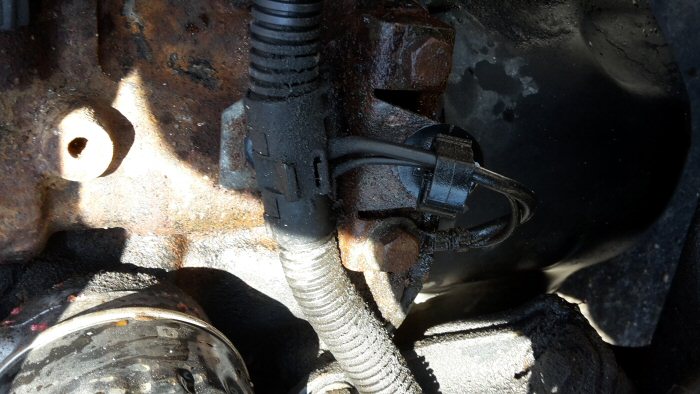
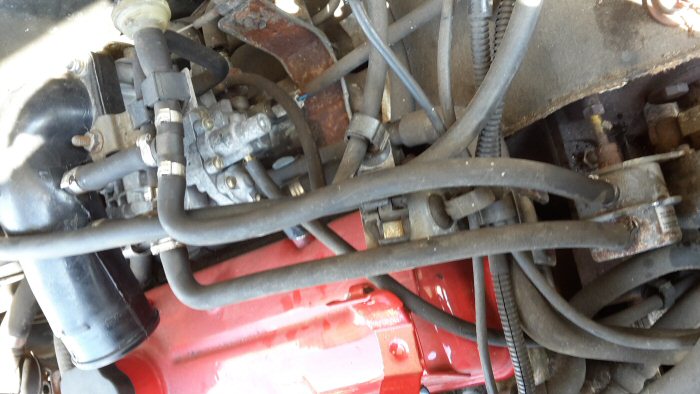
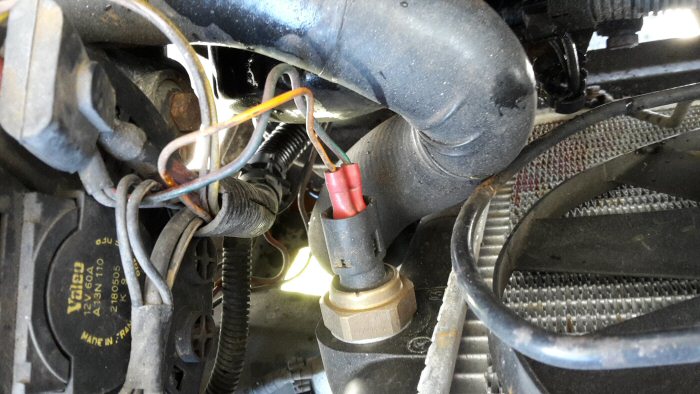
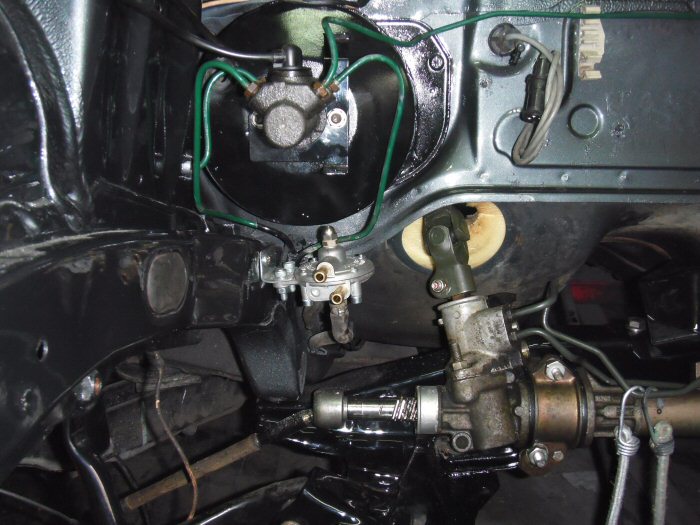
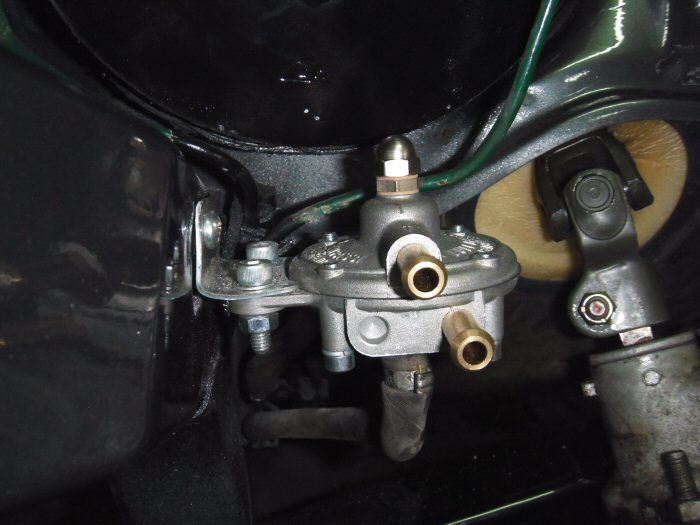
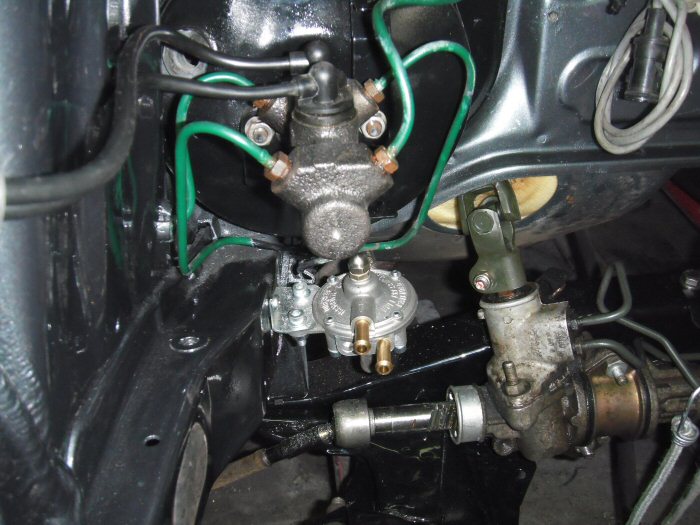
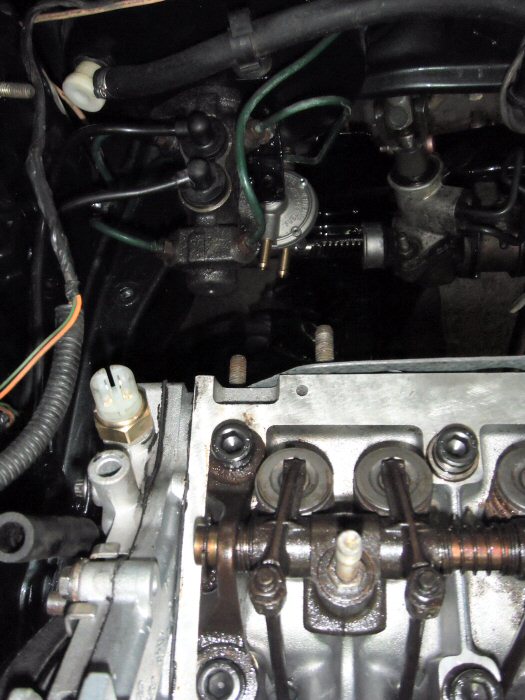
One of the last pieces to go back in to the bay was the new fuel pressure
regulator, so, here it is fitted...
Last minute preparations of the block, like fitment on lifting eyes. The original
one, newly powder-coated, will be refitted once the engine is back in...
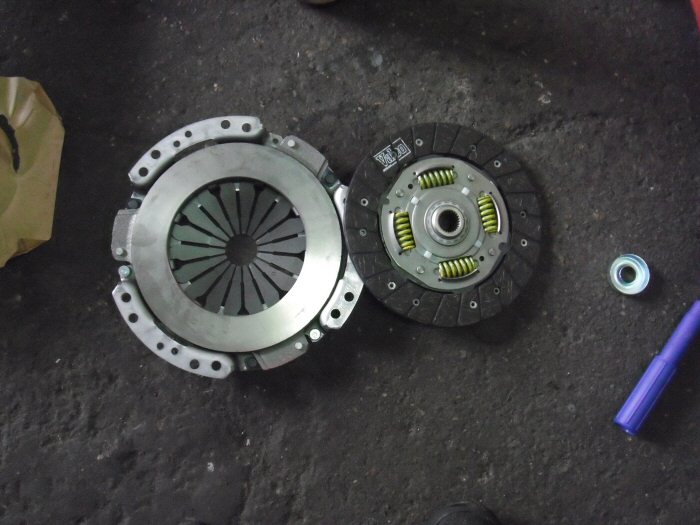
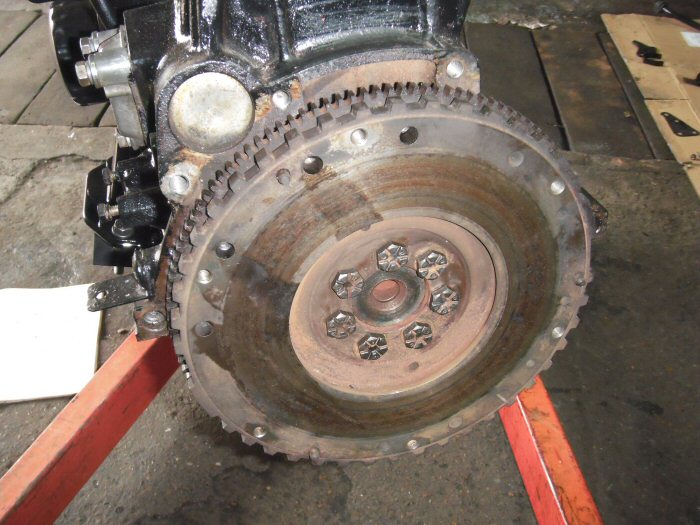
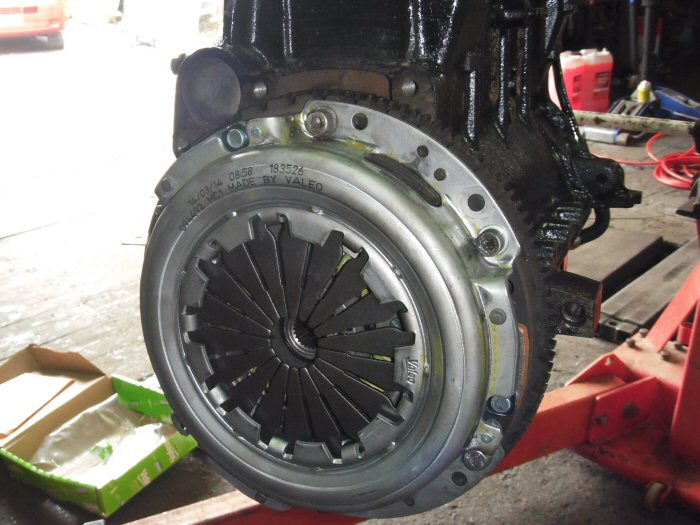
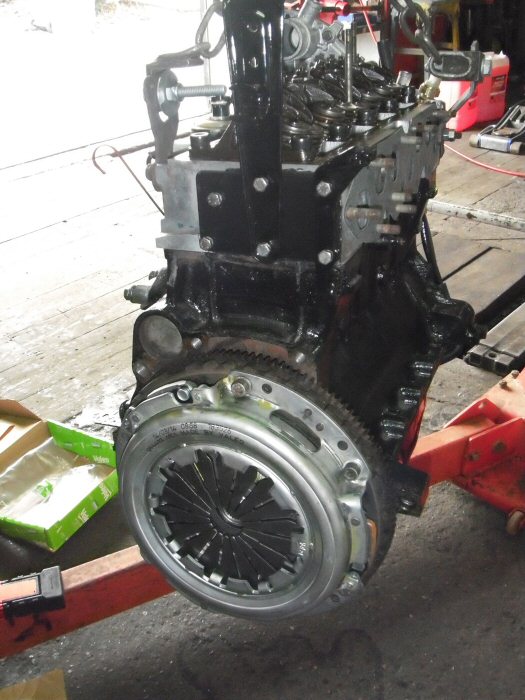
Fitting the new clutch. For some reason the soft clutch adapter didn't fit,
though Karl reckons he can make some adjustments to make the clutch a
bit lighter...
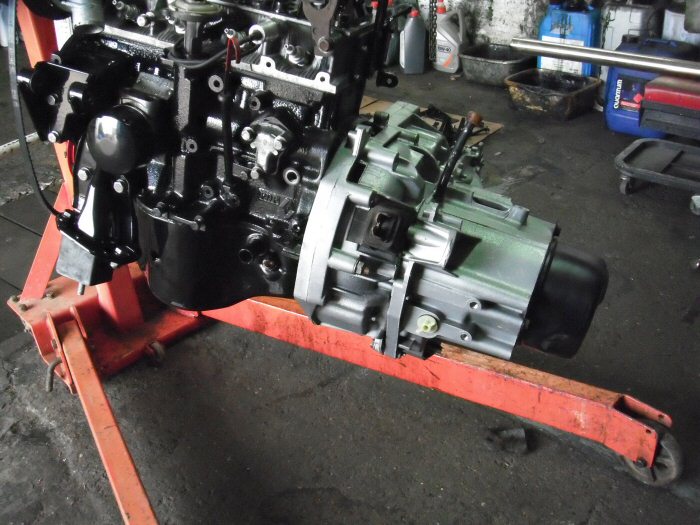
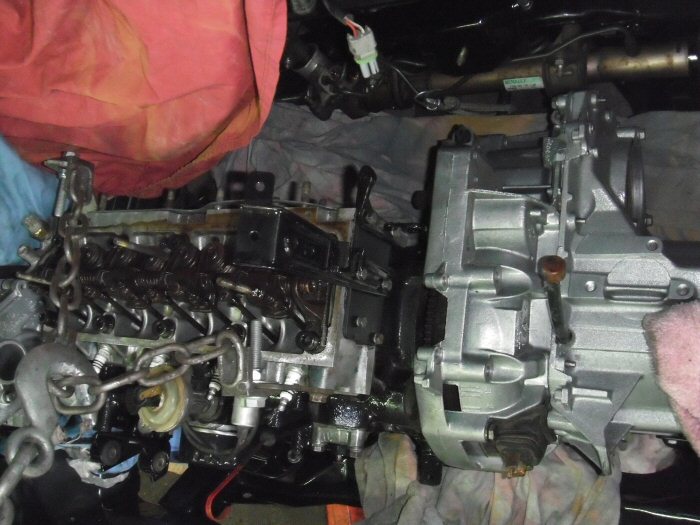
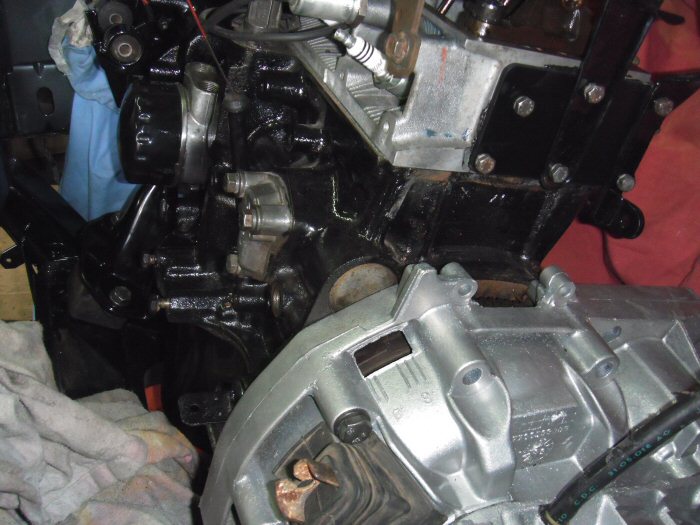
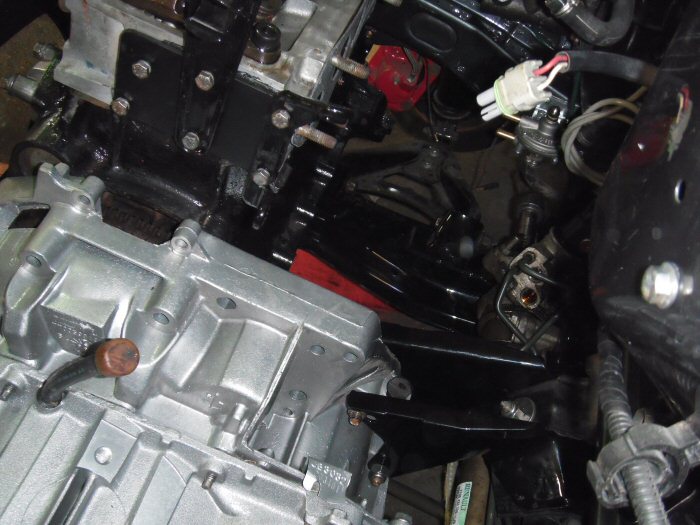
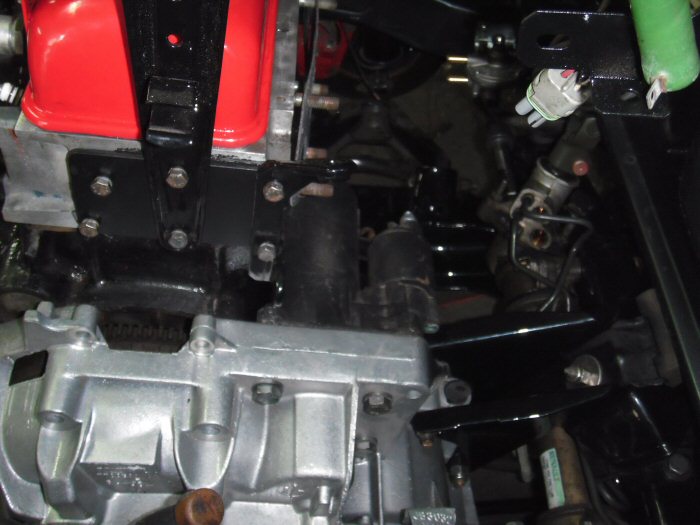
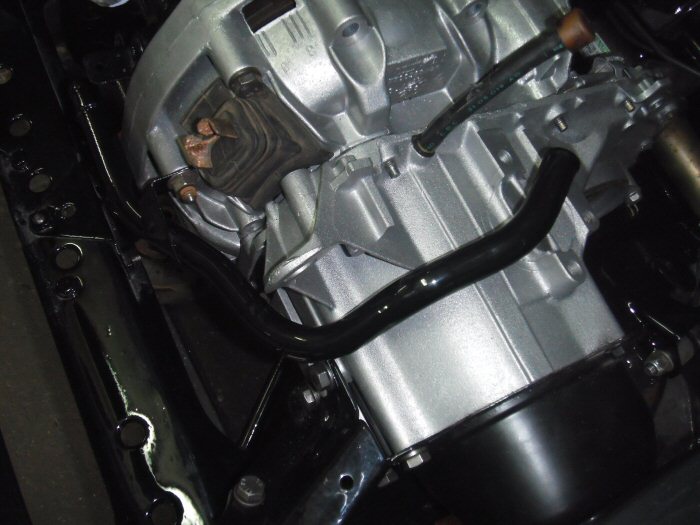
Block and gearbox re-united...
Engine protected from any stray bumps that could scratch the paintwork...
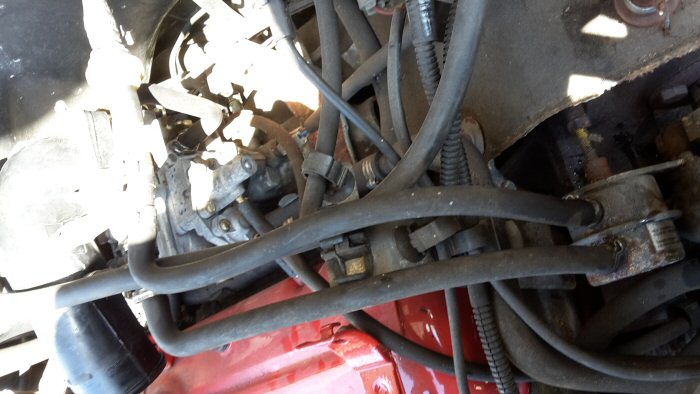
Engine still held by the crane, while front engine mounts are fitted...
Looks like everything is well clear of the steering rack...
Quick adjustment to help insert the locating bolts...
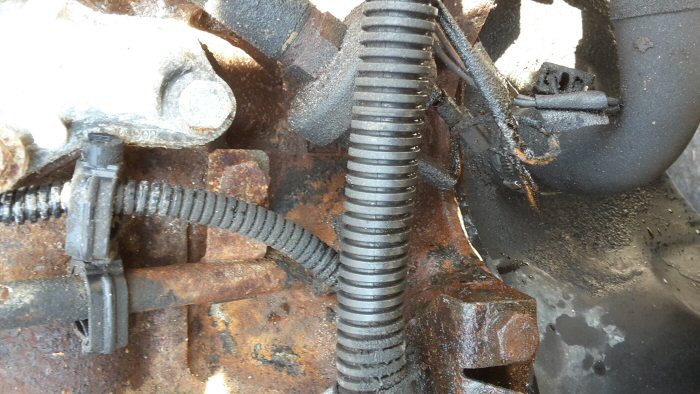
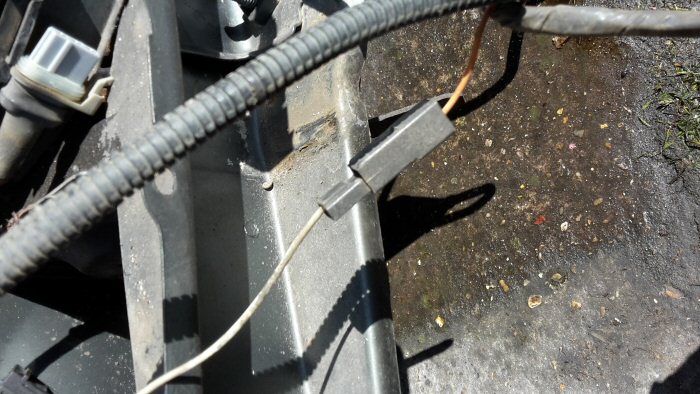
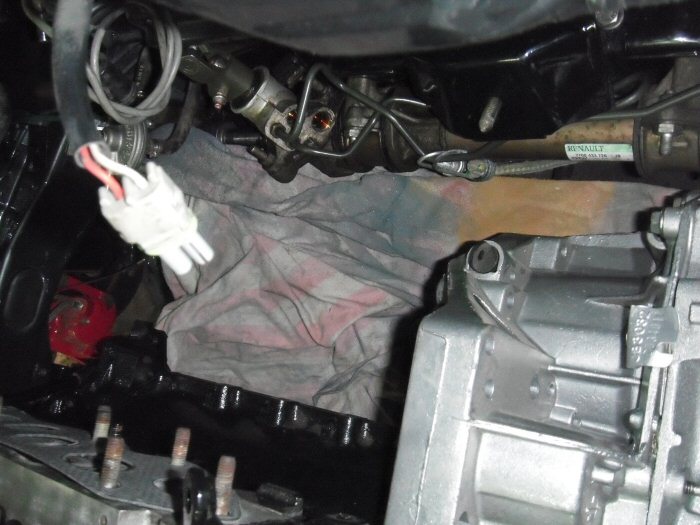
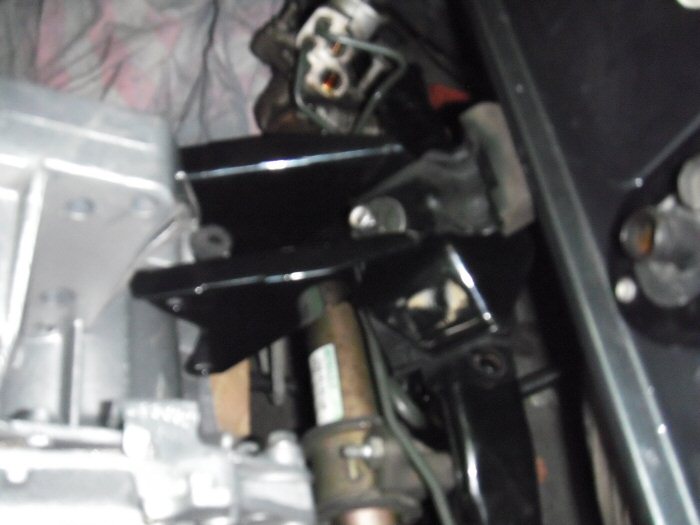
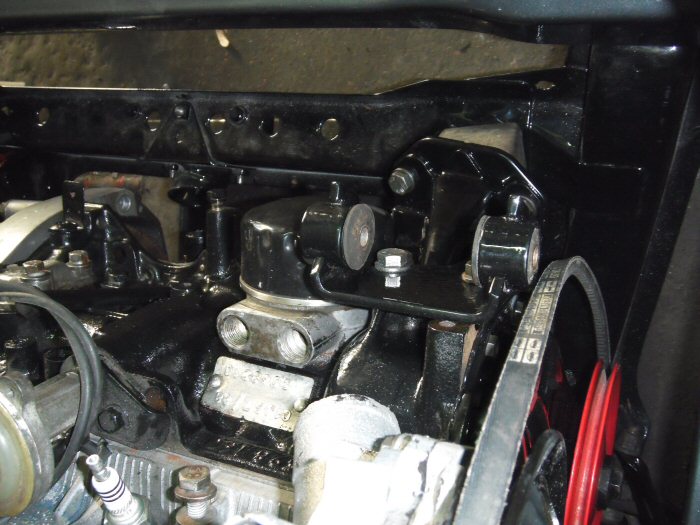
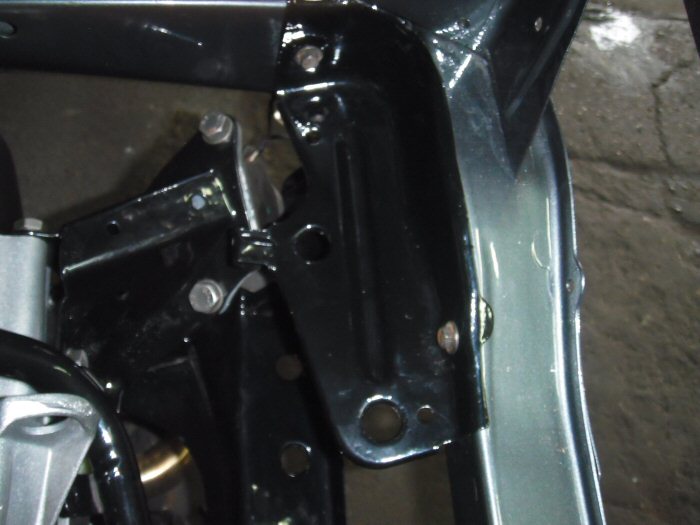
The rear mount temporarily positioned. Sorry for the camera shake
In this photo you can see the shadow of where the bracket was placed on its
host car. With it needing to be slid along almost an inch, the looped pipe needed
to be raised clear. The alternative was to shorten it, but that would have required
a bit of specialist work. Luckily, there was space to accommodate this quick
work-around...
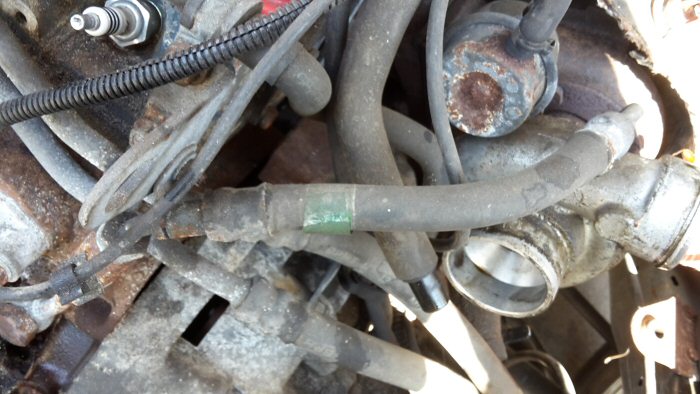
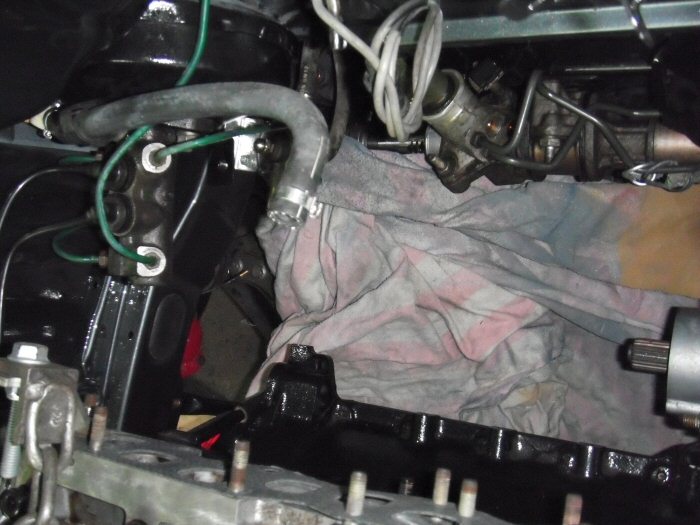
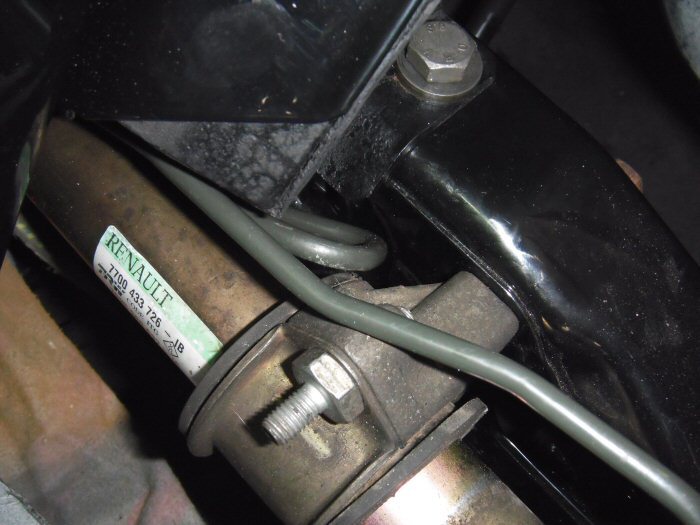
The rear engine mount is a composite of 3 interlocking pieces and each piece
had to be fitted over its top securing bolt before the whole assembly could
be refitted. The piece seen in place in other photos had to be removed for
this to take place. There's a lot of patience required in this work!
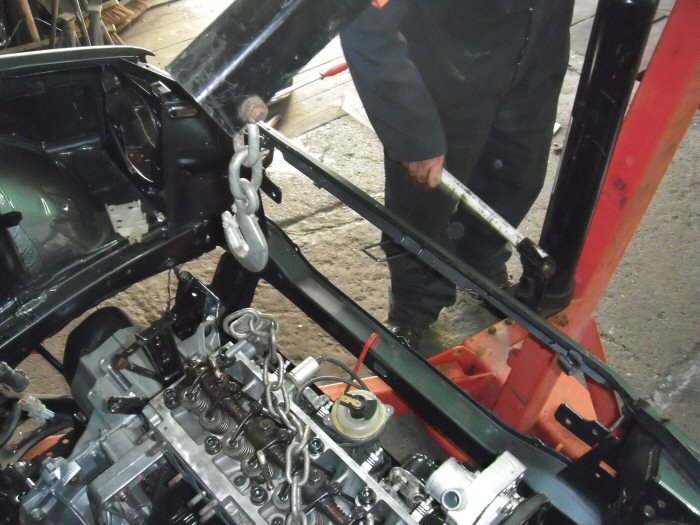
Karl disconnecting the crane from the lifting chain. The engine is securely
back in its bay...
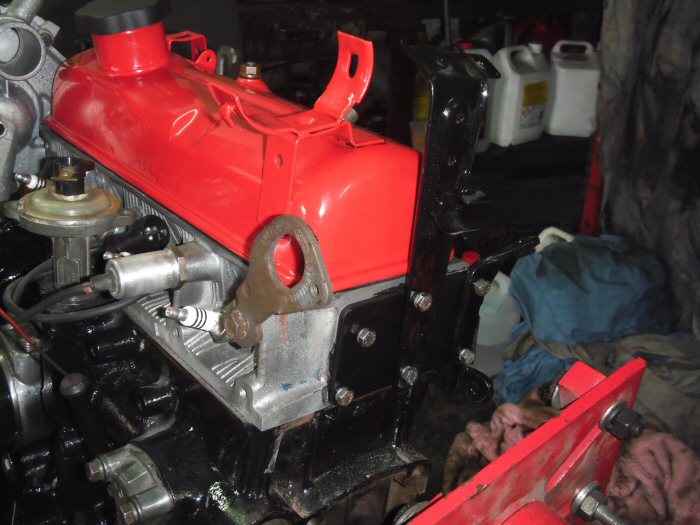
Rocker box refitted, temporarily, for a final tappet check to take place...
The original lifting eye re-fitted...
We are now at a point where the car can be handed back to Jason for the
paint preparation to continue. He wants to do most of the blocking while the
car is on the hoist. As for the engine bay, I want to get in there with some
protective coatings whilst there is ready access to the painted and powder
coated pieces. We're avoiding doing that now, just in case there are any
potions that aren't bodyshop safe.
Karl in the meantime will be sourcing the pump for the steering, along with
bracket and electrical controls for a trial fit, ahead of removal once more
so the scuttle area can be painted.
I have to admit that the delays were causing me to lose interest in this
project for a short while. However, witnessing this progress, I've got that
silly smile on my face once more. The one I can't seem to get rid of
Regards,
Steve

Brilliant work. One small thing I would mention is......... I would have moved that new FPR to a more convenient place so you can adjust it as and when you need to - it'll be a pain doing it in that location.
Lowiepete liked this post
Great work, nothing like a freshly built shiny engine being dropped back in.
Lowiepete liked this post
Alex - isn't the FPR a fit and forget fitment? How often am I likely to need
to get it adjusted? I'm assuming it comes adjusted out of the box. The
new one has been placed in more or less the same position as the old.
Regards,
Steve
Hi Steve. What you have there is an adjustable Malpassi regulator. You'll need to check the instructions to see what the base fuel pressure is (you'll need 4psi) If you're likely to be running more boost in the future you 'might' need to tweek it a bit.
Lowiepete liked this post
This page on the Malpassi site says nothing more than a 1:1 ratio. 4psi seems very
low where in specs for other FPRs the range starts at 14psi. No matter, really.
As for extra boost, forget it, the engine is remaining as close to standard that
I can get it. I'm only going for light touch OEM+. The FPR in that circumstance is
a fit and forget item. The replacement is in the same position as the original
and I'm not sure about giving Karl extra work on this...
Regards,
Steve
4 psi is just base pressure Steve, it will raise with boost. If you run OE boost (~8 psi) the fuel pressure will be 12 psi. I imagine the standard setting is in the right ball park for OE boost.
Lowiepete liked this post
Alex, I was given that assurance by the guy I bought it from and Karl didn't
raise an eyebrow when I presented it to him. I can't imagine any fiddling
with them in the factory, considering the care taken to calibrate them at
time of manufacture.
The only changes under the bonnet are a better air filter, some NGK plugs
and good leads. Now that the valves have been re-ground, it'll be premium
fuel only too. Probably the biggest change involves the power steering.
Regards,
Steve

Haven't checked this thread in a while and i have to say woe!
What an amazing attention to detail! Only thing i can comment on is i hope the steering rack won't cause any vague behavior!
It's not only the rods that are longer, it's also the rack itself. So basically you've destroyed the geometry of the wishbone & track rod combination
Lowiepete liked this post
Great work Steve. Loving the rack!
Lowiepete liked this post
That sounds a bit scary!!However, with Karl I have a mechanic I can trust
and I have little doubt that he'll find a solution, if he can. I'll mention your
comment to him and see what he says...
Regards,
Steve
Well,you shouldn't be scared as it's not like you're going to die or anything.
It'll just kill the feel in the wheel and handling.
Lowiepete liked this post
Phew...!!
That wasn't the fear! It was more about tyre wear and loss of grip.
I'm not going racing in the car, though I do hope to enjoy some
fairly spirited runs, occasionally...
It's amazing how views on power steering are polarised. Some say
it's the best thing to do, others offer dire warnings
Regards,
Steve
Hello Folks,
16 more pictures of re-assembly of engine bay components...
The eagle-eyed amongst you might have noticed the tiny rust patches
appearing on bolt heads. We've found a solution for that in the form of
ACF50 spray corrosion inhibitor...
Regards,
Steve
Last edited by Lowiepete; 04-09-2015 at 21:47.
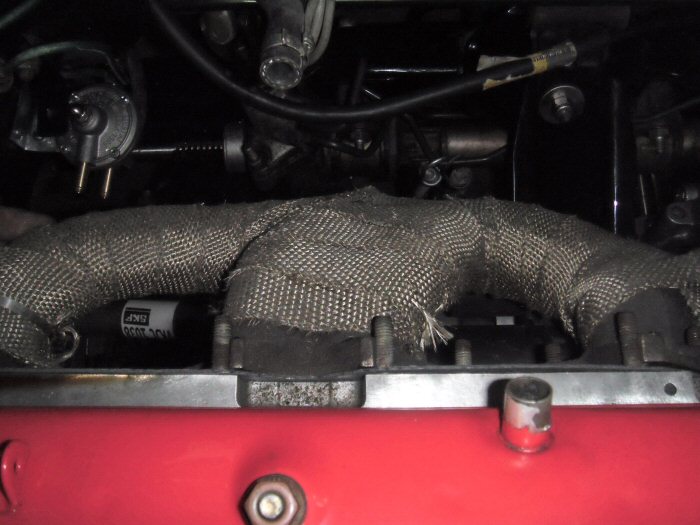
Steve. All looking great. A word of warning, I wouldn't wrap the exhaust manifold. It being cast iron tends to crack when wrapped. I've had a couple cracking over the years.
Matt
Lowiepete liked this post
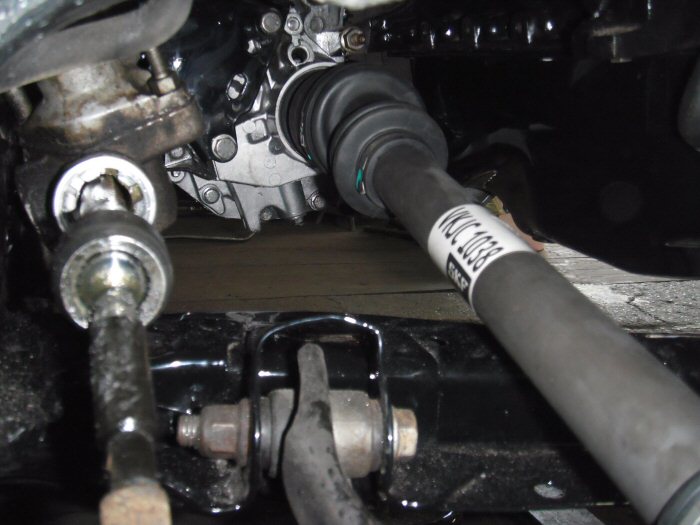
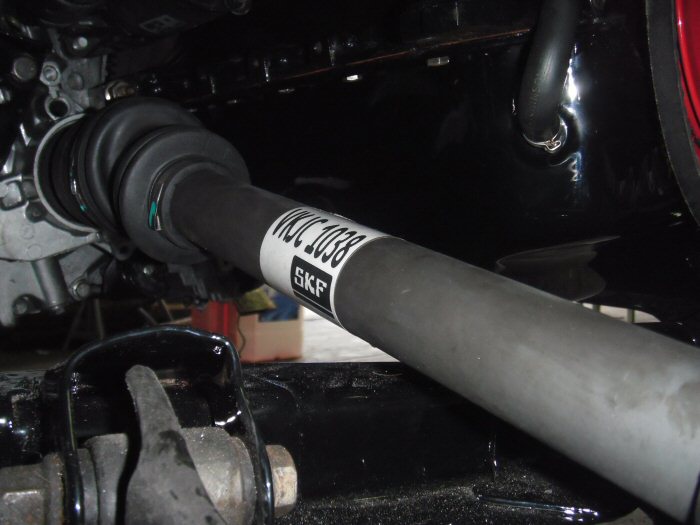
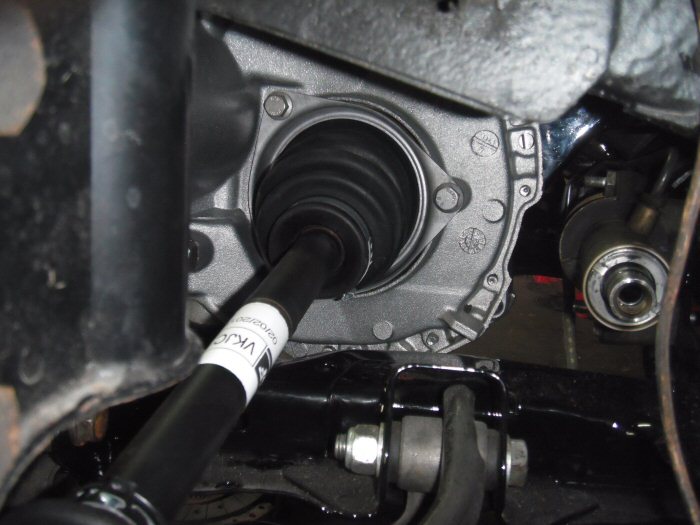
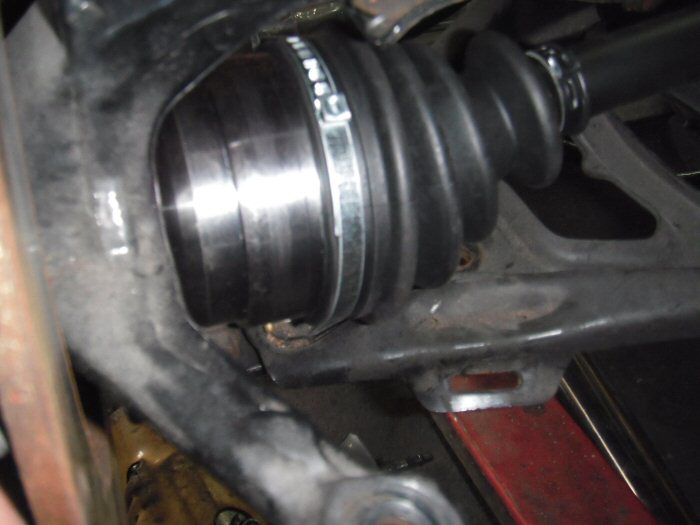
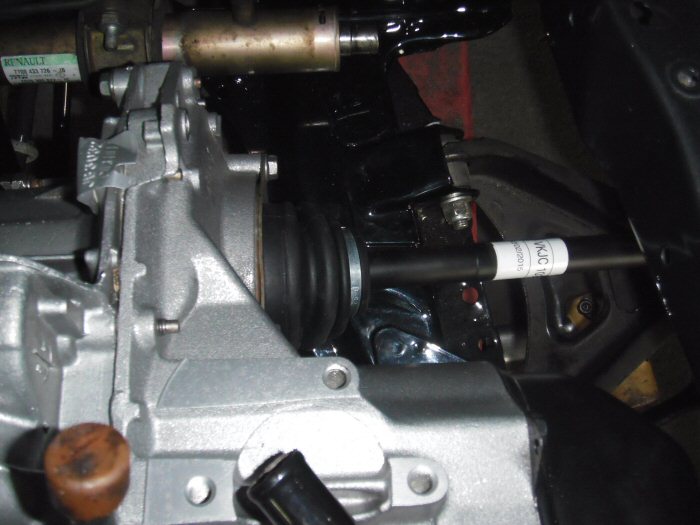
Great stuff, what driveshafts did you decide to fit Steve?
Lowiepete liked this post
The new SKF ones, Karl. They fitted a treat... There's no centrifugal force difference
because all is held in by the wheel bearing.
Regards,
Steve

Any further progress Steve?
Lowiepete liked this post
Not much...
Regards,
Steve
Come on Steve, your public awaits!
Lowiepete liked this post
A little progress is better than none, think thats where Im at now lol
Lowiepete liked this post
Well, the power steering pump has new brackets - sent to powder coaters.
Just got to work out how to join rack to track rod ends. Apparently some
lathe turning required. It has got a bit complicated, but no-one has given
up - not yet at least
Regards,
Steve
Steve, will it be ready for next July RTOC national day?
Lowiepete liked this post
Ummmmmmmmmmmm...
Hello Folks,
It has been a long time coming, but here's Part #6 of my video series...
Regards,
Steve
Last edited by Lowiepete; 01-04-2016 at 05:01.
Love it. Bare metal for the way!
Lowiepete liked this post
Hello Folks,
Well, Part #6 was a bit delayed, but it's closely followed by Part #7...
Regards,
Steve
Last edited by Lowiepete; 01-04-2016 at 05:03.
Hello Folks,
While I'm intent on restoring this car, I'm ever mindful of just how far to go
with it. With so much of the original metal to start with and the engine found
to be in good condition, I'm not going to go overboard with replacement of
cosmetic parts, other than those which need replacing, at least, where that
is possible.
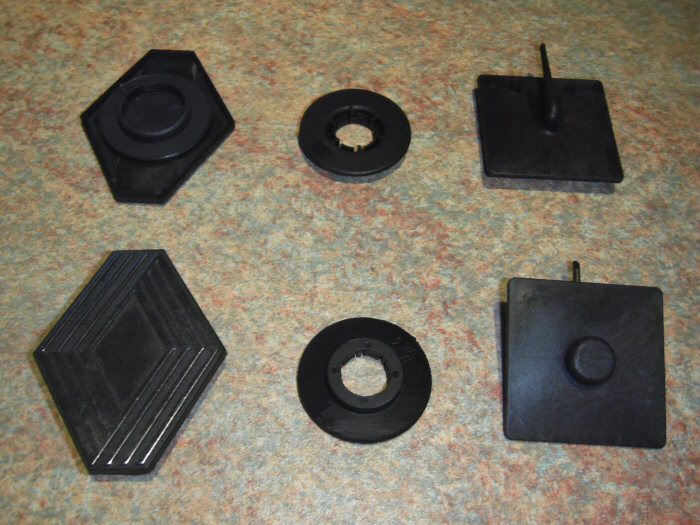
In earlier posts I had mocked-up the interior mats and I've finally been able to
source the fixing kits that came with my Laguna mats. When I enquired about
these at my local dealers, they seemed to be unable to find them. Then I
came across some on eBay, with a part number Renault: 7711220013, just
£4.30 exc VAT - yay!
The caps are flat enough for me to attach the self-adhesive badges to, so in
the photo the parts are upside down in the top row...
It's just a case of making the holes in the mats into which they'll fit.
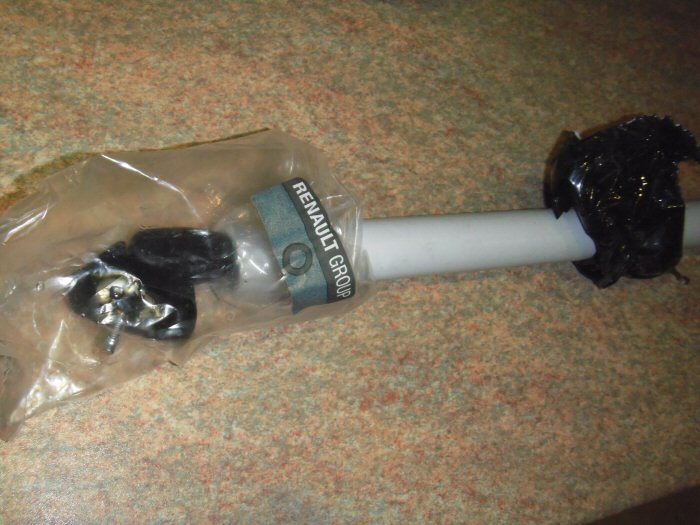
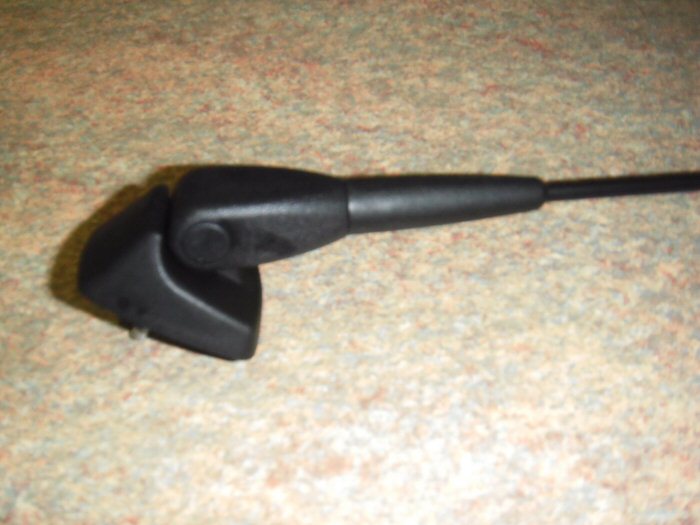
Another part of the car which would let the side down would be the aerial.
So, a replacement one of those was also a good find.
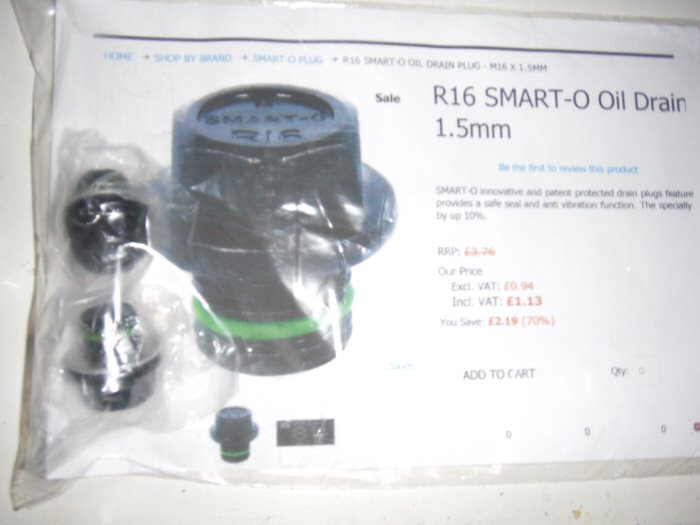
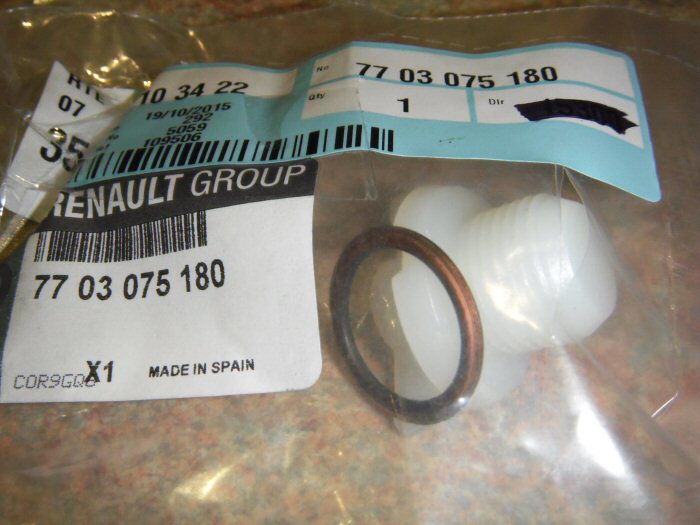
Then a couple of plugs. The top one was offered at 70% off its original price
and the lower one is the filler / level plug in the gearbox.
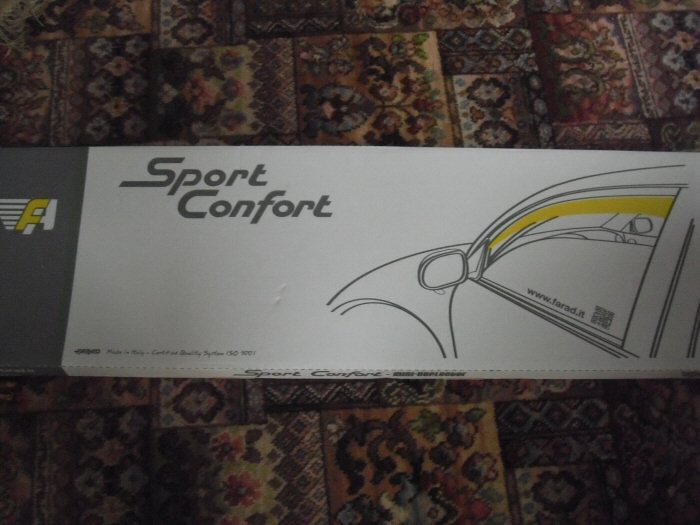
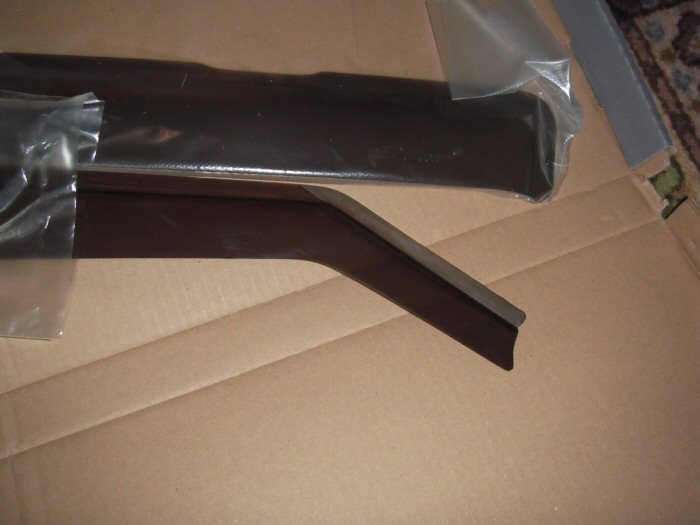
Next comes a treasure found on Amazon, from a company in Italy. They were
offered at £24.92 + £17 postage from Milan. I umm'd and ahhh'd for all of five
minutes before hitting the buy button...
I must have woken them up. When I clicked buy I was buying one of the last
two available. Revisiting the site, I noticed they're now closer to 50 quid with
19 quid's worth of postage and there are 15 in stock! Looking at the cost of
those available for modern cars, it looks like I bagged a bargain. We all agreed
that that its colour would look very subtle on the car.
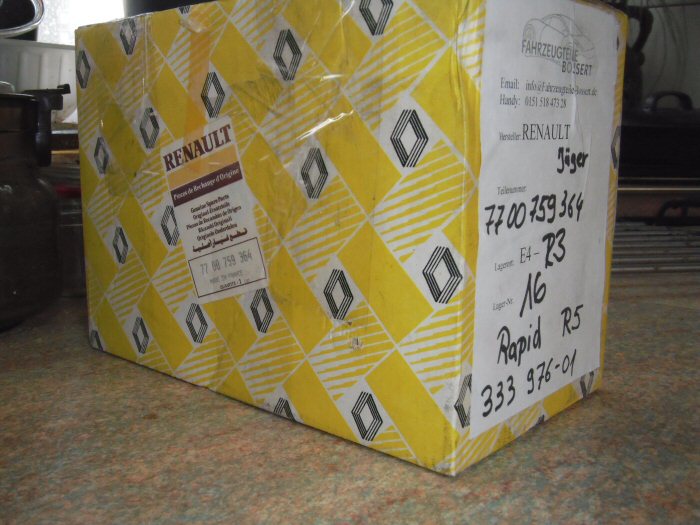
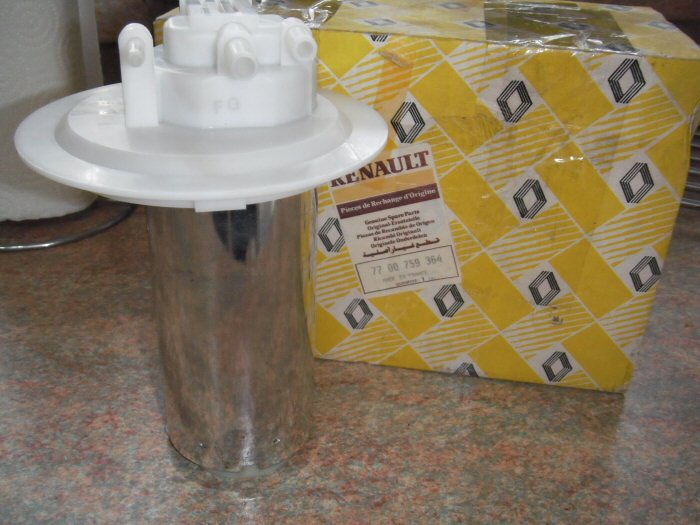
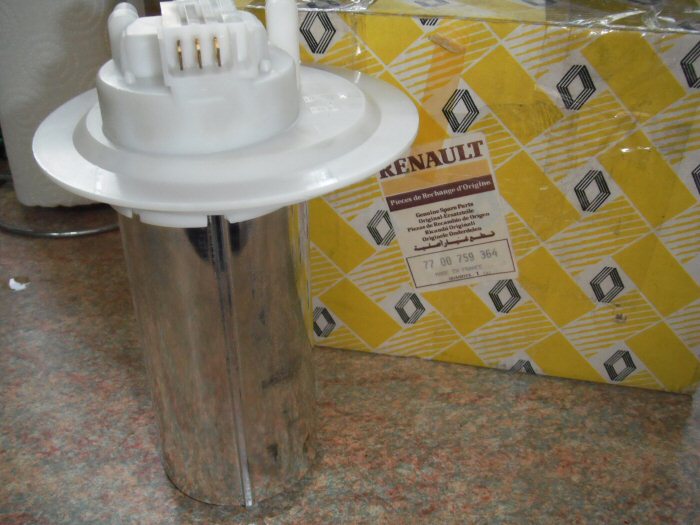
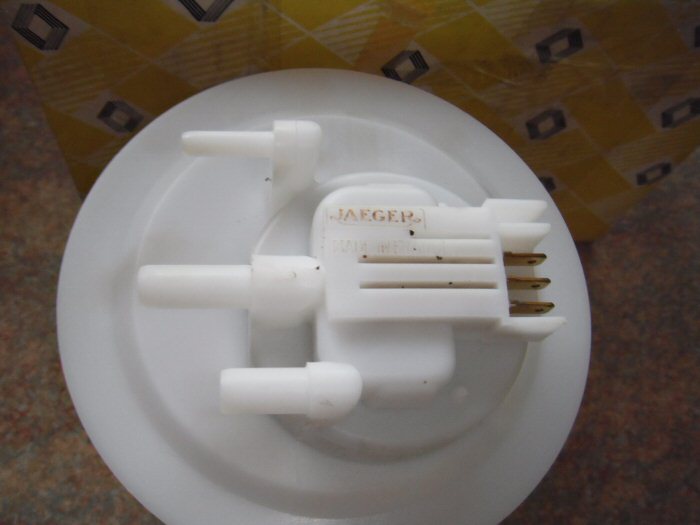
Now to another service part. During the shakedown we had some problems
with the fuel sender and I happened upon its part number. Doing a search for
it rendered a result of a Valeo one, again from Amazon, for a little over £57.
Then I happen upon a Jaeger one with the same part # on eBay France.
The seller, in Germany, accepted my offer of a similar price which avoided the
risk of one not being forthcoming because of no stock at the Amazon suppliers.
When I handed this to Karl, his first words were: "Well, that's a bargain!"
With the instruments being Jaeger, these will be a matched pair with the dial
it feeds..
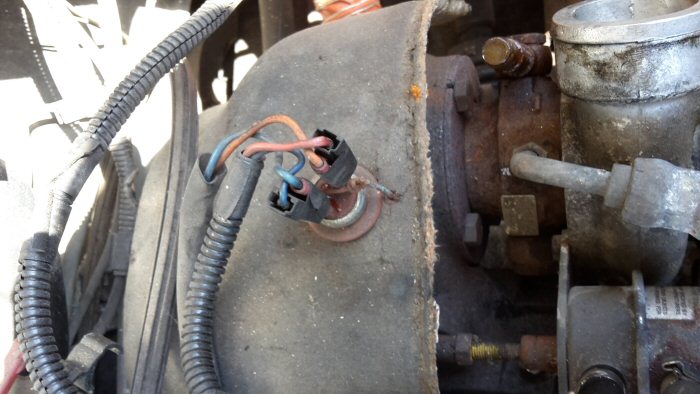
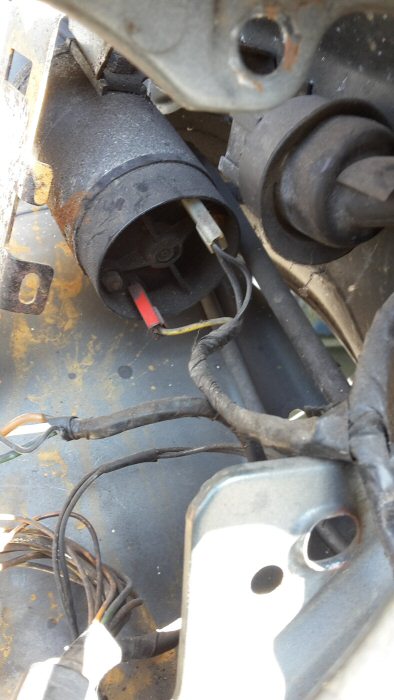
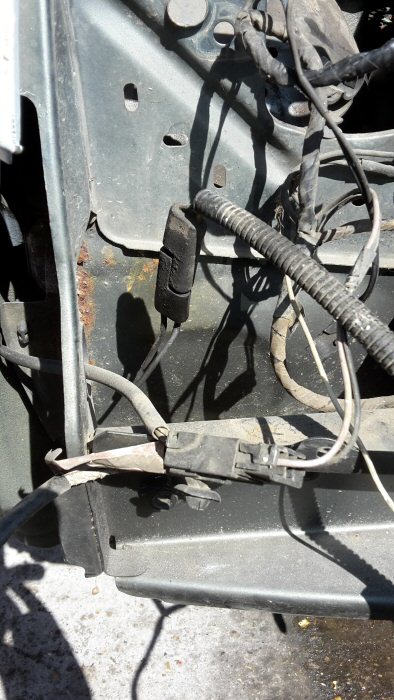
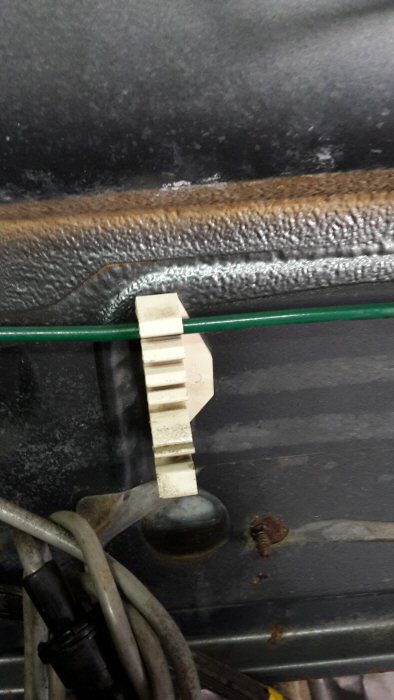
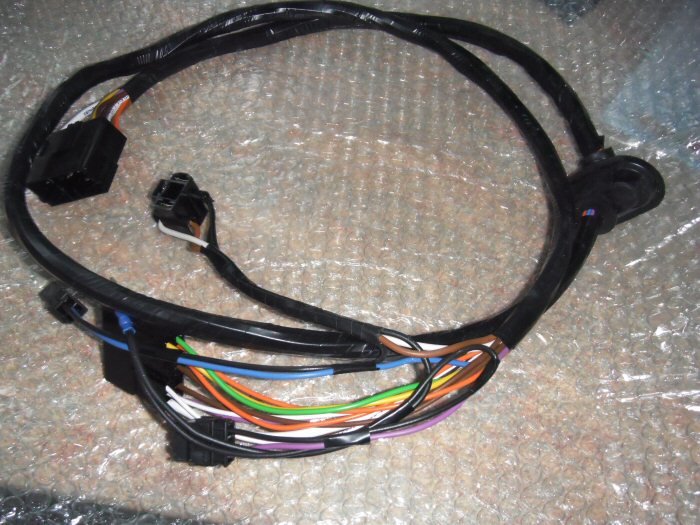
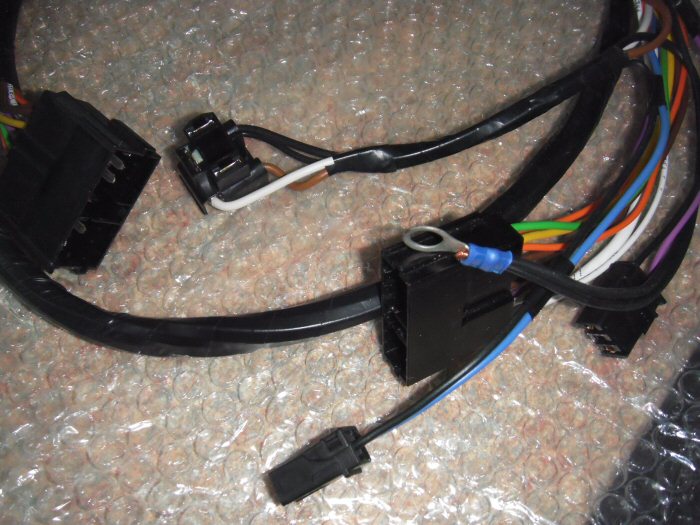
Having managed to source an engine bay loom, I later became aware of its
companion, the joint twixt dashboard and plug of doom. It came with a
request to return the 90 degree grommet inward from the engine bay...
...in the event, the grommet on the new loom has been mounted the wrong way
round. As ever when dealing with a Frenchman, I only got what I perceived to
be a deep shoulder-shrug when pointing this out. Karl will remedy that before
fitting...
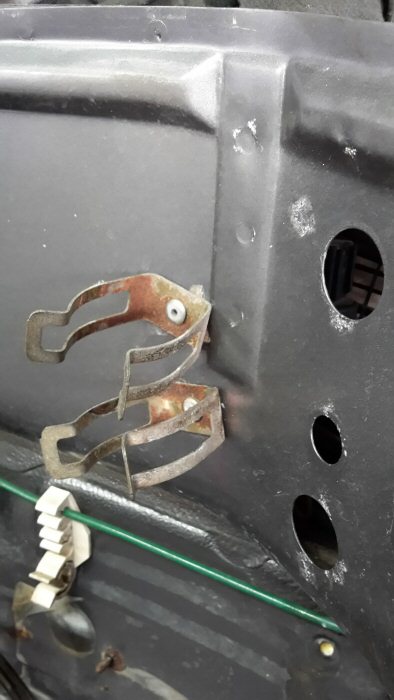
I've also been able to locate some of the side-skirt clips for a reasonable
price. Even GT Turbo Spares in the UK asks £16.50 each, which for what they
consist of is just way too much. This is probably fed by cheque-book sport
folks who bid £76 for just 4 of these clips on eBay. With the postage, they
came to over 20 quid each.
The resale prices of restored cars have yet to catch up with that level of
stupidity! It's still not clear just how many of the thousand vehicles still
extant are OE originals. There seems to be a move toward both the kitting
out of Campus shells to GTT spec, and also the import of left-hookers from
across the channel. Does this mean a severe price-hike is imminent?
I'm also now putting aside several service parts for the future. Things like
spark plugs and filters. One thing I'm quite proud of is the fact that the car
and the majority of its present fittings are those that left assembled at the
factory in the back end of 1989. Okay, so it's not original paint, but that was
taken out of my hands by a vandal keying every panel for me, just weeks
after I purchased it.
Hopefully, the car should be rolling again by the end of the week...
Regards,
Steve
Last edited by Lowiepete; 08-01-2016 at 01:17.
I don't know how you do it Steve! I guess you have a knack of sniffing out the bargains and NLA OE parts!
Lowiepete liked this post
It's quite simple - you find a part # then add a French word or two and Google
finds the parts suppliers. Then it becomes more difficult, not many French suppliers
will despatch to the UK, even when you ask very politely in their own language
A bit of patience is needed too because there are many blind alleys. Reading the
screen closely pays off. I think I was looking at fuel filters when I came across the
wind deflectors seen as "other options for R5GTT" lower down the page - Yay!
I've managed to find a pair of brand new Siem electric window winders - £170 delivered.
Beware the 3 door / 5 door trap!!
Also, found some more wind deflectors. Not tested this for postage costs, but the
starting price is pretty good...
Regards,
Steve
Last edited by Lowiepete; 08-01-2016 at 07:16.
Great work, you've sourced some real 'gems' there Steve!
Lowiepete liked this post
Posting Permissions

 Reply With Quote