Get on with it Cooke!!!


Get on with it Cooke!!!

should be running by SundayOriginally Posted by MATT C Ringworm Tuning


https://www.rtoc.org/boards/attachmen...0&d=1240150786
Thats a nice tidy job there mate, good work...
This is gonna be a mad project, those coil overs look fat....

Easter Sunday, 2012 ?


Is it running yet then Andrew?
I asked my friend about the clio 172 he used to have, he was as useless as me about info. All it had was aftermarket filter in standard box, make unknown, a stainless exhaust, make unknown(had factory cat fitted still) and a remap, apparantly was 190bhp, sounded great tho.
The one thing I noticed was that the inlet manifold got really hot, I know the japboys fit thermal gaskets on type r manifolds to stop this, not sure if the same thing can be done on the 172.
Hill Power (or something like that) do PTFE gaskets. Just keep the throttle open and let the airflow keep it cool

nice little project you've got going here.
not sure the cliosport lot will like it though, no silver visions, yozza exhaust or turinis!
so is this going be your daily runner and how long do you think it's going to take to finish it competely?

are ya gonna cover it in GDI stickers and 'detail it' so that you have more chance of getting it on cliosport?
Cliosport may grow to love it
It will be a daily driver, as to how long it'll take to complete, I doubt it'll ever be complete, but I'd like it running ASAP.
I've been a bit distracted recently, but hopefully I can play a bit without without being distracted over the bank holiday, ok, well, maybe get some time off to play.
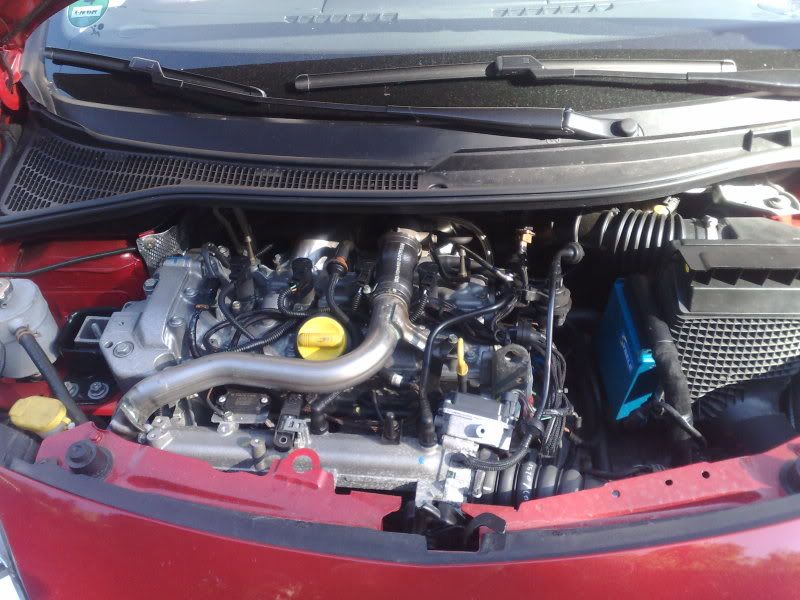
I recieved the engine mounting bolts, so could finally tighten the engine mount. The rear mount still needs finishing (still not managed to get a suitable mount to modify). The rear 'mount' is sat on a jack so that I can still play a little with the final position. The exhaust was a bit close to the floor, so I leant the engine a bit further back, and the exhaust now looks perfect, it's also given me a bit more space around the front of the engine.
The gearlinkage clashes with the cat, so it looks like I'll be using the 172 linkage as that fits tighter to the floor than the Twingo one.
I've also been playing with the fuel pump/collector/regulator. The PH2 172 has the regulator in the tank, I'd hoped to just drop the 172 collector into the Twingo tank, it's not as easy as that as the Twingo tank has walls around the pickup that clash with the clio collector. I'm not sure if the tanks are close enough in depth to allow the 172 collector to be used if I cut the walls out . I'd hoped that I could graft the regulator on the twingo collector, but it's moulded in, so not really possible. So, I have a few choices:
1 - cut out the walls and use the 172 collector - need to confirm depth, and I'm not sure how sucessful the cutting will be...
2 - get a PH1 fuel rail and regulator and use the Twingo collector (maybe with the 172 pump fitted - if it will fit)
3 - fit a 3 bar regulator on the bulkhead keeping the PH2 fuel rail, and the Twingo collector.
Anyone got any useful bits or suggestions?
Pictures show the plenum dropped onto the engine with the engine in it's new reclined position, there are cms to spare, and it looks like the bonnet will not need to have a bulgeNot much space to get the inlet pipe in, but a bit of hacksaw work will see something fitting..
Surely options to 2 and 3 make the most sense as it will allow you to keep the standard fuel gauge?If you did manage to fit the 172 tank sender/pump/regulator unit into the twingo tank you'd have to run an aftermarket fuel gauge and I thought you didnt want the dash cluttered with extras?Plus option one sounds like a right arse ache.
You know i kinda admire you in the way that nothing bothers you one bit, if it don't fit you will make it fit.. Thats the exact attitude you need on a project like this and so far it looks impressive...
When you take the twingo sender unit out is there a pump strapped to the side of the sender unit ?
Just i know where there is a company who does after market higher flow fuel pumps to the exact size of say your twingo one...
Rob
Andrew, in my trip to my local scrappy today looking for ICV to which I had no success as it looked someone had already pilferd them all(will just control idle with the throttle body adjuster for the accelrtor for now) anyway I managed to get a bosch 3bar fpr and the clip that goes in the phase 1 rail if you want them there yours.
Last edited by James5; 02-05-2009 at 23:42.
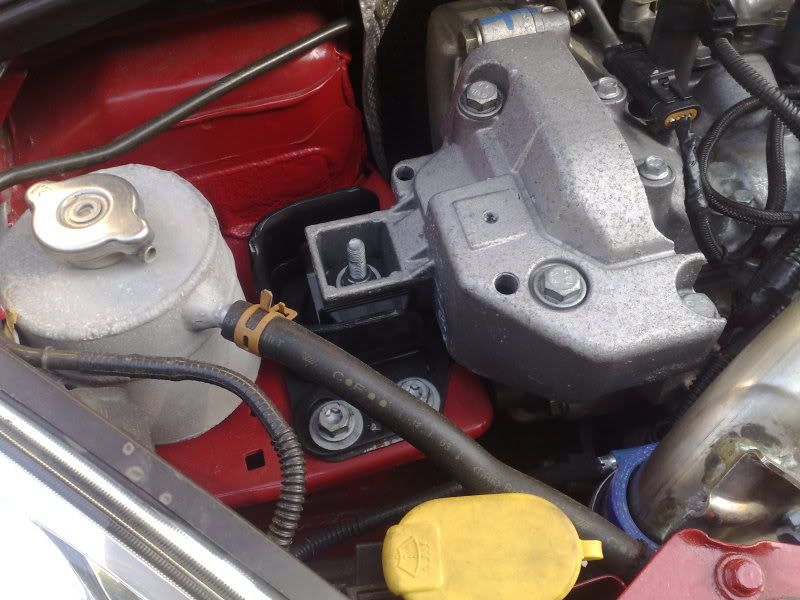
that'd be great, I don't suppose you managed to get the bit of fuel pipe with the joiner for the fuel rail?
I got about 5-6" of the small bit of the pipe that has the push on type fitment.
I'm a bit lost, can you take a picture?
Let me go find the camera
Edit - Picture added
Last edited by James5; 03-05-2009 at 16:33.
that's perfect, you're a star
Running yet andrew ?
I've been a bit slack on the 'actual work' front, but have been gathering a few odds and ends. Thanks to James for the requlator, clip, and pipe
This evenings 'actual work' has been making up parts for the rear engine mount. But first I did the nice easy job of fitting the top mounts onto the front coilovers - turned out to be a real fiddle to get them to seat correctly, but it's done now
In a previous post I'd modified a GTT rear mount buy cutting and welding some 2x1 box onto it, the engine is currently sat in place with a jack under that mount, the angles have been tweeked to make the exhaust line up nicely. To make the rest of the engine part of the mount I bought a Powerflex universal poly mount - the biggest they did, and 'found' some 2" bar and some 2" box. First job tonight was to drop the box into the mill, and with a 44mm hole saw cut semicircles out of the end. Next was to bore the 2" bar out to 38mm to fit the bush, I cut the end off, and turned it down to 60mm long. Finally I turned the centre down to 44mm so that it sat nicely on the end of the 2" box. Sounds simple enough, but that took me all evening

You shoulda asked!! How much did that cost?
do I have to think of everything
was about £15
I've booked the 29th off, will you be at the Pod?
I had 2 choices with the drive train, use the twingo driveshafts, hubs, and suspension, and make a caliper bracket so that the 172 brakes could be used, or use the 172 driveshafts, hubs, and brakes, adapting the hubs to 172 the Twingo suspension. I'm going to try the latter, and hopefully the 172 shafts will work out OK.
The 172 is a fair bit beefier than the Twingo stuff, the obvious differences are that the hub is 3mm thicker where the damper bolts on, uses 14mm bolts instead of 12mm bolts, and has 54mm between bolt centres rather than 52mm.
First things first, I need to machine some thickness off the 172 damper mount. I've been wondering how this could be done on my mill for a while, this is what I came up with.
-clamped a bit of tool plate in the vice, and ran a cutter over the top face to true it up.
-drilled 2x 10.5mm holes 54mm apart, tapped them M12, and counterbored 14mm dia
-made 2 steel dowels 14mm OD, 12mm ID, and pressed them into the counterbores
-sat the hub over the dowels and fitted 1 M12 bolt, this allows me to machine 1.5mm off the face where the bolt isn't, then move the bolt to the second hole to continue machining off the rest of the face. 1 bolts holds in down OK, and the dowels stop anything spinning.
-flip the hub over and machine 1.5mm off the other side in the same way.
Some inspiration for you Andy...

New poster! (less than 10 posts)
did you already remove the cap from the fuel tank ? im having the same problem in my twingo turbo... lol
problems removing the pipes? I got them off, but have since bought a tool off ebay, not tried it yet....
like these: http://cgi.ebay.co.uk/US-PRO-TOOLS-3...3%3A1|294%3A50
New poster! (less than 10 posts)
no, the cap to get the fuel pump
ahhh, big screwdriver and a hammer
New poster! (less than 10 posts)
loool
I've not totally stopped working on it, only almost....
I've been swapping the 172 gear linkage into the Twingo to give clearance to the cat, I may still need to tweek the length, not sure yet.
The rear mount is coming along nicely, as soon as I get a free evening where I'm not roped into being a removal man, drunk, dinner guest etc. I'll have a crack at welding in on. I'll take some pics when there is something more to show.
Drilled the bottom damper mount to 14mm and offset a mm to fit the 172 hubs, I'll leave the top one until I bolt everything up and check the camber.
Added a bit more bracing to the fabricated front engine mount - it's location was a bit undefined, it won't be once I weld the bits on...
Being a socialite seems to be hampering your progress Andrew!
tell me about it
National day is just around the corner, and I really want to play on the track.
no, I'm not going to sit in your garden eating ice cream, I'm going to do some welding....
The rear mount is now pretty much tacked in place, the new bush housing is tacked onto the subframe, and now just needs tacking onto the bracket on the engine. I'm looking forward to removing the engine and subframe so that I can weld everything the right way up. I don't like being showered with sparks
Back to being a removal man / socialite tomorrow night, but might get chance to play more on Friday evening/ Saturday morning.
Looking forward to seeing this at ND mate.
Chop chop
kin'ell thats gona be a stiff rear mount!!
big engine + small car = not much space for engine to flop about in
The poly mount is pretty thick, I can always drill holes in it to soften it off a bit, that said, I'll bet it's not as stiff as a mini engine mount. (certainly not as stiff as the mount in my GTT
We need to build him a REAL mount marrow!
Tonights fun..
finished tacking up the rear mount.
pulled the engine out
removed the subframe
did a bit of bracket welding
checked the cam timing, it's out so I need to set it right.
pulled off the gearbox, checked the clutch, it looks to have been replaced, as has the flywheel, all OK.
removed the flywheel to check the crank seal, it's weaping, so it looks like I know why the bottom of the engine/gearbox is oily.
I have a home made cam alignment tool, if you need a loan.

I need to do the cambelt on my 172, any takers...*cough cough...SCOFF*...
lol, drop me a pm if you need to loan it spooks.
I have an alignment tool, need to make something to lock the cam pullies and crank.
Any idea what the part number for the crank seal is?
PM...
77 03 087 224 CRANK SEAL M2 £14.81
Double check that before ordering though.
8mm punch or rod to lock the crank off (feed it through the block, bottom right hand corner at the front behind the star head bolt).
I have the cam locking tool, albeit home brew, or you can buy the real tool from ebay these days it seems.
But you mean the tool to lock the pulleys themselves. I've never bothered though, you find that if you de-grease the mating surfaces as you are supposed to, then lube the bolt, the pulleys do not turn as you torque them up.
I've got the ebay C shaped cam alignment tool, and pin for the crank. I'll probably make something to lock the pullies, it's only a couple of triangular bits of ally and a bolt.
I've got the cam locking kit from when i did Millie's if you want a lend!?
that number seemed to work ok, ordered the crank seal, camshaft bungs, and new bumper bolts. The seals and bungs were on the shelf, but the bolts will be in on Thursday, guess that's a road trip on Thursday lunchtime then...
I'm thinking about replacing the steering arms, trackrod ends, wishbones, bushes, and bottom ball joints.
iv'e just done the crank seal on the 225. I had to drive the seal in a couple of mm further to miss the deep scoring from the original seal. Seems to be ok.
Posting Permissions

 Reply With Quote
")