-
Detailing Mod

The Spit'n'Polish Technique in Waxing Your Paint - Guide
Hello Folks,
Introduction to an Interesting & Rewarding Process
It's been one of those days, too sticky to stay indoors and rain threatening
at any time outside. However, the cloud cover did give me some ideal waxing
weather. Having been reminded of a boot-polishing routine, I thought I'd try
and adapt on my car the spit 'n polish that I used to do on my shoes, just to
get past a far too perceptive Chief or 2nd Steward at 7am each morning.
So why would I want to do this? Well, there's not only the shine, but the
sheer satisfaction of achieving it. Also, if you look after it, it'll last and last.
Obviously, I'm gonna put a bit of a modern twist on this, but essentially this
method of applying wax is time-honoured.
One of the things to consider is the carnauba wax being used for this. A lot
of modern waxes contain new fangled things like solvents and polymers
which in all probability would interfere with this process, so I've used a good
old-fashioned wax. Harlys Wax was the weapon of choice, but a good old
tin of Simoniz Original would probably do just as well.
The Process
Basically, spit 'n polish requires just a cloth, a wax and some spit. What it
also needs is a lot of patience and when applied to shoes, some strength
in your fore-finger. You dip into the polish just once and apply it raw,
working it well into the surface, then leaving it to haze. The next part is
known as "bulling".
You apply a dollop of spit, which revives the working area, and using the
same polishing cloth, with no extra polish, just continue to work the surface
until either you get the shine you desire, or you repeat the spit refreshment,
only stopping when you get to that point.
Translated for the Car's Paint
Using a largish foam pad, run it round the carnauba wax tin and immediately
spritz that with liquid. I used Meguiars Ultimate Quik Detailer, about 6 squirts.
Lightly apply to a small area, initially in a circular motion, then alternate twixt
straight lines in opposite directions for about 2 minutes. At no time do you do
any rubbing! This first coating is just to ensure that you don't miss a bit.
Having made sure that you have given the area a complete coating, stand
back for about a minute to allow it to haze. Then directly spritz the area
with the QD. Without reloading your pad with wax, just continue working the
surface. This is the bulling stage.
Your wiping motions should be very light and fairly brisk, just continuing the
wiping patterns from where you left off from the first wipe. Eventually, after
say 4 or maybe 5 minutes, you'll notice that you'll achieve a shine that needs
very little buffing indeed. Now, you could at this point give the paint another
spritz. However, to get back to this state may take a further 6 to 8 minutes.
In other words, each spritz will elongate the bulling period. Still no extra wax
is required.
It's your choice, if you have the patience, then go ahead with the 2nd spritz.
Either way, buff off the paint once you get to that shiny state where if you
continue, the surface will be too dry. It's difficult to describe, but you'll
recognise it soon enough. The buffing will reveal a slickness that will probably
surprise you, especially with a carnauba wax.
You might think, why would a guy with gammy hands advocate such an
involved way of applying wax? Well, what you will have done, with just one
dab at the wax and just one very easy buff-off, will be the equivalent of
applying several layers of wax. As long as you work it properly, getting it to
the stage I've described, always working as gently as you like, there'll not be
any satisfaction like it - guaranteed!
Often, especially with modern waxes, you need to allow a good enough curing
time in which to layer wax. There's actually a real risk of the solvents just
removing the first layer. Either that, or you get to a point where buffing is
almost impossible because the layer is too thick and too soft. Using this
method obviates all of that.
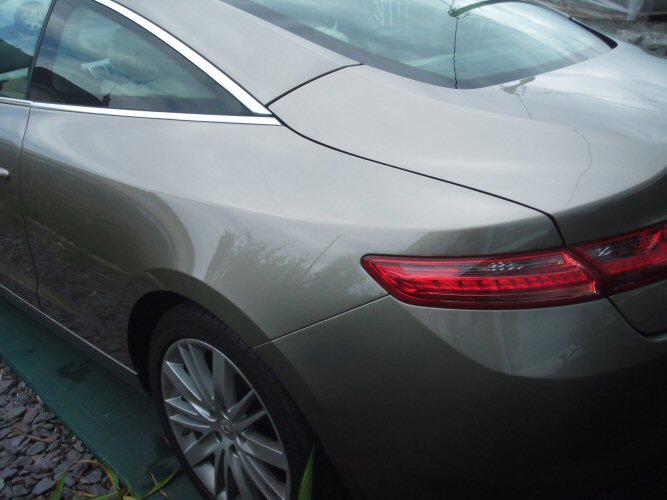
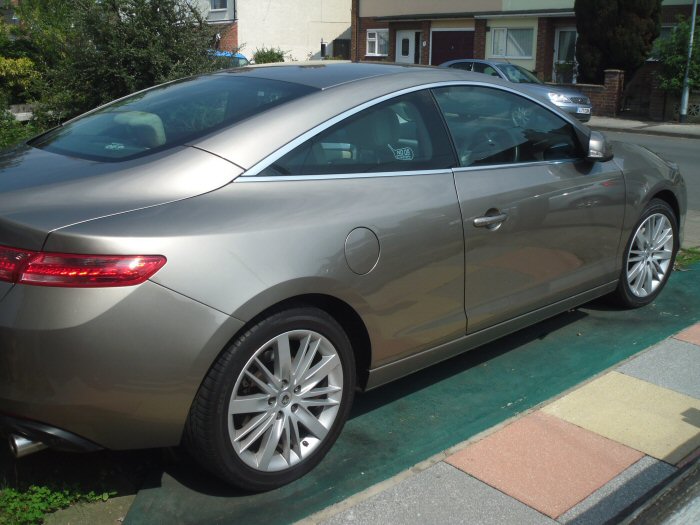
The finish you get will make it look like you've used a special wax, rather than
a plain and cheap carnauba, like the Harlys is. It's probable that the slicker
surface will repel dirt better and be very much easier to clean - I'll report
back on this. All in all, I'm thrilled with how this experiment has gone thus far.
With little or no sunshine, the photo quality doesn't do the process justice.
I have a feeling it'll look much better by tomorrow anyway.
How Many Layers Does This Method Produce?
The idea of "layer counting" may be a bit of a misnomer. What this method
does is interleave several fine layers of wax. So, it's actually very difficult to
count any physical layers. You could be creating many interleaf levels (small
areas that set under the water) after just the first spritz.
The process will also do a bit of light filling, so if, like me, you have some fine
swirls, they'll either be diminished or disappear.
One thing I've omitted. If it seems that you're not likely to reach that almost
set point, (it feels like the process may have stopped) it maybe because you
have too much liquid absorbed into the pad. Just a gentle squeeze will be all
that's needed.
Certainly avoid appyling any pressure, the layers are doing their bonding
thing while the pad is elsewhere, so don't undo your work by pressing too
hard. Repetition of the spritzing process, will be beneficial, though a deal of
patience is very much a necessity too.
What Do You Mean by "Interleave"?
OK, now this might be a bit long-winded - but I'll give it a go. It would probably
be much easier with diagrams, but in the absence...
So, let's start with a visualised area, half of a bonnet side or a quarter of a
roof. You start with circular motions from top left to top right and step down
to work back to the left and across again until the whole area is covered.
Now you go straight up, and back down, in straight lines like a mowing action,
then across and back.
Once you've covered the whole area and you haven't missed anywhere, at
any one point there will be wax bonding taking place. As you come to pass
over it after the first spritz, the water will prevent the immediate bonding of
new layers with those existing, simply carrying the wax in suspension over it.
However, at no point is this process even. You don't have any control over
the amount of water between the wax layers, so some of the original layer
could indeed be temporarily compromised, only to be filled with new wax.
Another factor in this is the wildly varying amount of pressure that you are
bound to apply. In some areas you are bound to squeeze out the water,
but this could be over set wax anyway. A second layer will be applied.
Over the area as a whole, bearing in mind that you could be working it for
anything up to 10 minutes means that you'll have countless and very
random overlaps between the layers. In my minds eye, interleaving is
probably the closest description I could get to what's on the paint. I hope
that makes sense.
A Very Satisfying Finish
I've just been out to the car, the cloudiness is being a pain. What I'm seeing
is a surface very much akin to that of a wax twice the price, i.e. the CG 50/50
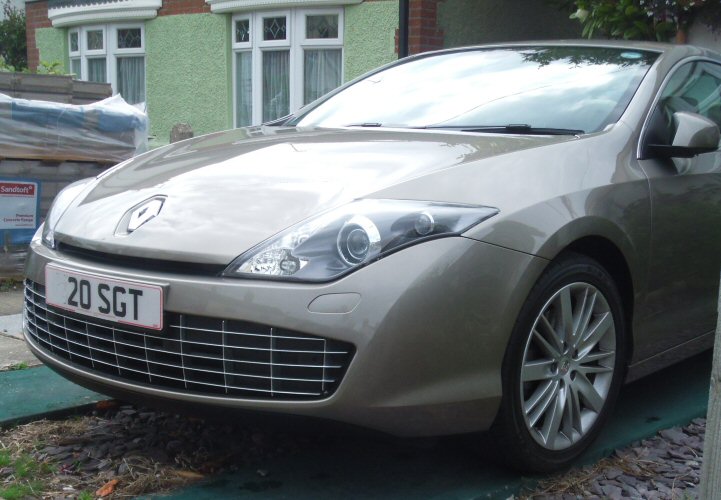
Please ignore the dirty wheels, may tackle them later today...
Conclusions
Quite apart from the therapeutic nature of this exercise, from my point of view
I'm doing this for both looks and protection. The idea being to get the surface
as hydrophobic as I can get it, _and_ still have a "warm" finish. I'm not a fan
of the cold hard look, especially as the flake pop on this car is silver.
As far as durability goes, to a great extent, that's academic. However, it should
make maintenance easier. The slickness of the surface tells me that instantly.
I find that layering wax is quite difficult, especially as with some waxes the
solvents may be interfering anyway. So I see this method as more of making
best use of every dab of wax and just seeking the best shine from it. Both
from the application and the results viewpoint, the process is very satisfying.
Regards,
Steve
Last edited by Lowiepete; 29-03-2016 at 04:51.
 Posting Permissions
- You may not post new threads
- You may not post replies
- You may not post attachments
- You may not edit your posts
-
Forum Rules


