From this Mr-Auto site - great service and reasonable prices.Originally Posted by gtmatt

With Season's Greetings,
Steve


From this Mr-Auto site - great service and reasonable prices.
With Season's Greetings,
Steve
Hello Folks,
The speedlines are going in for refurb at Aerocoat this week. So, there's
a decision to be made over new tyres. I have quotes for Falkens @ £200
for 4 or Yokohamas for £268. I presently have Falkens on the Laguna
Coupé and they're much better than the Bridgestone Potenzas that they
replaced.
The 5GTT will be driven to shows and stuff, so I'm thinking Falkens. It
had Yokos on there until now, but my vague recollection was that they
were possibly not as good as the hype suggested.
Has anyone here some experience of Falkens on their R5?
With Season's Greetings,
Steve

What size are you gong for? 185/60/13? If you go for the original size 195/55/13 your probably limited to uniroyal.
I would pick yokohama over falken. What about toyo r888?
 Lowiepete liked this post
I'm looking for reasons to choose one over the other. I'm quite taken by the Falkens
on my coupé...
With Season's Greetings,
Steve
Hello Folks,
Firstly, can I just thank everyone for their very supportive messages here
so far. I've now settled upon the Falken tyres.
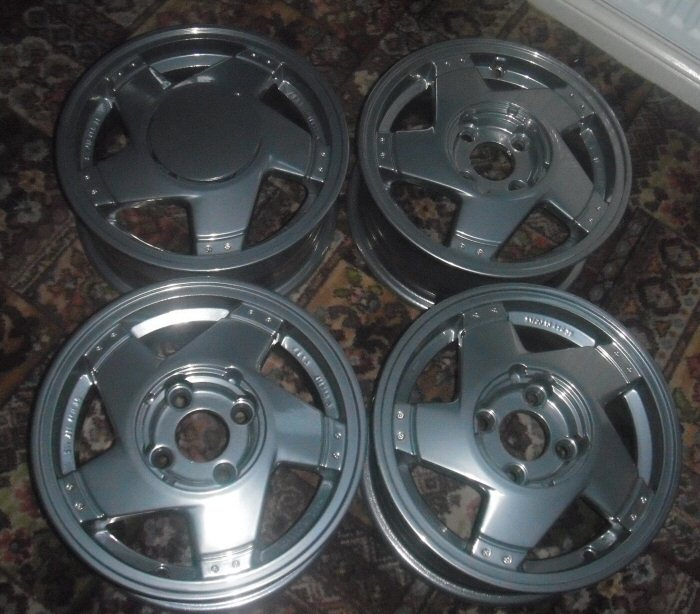
The Speedline wheels went off for refurb at Aerocoat today. The original satin
finish on the silver will make way for "titanium chrome" - more of a really bright
silver. Hopefully, they'll be back by the end of the week...
With Season's Greetings,
Steve

So what size are they?
185/60/13 80H
With Season's Greetings,
Steve
Hello Folks,
A little ahead of schedule, this part was meant to happen when I got the car
back into my garage, it has been off with the tyres and down to getting the
wheels treated. Then came the agonising decision, if they needed to go to the
powder coater's what colour should I choose? However, I'm ahead of myself.
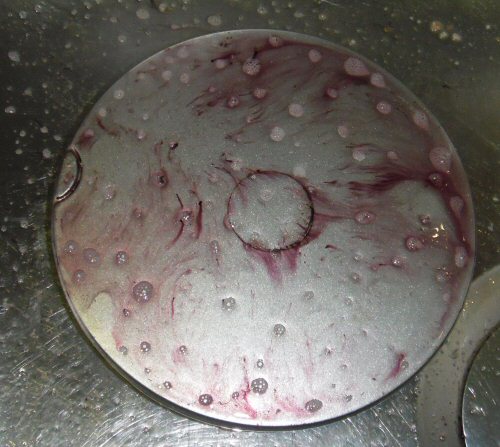
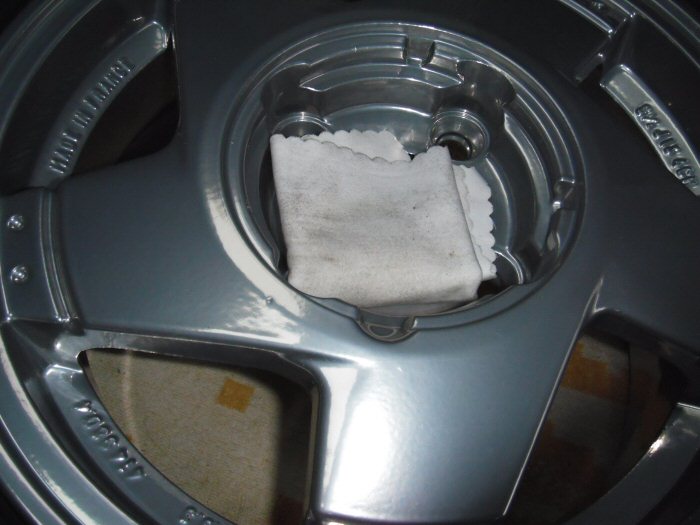
Karl brought the wheels round along with the centre caps. Here's one getting
a test bath of BH Autowheel...
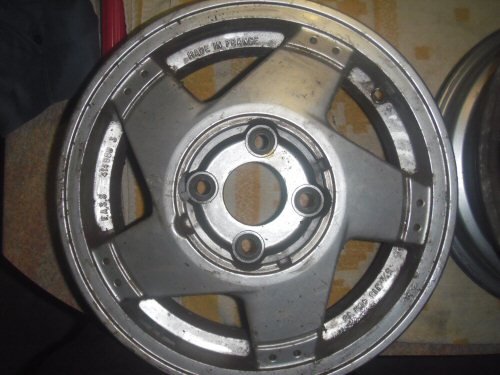
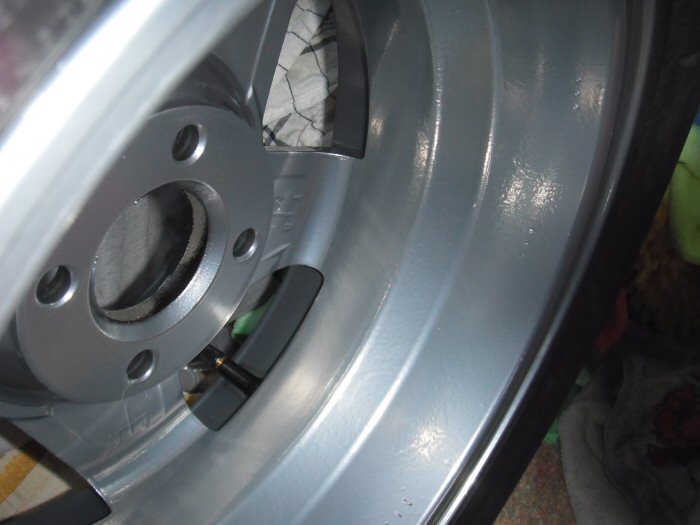
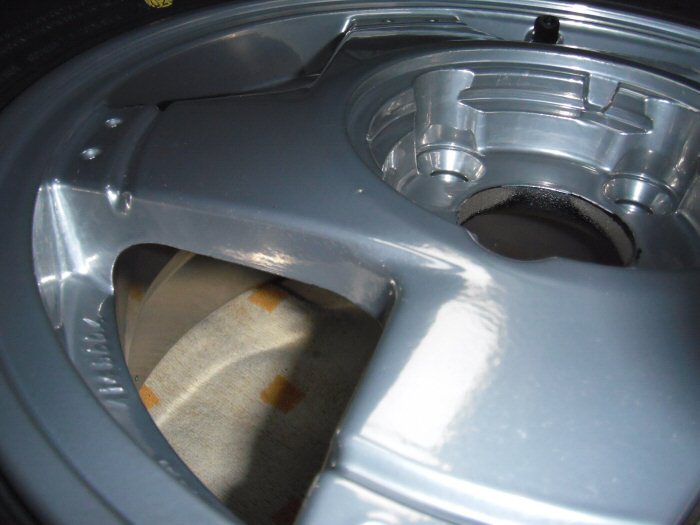
When it came to examining the wheels themselves, it came to the need for 2
of then to go for refurb. So, who gets just two wheels done? The next pics
show two of the better wheels.
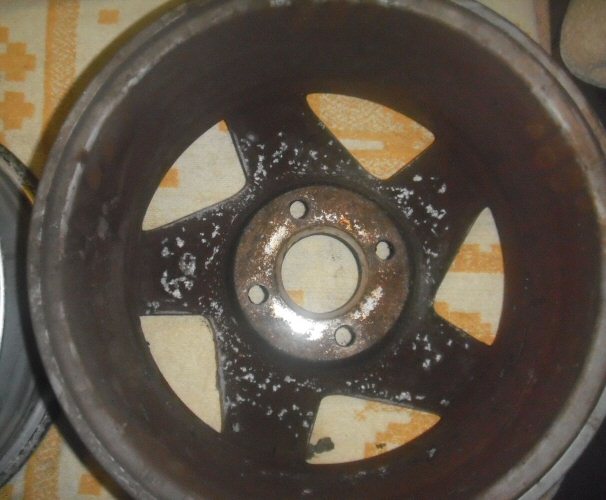
Certainly some crud to remove from inside! One thing about my coating colour
decision was that there was no way I was going to repeat the OEM semi-matt
finish.
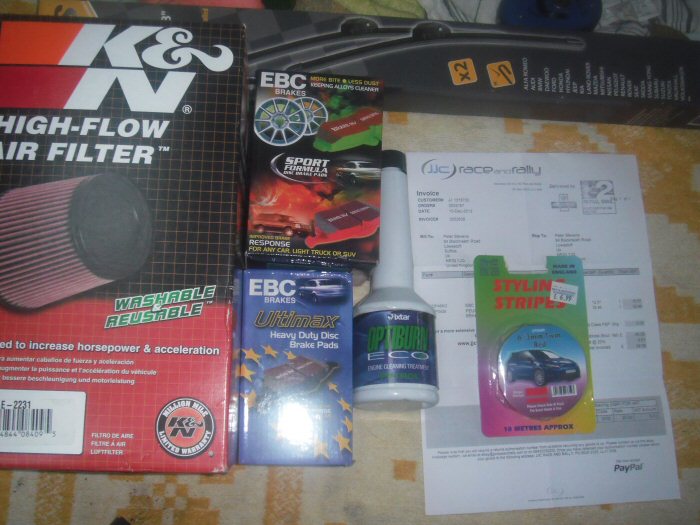
A little diversion while the wheels were away. Just a few more parts gathered
together...
Having discussed this with Karl, in the absence of getting Red Stuff pads for
both front and back because they're unavailable, we've plumped for some
Green Stuff pads for the front, and standard pads for the rear. At least there
should be a lot less dust on the front wheels
Especially as they now look like this...
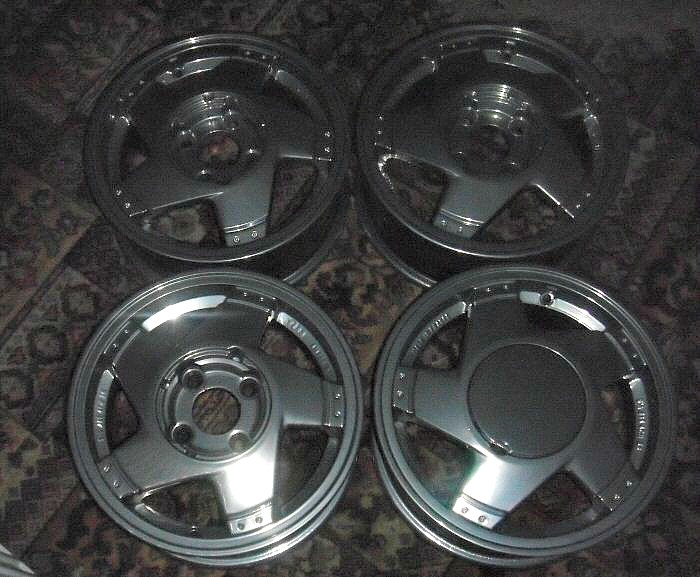
They appear to be very difficult to photograph indoors with the flash, even
though I had another go...
The finish, called Titatium Chrome, is just superb and out in the sunlight they
have just enough bling, without being overpowering. The guys at Aerocoat
in St Olaves have done me proud
The next stage is get them coated with the ADS ArtDeWheel that came in my
Octagon Formula box. I'll be posting pictures up in due course.
With Season's Greetings,
Steve

Looking great Steve with seasonal greetings. Aero-coat do a mint job, they are the one's down near the Haddiscoe bends right?
you won't be dissapointed with the EBC's fella, they have given me a much improved braking performance over standard. Even on track with yellow up front and ultimax on the rear, they never faded and kept on biting. Why Red?
Lowiepete liked this post
Hi Andy,
Yeah, just before the bridge on the left as you head toward Great Yarmouth. They did
the Shadow Chrome on the Coupé GT wheels and I get nothing but complimentary
remarks about how well they suit the car
I have Red Stuff on the Laguna Coupé, which are excellent. I changed mainly to reduce
the OE pad dusting. It was horrendous! The R5 might visit a track or two, but I have little
intention of doing any circuits at speed. My disability would probably preclude me anyway
These Speedlines are notoriously difficult to photograph, but here's another go...
and again...
I did have another two or three goes with the caps, but I've given up. Hopefully,
they'll look good once they're back on the car. Wheels now put away...
With Season's Greetings,
Steve
Wheels look great.
Greenstuff - wait! Haven't EBC Greenstuff been given the absolute thumbs down over many years on RTOC?? Isn't DS2500's the tried and trusted upgrade on standard discs!
Lowiepete liked this post
Oh, I think they have outlasted that debacle! The EBC pads on the Laguna are A1
I've discussed this topic with Karl who is doing the resto work and he's fine with them.
I don't think that I'll be putting them through the same stresses that pads encounter
on track days anyway...
With Season's Greetings,
Steve
Trev - I did this whole DS2500 / EBC thing about a year back. I went on the EBC website and had a good look around. It seems that they have changed there compounds / materials since anyone on here last used them. I have absolutely nothing but praise for them. for fast road and track days they haver never let me down or faded. I might not be using them as intensely as a hardened track beast, but imo - they are the tits. I can't compare them against the DS2500's as I've never used those pads.
Lowiepete liked this post

Good work Steve, coming on nicely - standard speedlines looking very minty fresh! more goodies for the resto too, bought a full set of EBC Green Stuff pads around 2006 I think, had the rears on for a few years and the front set are still in the box!
Seasons Greetings
Karlos
Lowiepete liked this post
I bought Red Stuff for a 5GTT (to go on the Fuego) in July for the National Day so they are still available I believe.
I hammered the living crap out of them and they held up well, I must say....enough to make me go for reds in the 172 and yellows in the 4-pots for the 21 (which is going to be >400hp).
However....they dont last long if you drive like I do. Greens in general are worn out for me in 2500-3000 miles, Reds seem to fair better and don't need changing yet after 2000 miles and a 20min session at Mallory.
Greens do NOT like track abuse. I put a new set on (172) for 2012 ND, bedded them in on the way there and then the next 500 miles after ND the brakes were not good and I binned them at 50% wear. Changed up for reds.
Summary:
Greens: Normal to medium fast road, good at all temps.
Reds: Fast road to Track for lighter cars, Not great until warm, but not dangerous when cold.
Yellows: Hard track, Heavy cars on track, good performance pad but be aware when they are cold because they're rubbish. Coming off the motorway after a blat, on to the slip road be ready to brake EARLY.
Blues: Not used.
Lowiepete liked this post
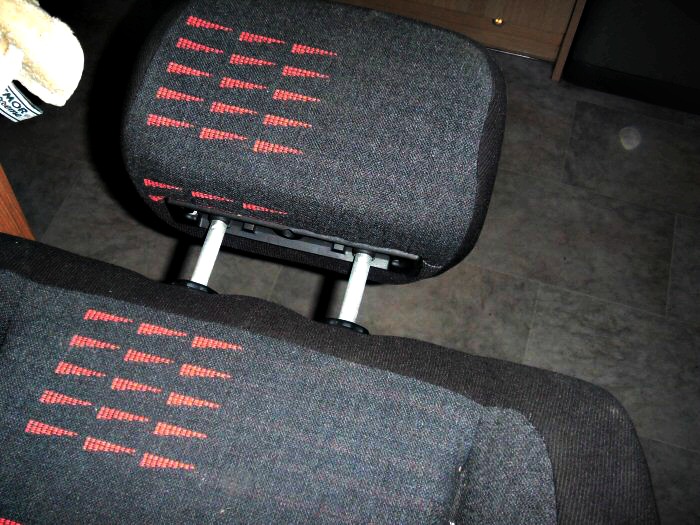
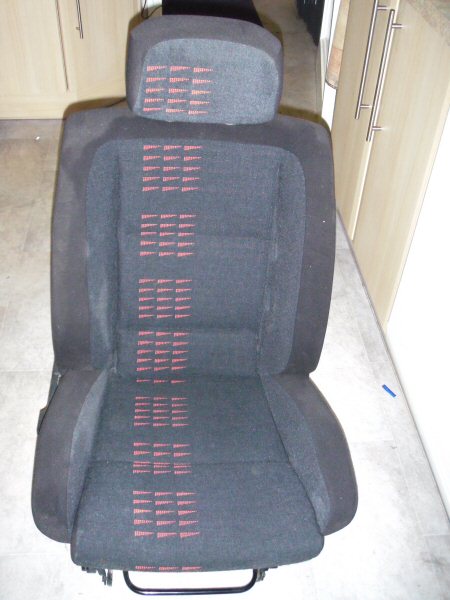
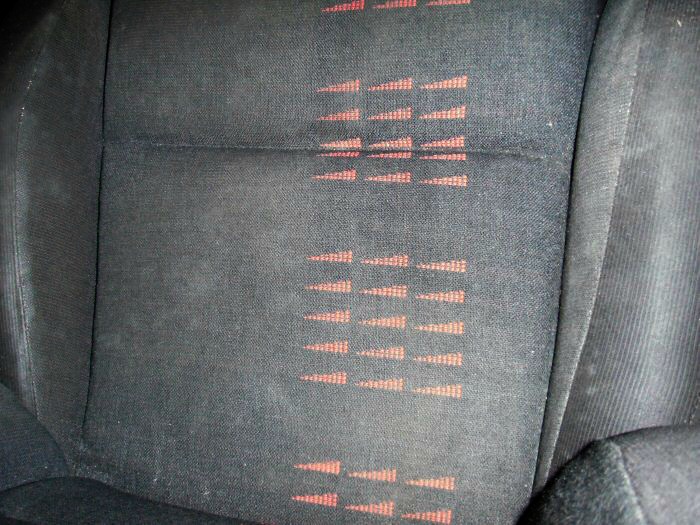
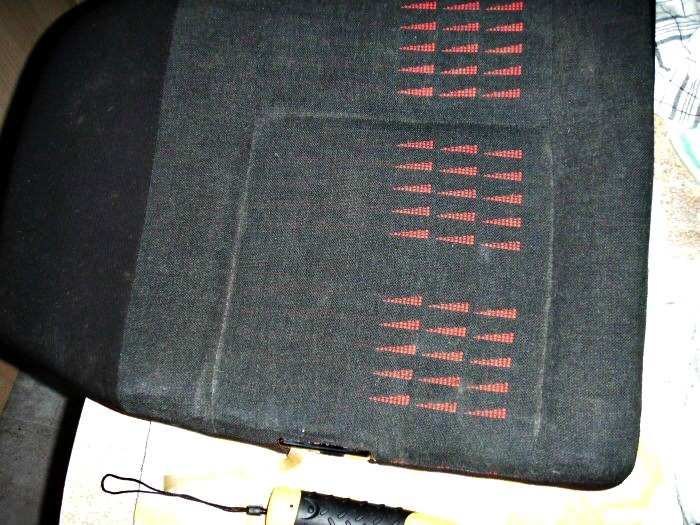
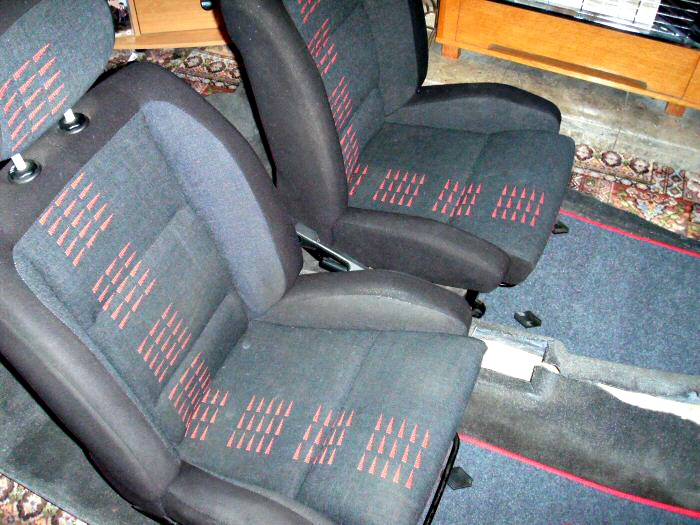
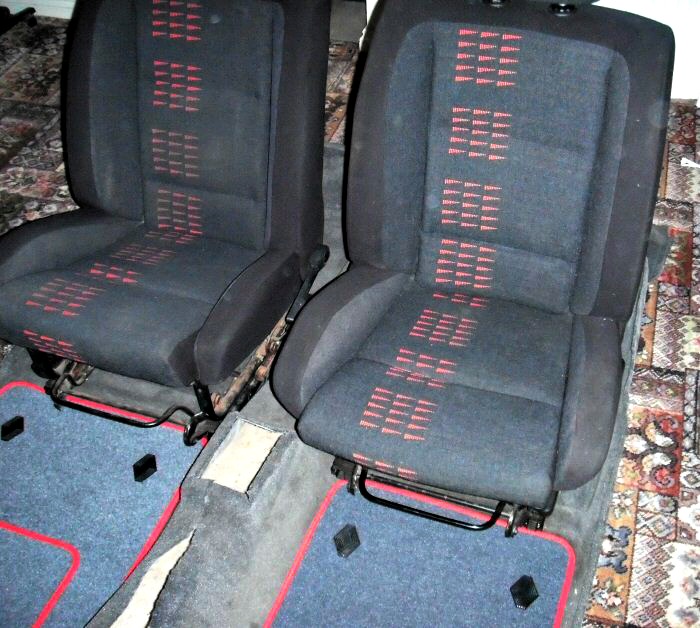
Hello Folks,
When I first had this car on the road, it could have been called "Nell's Taxi",
and she travelled on the back seat. Oh, and she didn't appreciate having to
share it with a back seat passenger, oh no!
Anyway, Karl brought the seats round yesterday and seeing them out of the
car showed that they were going to take a little more than a wipe-down with
a damp cloth. With all the dog hair, it presented quite a cleaning challenge.
Having managed to gather a few worthwhile Nectar points over the past 8 to
10 years, I did some research, looking for a cheap steam cleaner.
I ended up buying a 1,300 watt Bush appliance, complete with all the tools,
for just £2.50 in cash - still a bargain at its 25 quid asking price. I had a look
for a review of cheap steam cleaners on here, but couldn't find one. I guess
that's my cue to write one about this little machine.
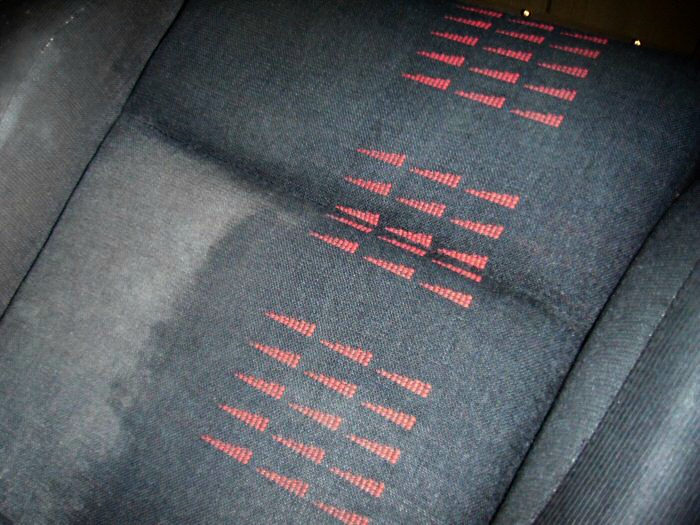
So, to the task in hand - here's some pictures to show how much of a
challenge this was going to be. No light task!
Some "during" pictures...
These pictures show just how quickly the steam cleaner was working. Hardly
more than two quick strokes, working north to south. The steamer leaves
the surface rather wet, so I went straight in with a microfibre cloth, though
this wasn't hard work!
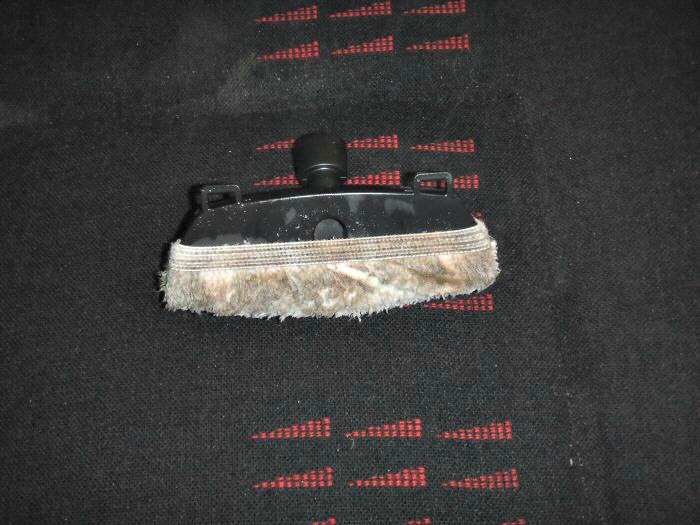
The bonnet on the steamer head was certainly picking up the grime!
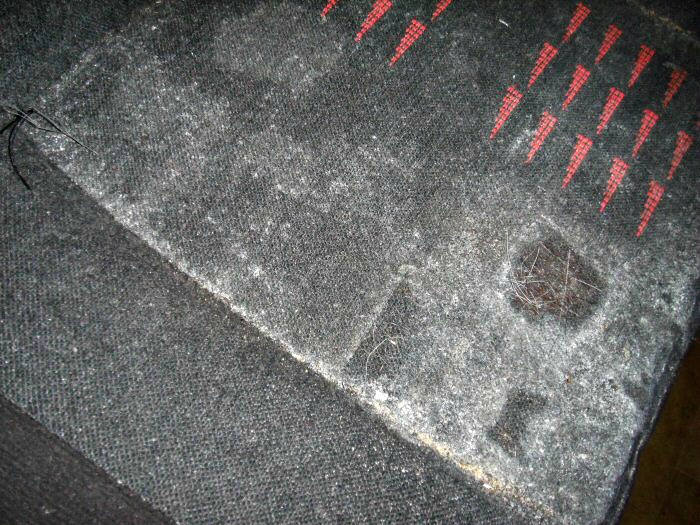
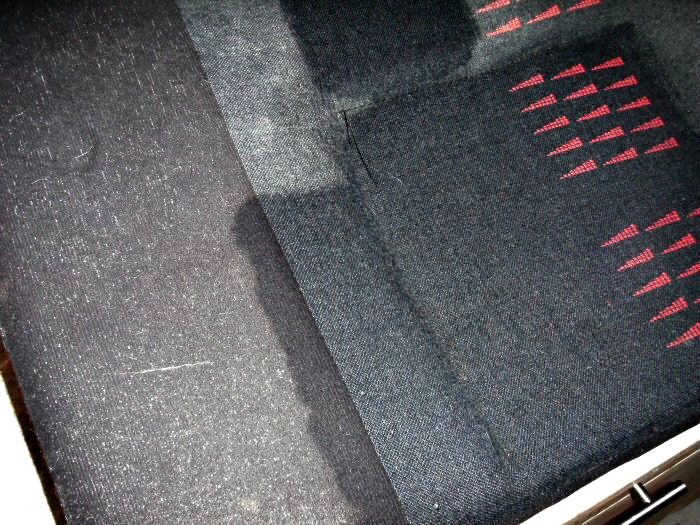
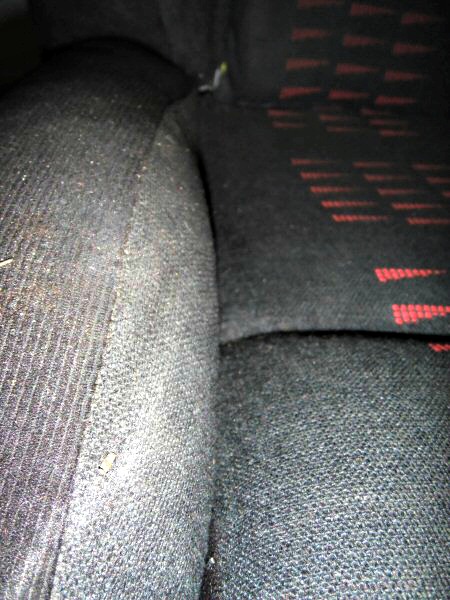
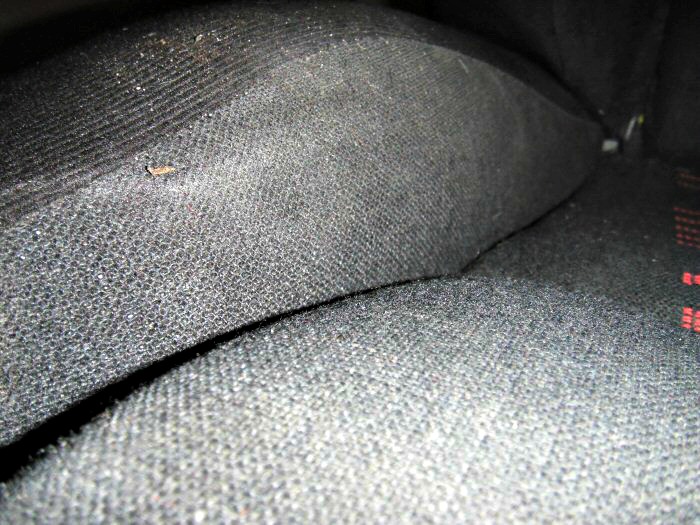
One of the worst areas was those that are normally hidden from view...
dealt with...
The flash on the camera is highlighting even the smallest flaw. The seats
were being photographed between cleaning bouts, where the fabric hasn't
fully dried. This next photo shows the bits that were difficult to reach with
the steam pad...
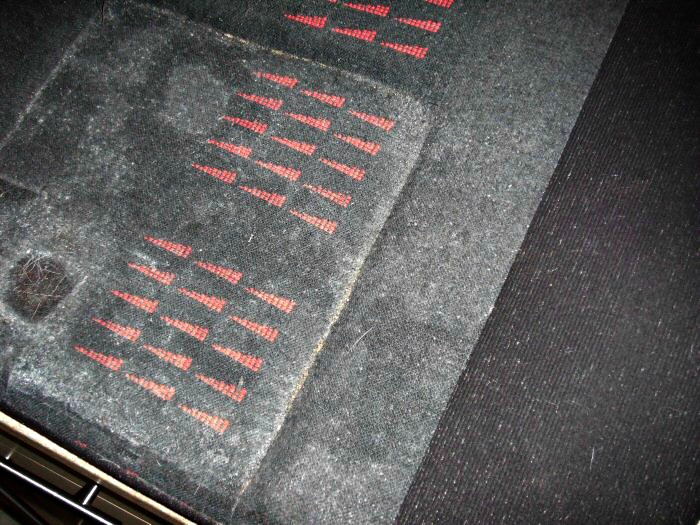
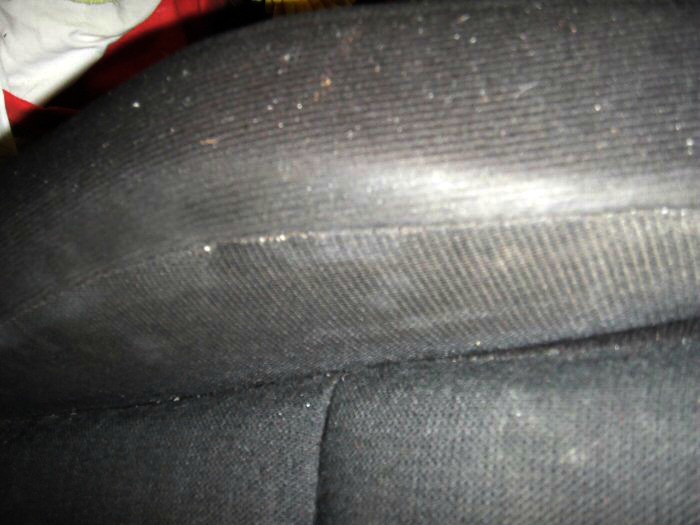
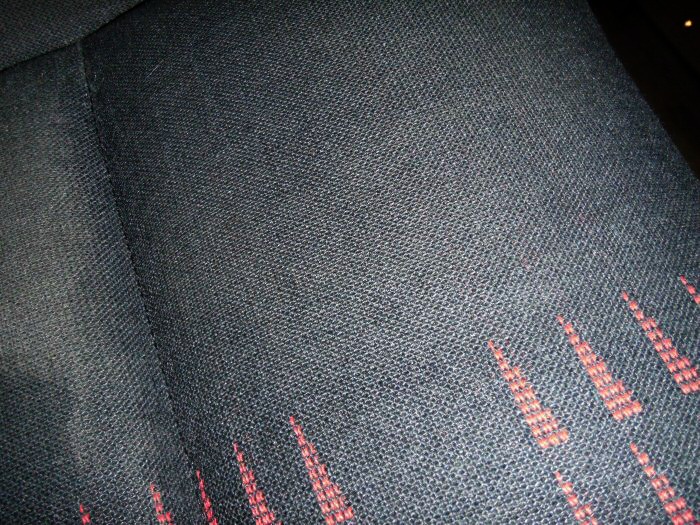
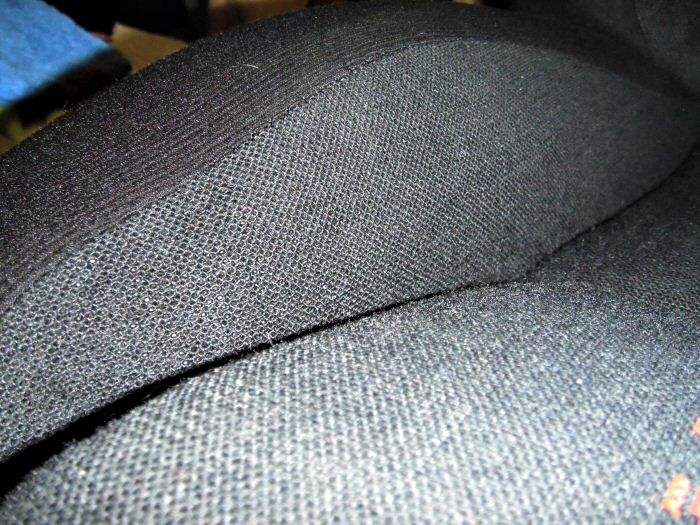
Moving on to the smaller part of the split-seat. No less minging, with a lot
more fungal evidence. It looks like my choice of using steam is the right one.
The steamer has about a teaspoonful of ONR mixed with its water, so that
has limited the possibility of a dank smell filling my kitchen...
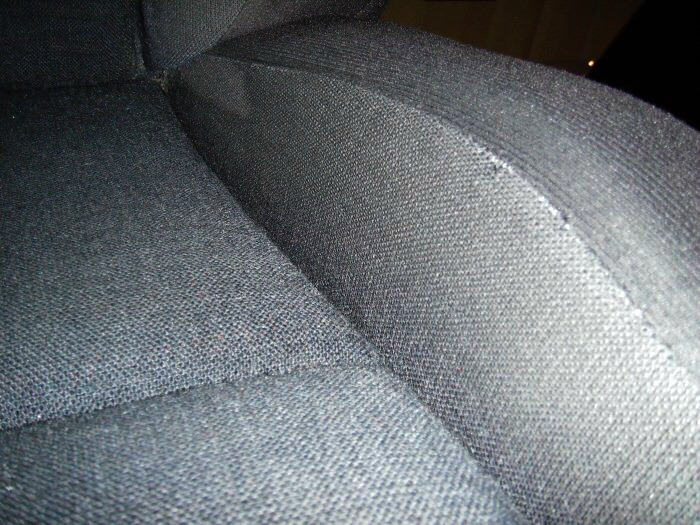
Now to the cleaning...
...and cleaned
Another hidden edge...
...and cleaned
Now the seat back, with its built-in 60/40 split, quite a job to manipulate.
...and cleaned
Well, that was a very productive hour! I had to refill the steam jug just once
and I'm very happy with the results. The seats have since fully dried and
they look really tidy. I'll be giving them a good hoovering to remove all traces
of fine dog hair before they go back into the car.
The tiny circles are flash reflections from the wheels... grrrrr!
With Season's Greetings,
Steve
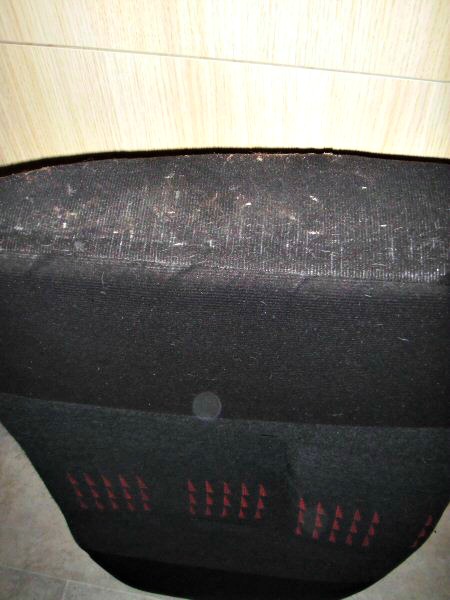
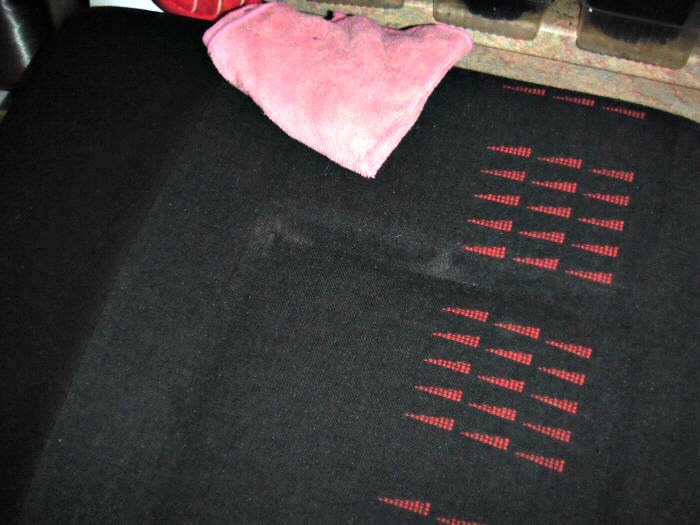
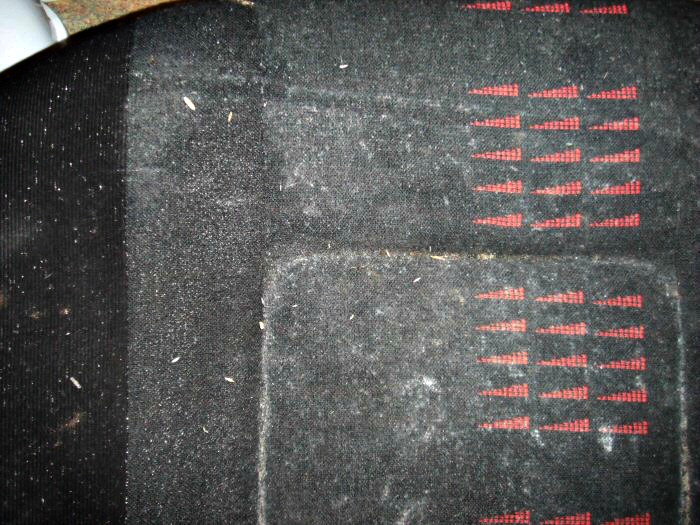
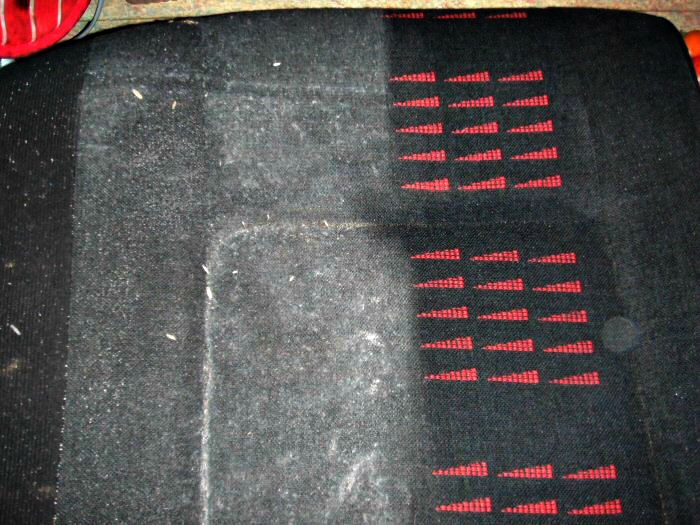
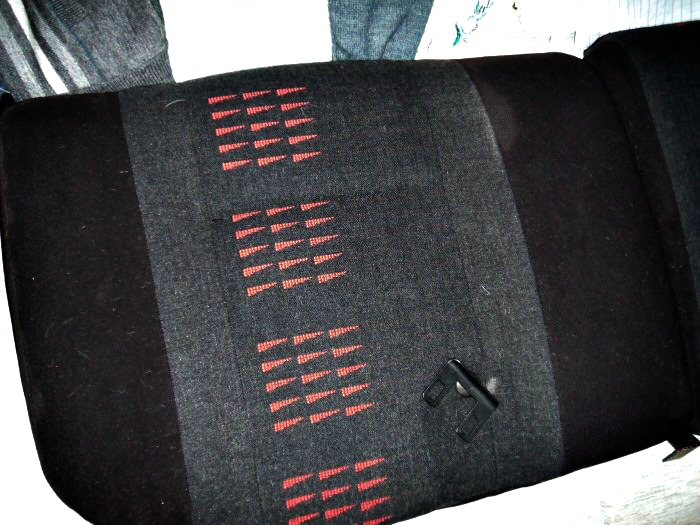
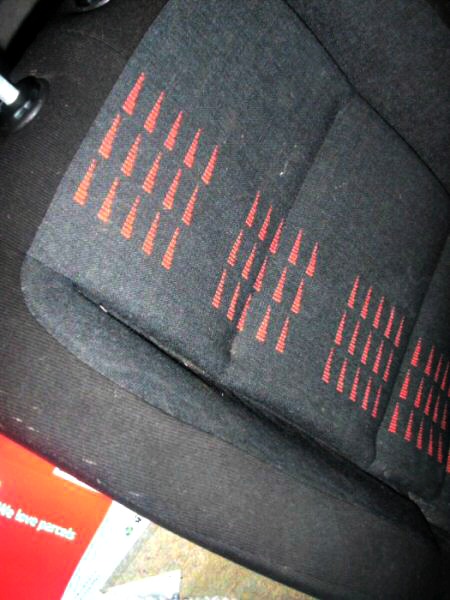
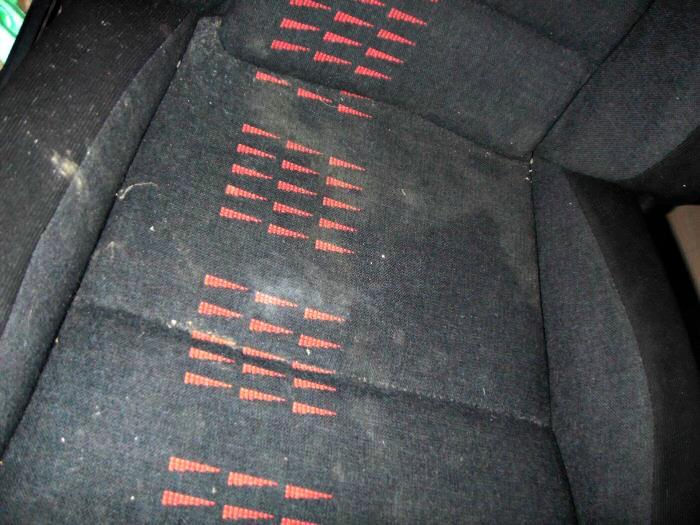
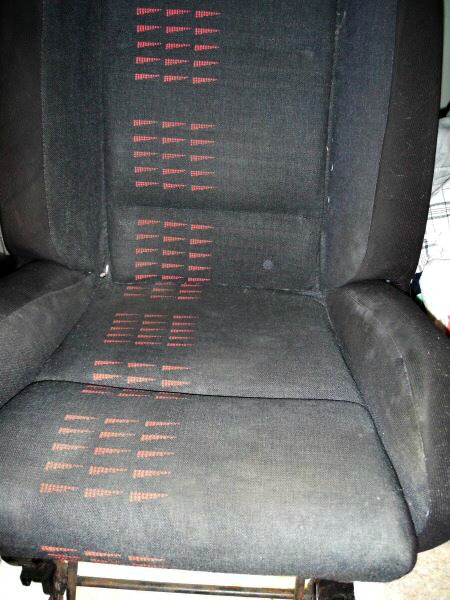
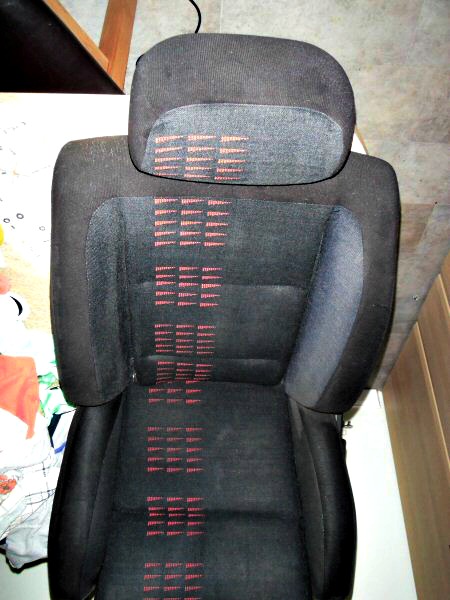
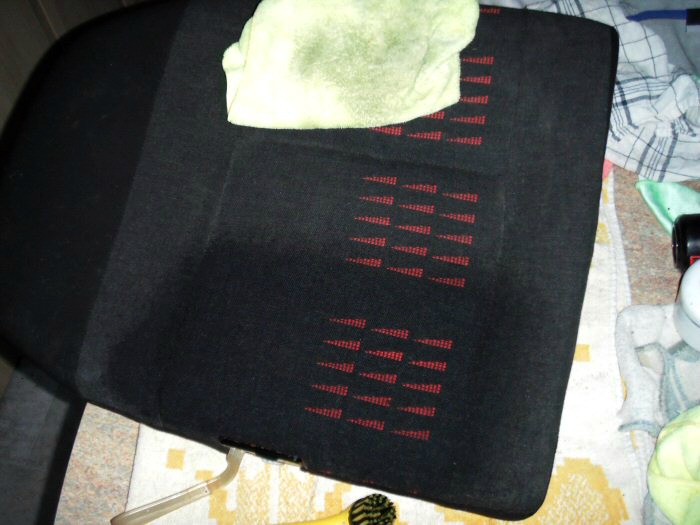
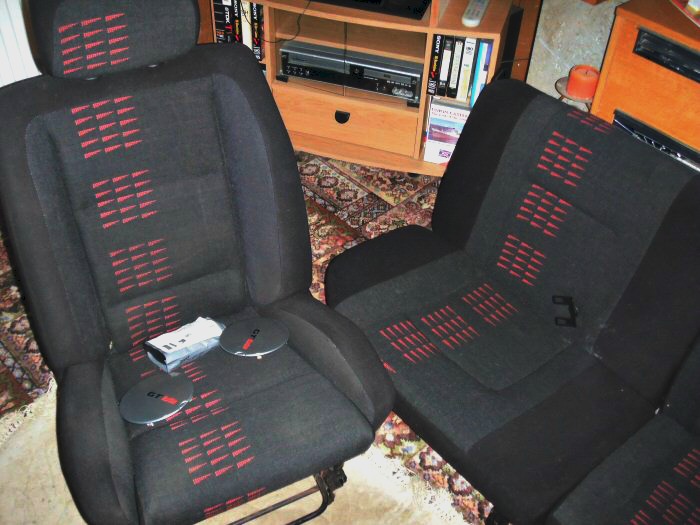
While I'm happy with the way that the back seats have cleaned up, it'll be
the front ones that will throw up the biggest challenge, especially the driver's
seat! However, let's start with the passenger seat. At first sight, it doesn't
seem too bad...
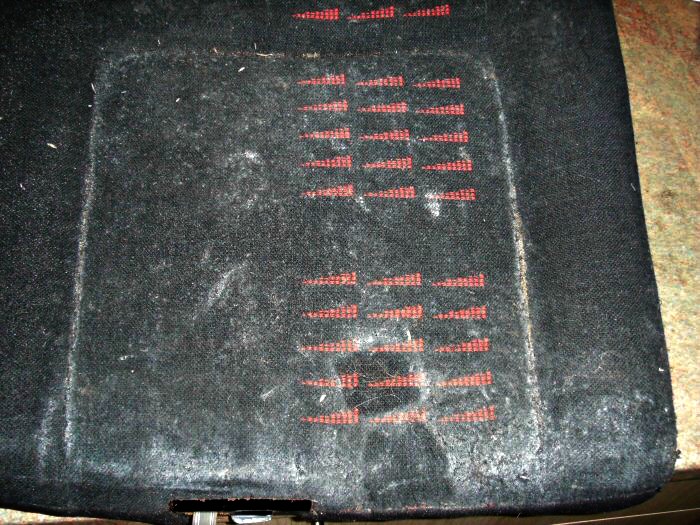
OK, so the back seems fairly clean, but the squab is going to need some
attention.
So, the cleaning begins. This picture shows one of the drawbacks of the
steamer. To get into those vertical crannies, it's going to be necessary to
turn the seat on its side. Giving a good blast of steam is going to help deal
with any nasties in the crevices.
Seat completed. The steamer doesn't leave an even pattern of dampness
across the surface, so drying isn't even either. I was quite surprised at how
much dirt the separate microfibre towel was collecting as I tried absorbing as
much of the liquid as I could.
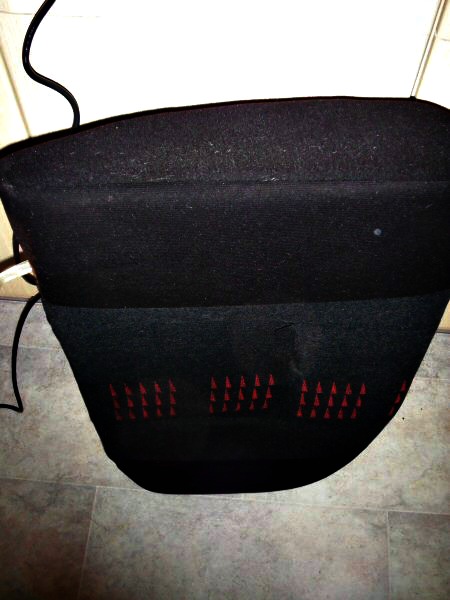
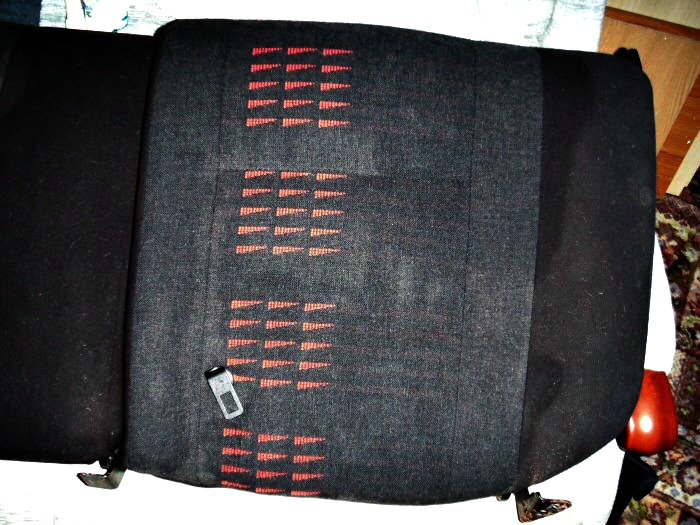
So, now we come to the driver's seat. When I first used the car, I found that
the seat wasn't properly supporting my legs below the lower thigh. I took the
car to a local upholsterers who specialised in boat outfitting. He was able to
pad out the front of the seat squab by about an inch without having to tear
or damage the fabric.
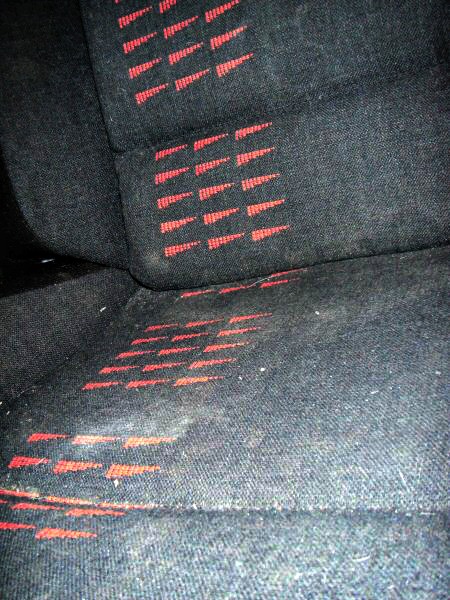
With my massive frame getting into and out of the car, the wings of the seat
squabs took a fair of stick and the "tide mark" of shininess gives this away.
I reckon that I'll be pleased if I can reduce this, I doubt very much if I'll get
rid of it altogether...
Compared to the passenger seat, this one is not in good condition, so it looks
like it will be quite a challenge!
So, down to the clean. The steamer made short work of most of the base
areas. The raised area at the front had some shiny areas, where I have used
my hands to support myself getting in and out.
All clean, as this close-up shows...
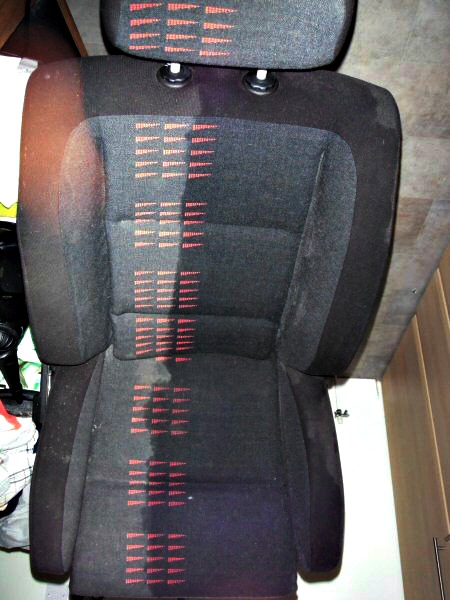
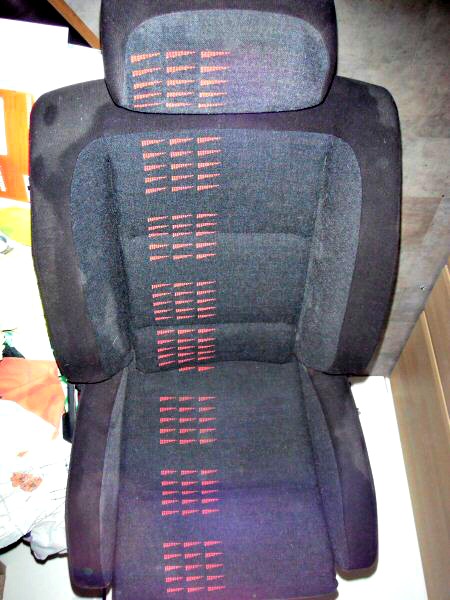
The completed seat...
Now, more close-ups of the seat wings.
Before...
After...
There is still the vestige of a tide-mark. However, I'm delighted with this
cleaning result..!
The seat squab on completion...
So, that's my first outing with a steam cleaner. I was quietly dreading the
prospect of dealing with whatever might be lurking in that fabric. However,
around 3 hours of work in total has produced results that really delight me!
One thing I don't regret is that I added half a capful of ONR to the 350 ml of
water the steamer took. I would not normally advocate doing this, in fact I
was reticent, but I didn't want my home smelling like a musty chinese laundry.
The seats, and indoors, now have that pleasant odour that comes from ONR
Wash and Shine :thumb:
I'm so pleased with the way the seats have come up, I've asked Karl to take
out the carpet, so I can give it a once-over with my floor-cleaning steamer.
Once that happens, I'll go round and take some photos of the car's floor. That
should be very revealing!
With Season's Greetings,
Steve
Hello Folks,
Now that the wheels have been beautifully refurbished, I'm intent on keeping
them looking nice. So, the first coat of protection is ADS ArtDeWheel and it
needs a bit of preparation, not just for the surface, but for the operator too!
There are two vital pieces of kit to don before you open the bottle. Oh, and
it's _not_ a good idea to sniff it to check for perfume! Some protective gloves
and a face mask are basic PPE requirements. This is especially important if,
like me, you're working indoors.
Working with these things makes this not the most pleasant of tasks. What
makes it even more difficult is that you can barely see the coating on the
already very reflective silver. However, I'm ahead of myself, as usual.
The most vital aspect is that the surface is spotlessly clean! So, a proper
wipe over with the ArtDeParadise panel wipe ensured this. In common with
all the ADS products, less is definitely more, so while it took several drops
to prime the pad for the first wheel, it took no more than 6 to 8 drops more
when replenishing.
Out of the 20ml bottle, I ended up using just half. Yes, all four wheels coated
inside and out by just 10ml of product! Again, just as with the other coatings,
you can get in there almost straight away with the buffing cloth. The sudden
feeling of slickness is noticable.
Once you have finished, and put your disposable gloves and mask in the bin,
make a point to _go and wash your hands_!
As I write this, in another room, the wheels are drying. This will need a couple
of hours minimum. I'll probably follow this coating up with some ADS Obsidian
wax, as a belt and braces approach to the protection. That will be the
sacrificial layer.
The seats have now dried and it's probable that I'll have a second go with
the steamer on the 40% size seat squab. Otherwise, I'm thrilled with the way
that they have cleaned up :thumb:
With Season's Greetings,
Steve
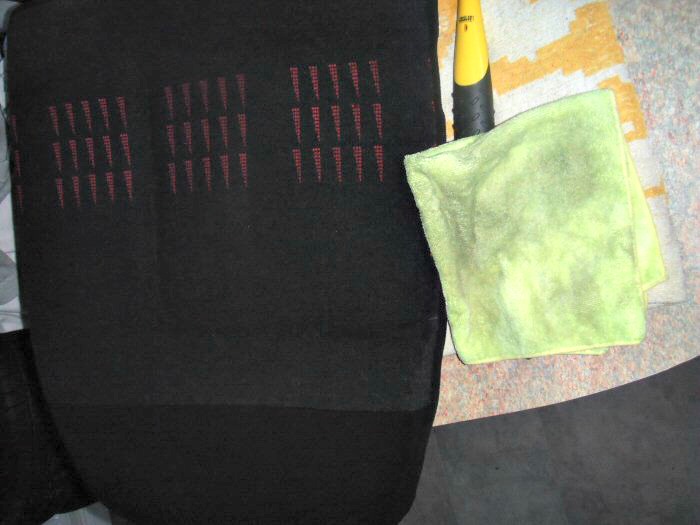
...and Enter the Sonic Brush!
Although the steamer has done some excellent cleaning work, it looks like my
gammy hands have let me down a bit. This was particularly noticeable on the
squab of the smaller rear seat, as seen in these two pictures...
A friend of mine came round today to look at the progress, and I was able to
tap into his better knowledge of modern cleaning methods for cloth and
alcantra seats. Professionally, he'd be using G101, but in the absence of that
we tried some Flash All Purpose Cleaner, diluted at about 20:1 from a spray
bottle.
Initially, we just sprayed a little on and gave it a good scrub with a high
denier weave microfibre cloth. His biggest tip was to use short strokes in
just one direction, with a slight hand rotation, so that he used as many
clean fibres as he could. Sadly, his application force was one that I don't
have the strength to replicate
So, To A New Tool
Last weekend, Aldi offered a sonic brush set for a tenner, and I saw this as
an ideal tool for cleaning things like the outside of the carburettor and other
aluminium based parts. However, the biggest of the three brushes looked like
they might suit the purpose, showed it to my mate and got a nod of approval!
So, I got the seat squab in position, gave a small section a few sprays of
APC and set to with the brush. Like the cloth, straight strokes in just one
direction was doing the business. A quick follow-up with the MF cloth and
it was amazing just how much dirt had been left!
Here's a quick 50/50, though we need to see the seat dry before pronouncing
on how clean it actually is. The dirt on the cloth was giving good indicators
of dirt removal...
...and here's the completed seat sqab
Before concluding that the steamer might not have worked as well as hoped,
we need to remember how these seats started out. Here's a quick reminder...
What pleases me about the steamer is that the heat will have killed off the
fungal spores without them being distributed far and wide. All this second
clean is really doing is helping to compensate for my lack of scrubbing ability.
Either way, the seats will come up like new by the time I've finished!
With Season's Greetings,
Steve
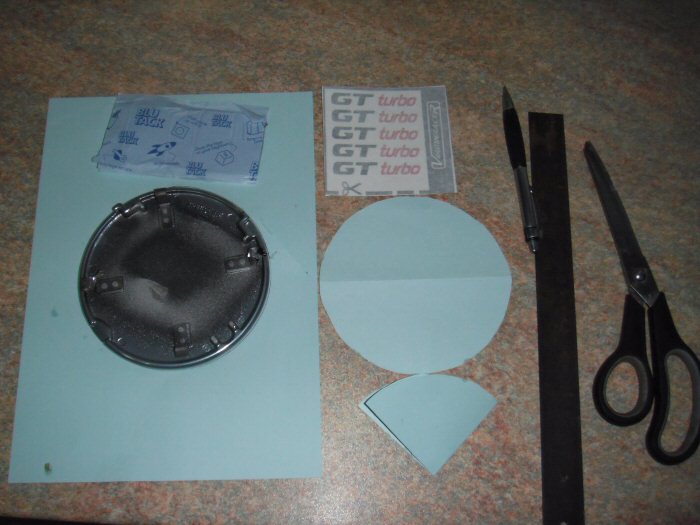
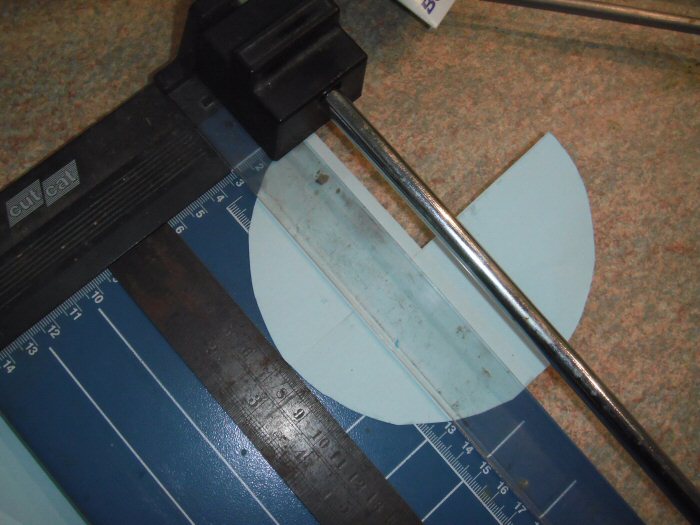
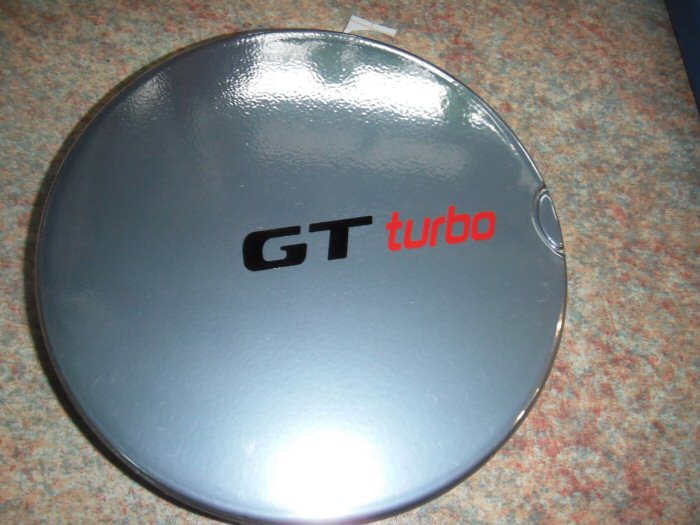
Hello Folks,
Having seen these graphics, it set an idea in motion. I was not having the
wheels refurbed in the boring original satin finish, so how about a bit of
a 21stC touch? Having secured some correctly coloured graphics, it's time to
apply them. Obviously, I wanted them all to match, so a bit of preparation
work was needed. Here's the start...
What I've done is to draw the cap outline onto two pieces of coloured paper.
The second is a spare, just in case. Fold the circle into half and ensure you
have a very sharp folded edge. This helps when you come to fold it in half
once more.
Draw a line along the entire way along one fold. Note that this is absent in
this photo! Cut out a quadrant and test out the position on the disc. Remove
and set aside.
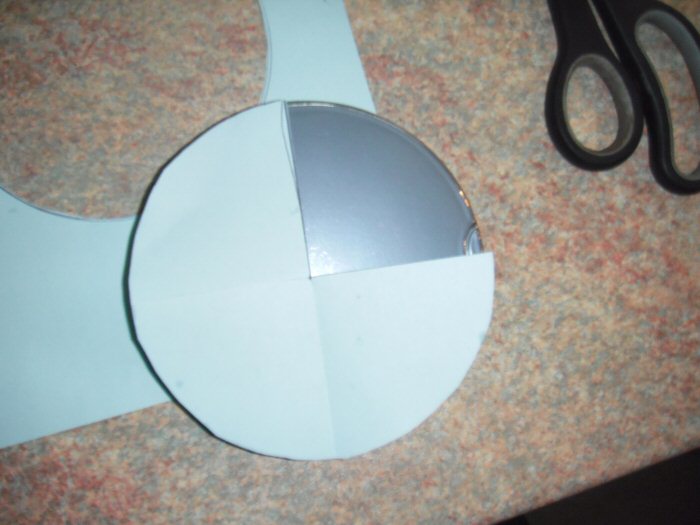
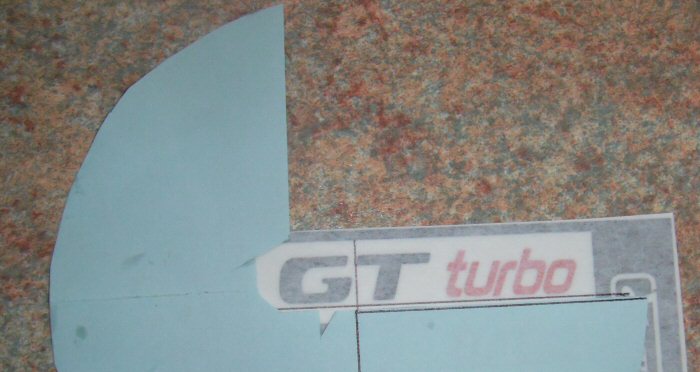
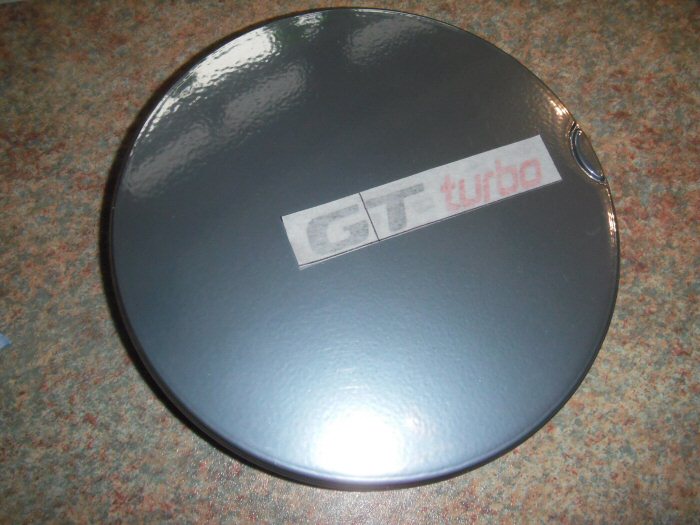
Next comes the preparation of the decals. You need to decide on your centre
line. Note that I have lined up with the T edge, rather than guess where the
middle of the two letters comes. I'm working with a chunky biro, because my
hands cannot cope with a fine pencil...
Then underline each piece leaving about one millimetre gap below the letters.
Number 2 in this sequence is too close, so will become my spare if it all goes
wrong. The vertical line will be used to match up with the centre line on the
blue template, and the horizontal will be placed over another line on the
template, which is our next stage. First, measure the exact height of the
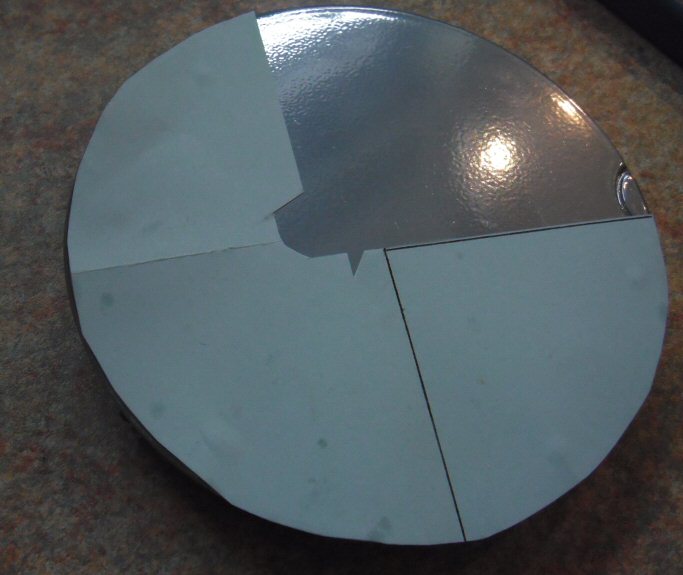
larger letters. Just 1cm.
Now carefully measure and draw a black line 6.5mm from one of the quadrant
edges. Cut away 6mm so that your black line is still visible on the template.
That will give you your base line.
Remove about 10mm from the other quadrant edge, don't overdo this or you
will lose some of your centering that the tempate provides. Then cut away
in the centre so that the lettering can be placed freely, as this mock-up
shows. On the cap, the baseline of the decal will go over the line on the
template.
Apply tiny dots of blu-tack to the template and place into position. The
height of the access curve on the cap is 2cm, so I'm placing the baseline of
the template about 4mm above the bottom of the curve.
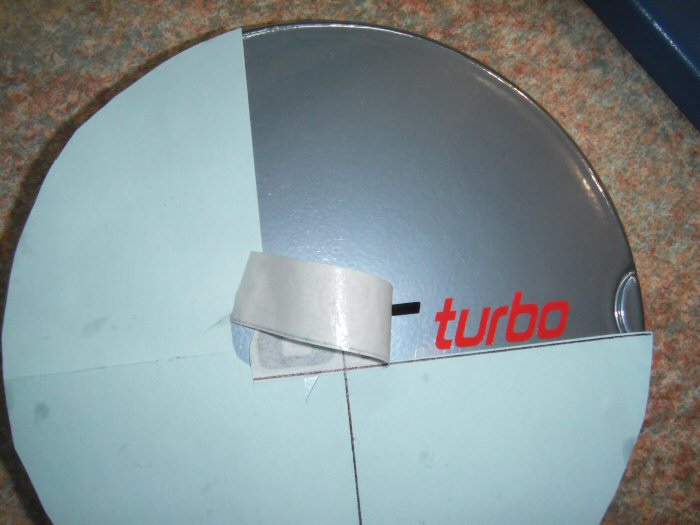
Now, it's time to remove the backing paper. The trick here is to curve the
backing paper away from the decal paper, keeping that as flat as you can.
Hold the complete decal gently twixt thumb and forefinger in the vertical,
while bending the backing paper over the forefinger as you progressively feed
the decal. Take your time here!
Now place the decal into position, so that the vertical lines match and that
the drawn line on the decal paper rests over that on the template. Once in
position, give the decal a gentle but firm press into position with a microfibre
cloth stretched over the end of your forefinger.
Now, carefully remove the decal covering paper. You need to keep the lifted
edge at an open angle of greater than 140 degrees if you can. Once you
have peeled back, remove the template and gently firm the lettering with
the MF cloth.
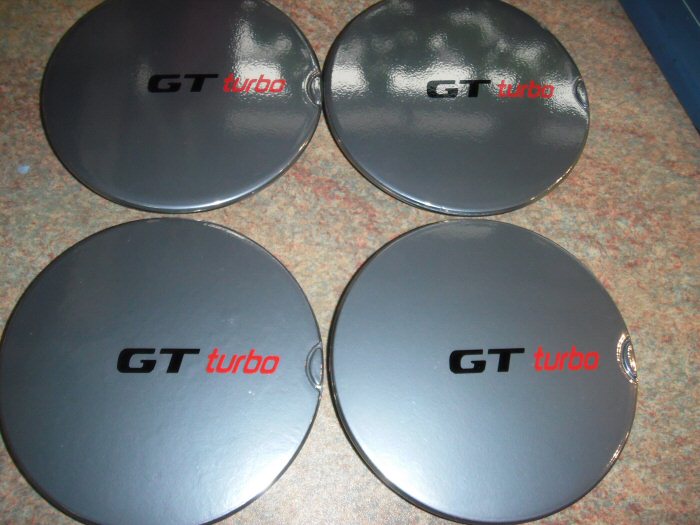
The first cap completed...
For the subsequent caps, I found it easier to remove the template first. With
the slight overlap of the backing paper, I took my time so nothing moved out
of position.
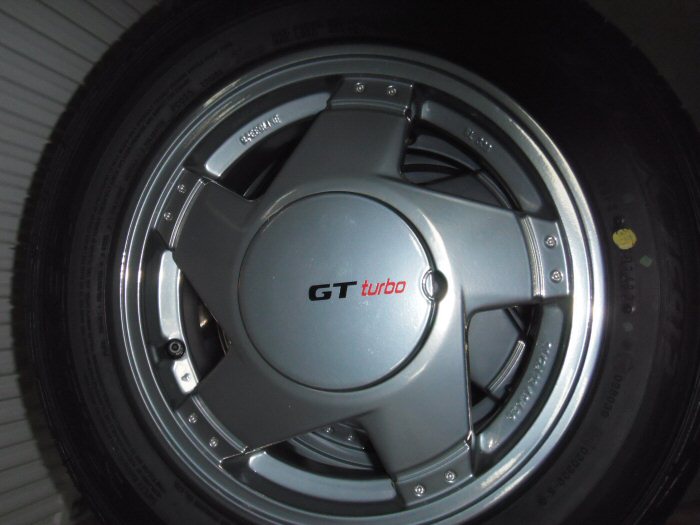
All four caps completed...
...and in position on the wheel
Considering my gammy hands, I thoroughly enjoyed myself doing this! Who
cares if it divides opinion..?
With Season's Greetings,
Steve

wow!!! thats it just wow!!!!
Lowiepete liked this post

Nice work as per Pete ,have you link for steam cleaner
Lowiepete liked this post
Hi Matt,
In the absence of which, I have done a review on Detailing World
With Season's Greetings,
Steve

Great work its cleaning up nicely
Lowiepete liked this post

Nice one.ill have some seats just as bad to do eventually
Lowiepete liked this post
Great work on the seats.
Thanks to those guys who brought us all up to date with the EBC pad range, very useful guys
Lowiepete liked this post

A great bit of progress over the festive period! Good to see the seats have cleaned up well, I guess they haven't had THAT much use anyway.
I really like the the colour and finish of the Speedlines, not sure on the graphics mind. Different though
Lowiepete liked this post
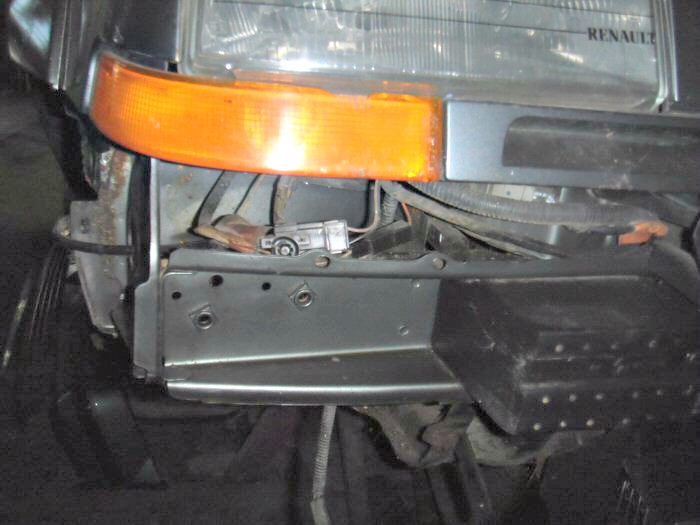
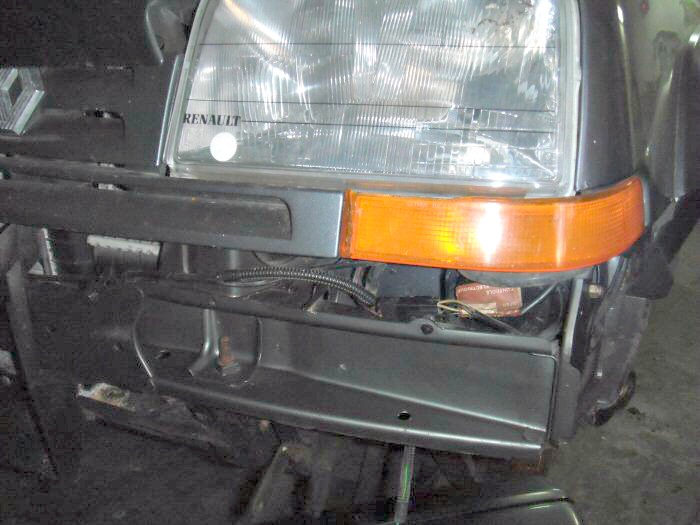
Hello Folks,
After the Xmas break, and time to think through a forthcoming stategy, I
went to talk to Karl today. There was some more progress, with the front
bumper removed to reveal this...
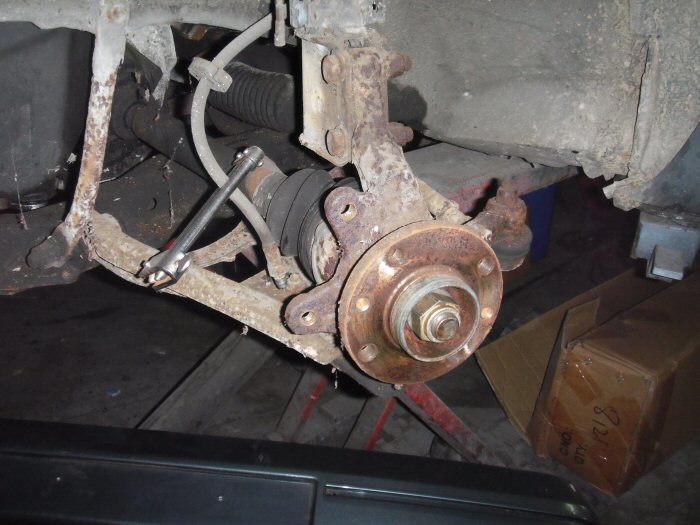
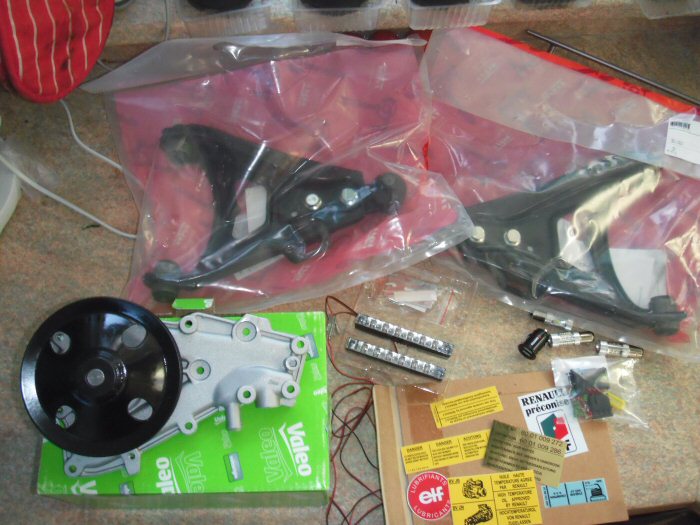
So, part of the discussions for future work involved the hub carriers which
will be powder-coated in black. I've also ordered new front bearings and wish
bones. The springs, not seen here, will be powdercoated in red.
The front sub-frame is in excellent condition, with just odd patches of surface
rust. There is no steering play. Anyway, the plan of action is to restore all the
front suspension. Then we'll concentrate on getting the engine started to
have a listen. Once done, it's engine out with surface maintenance and clutch
and gearbox inspection.
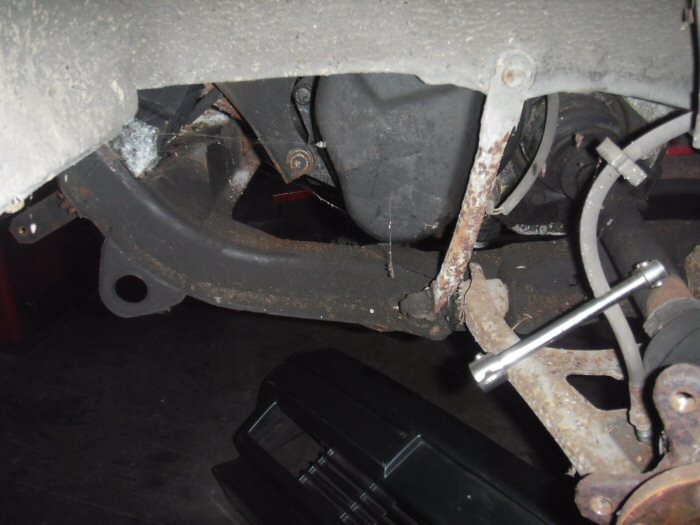
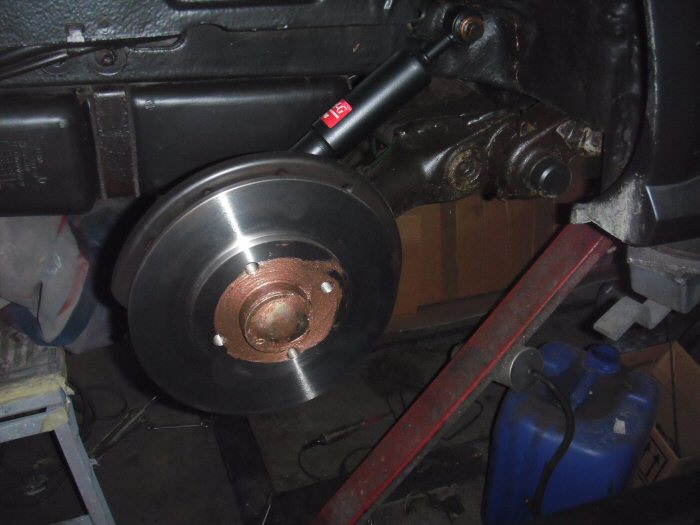
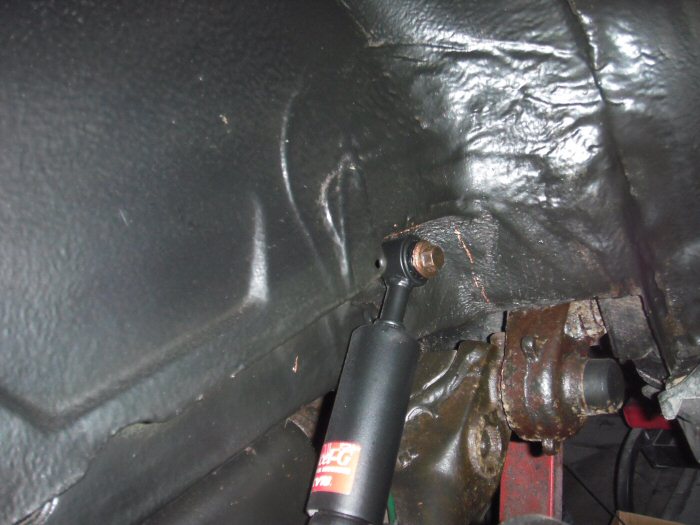
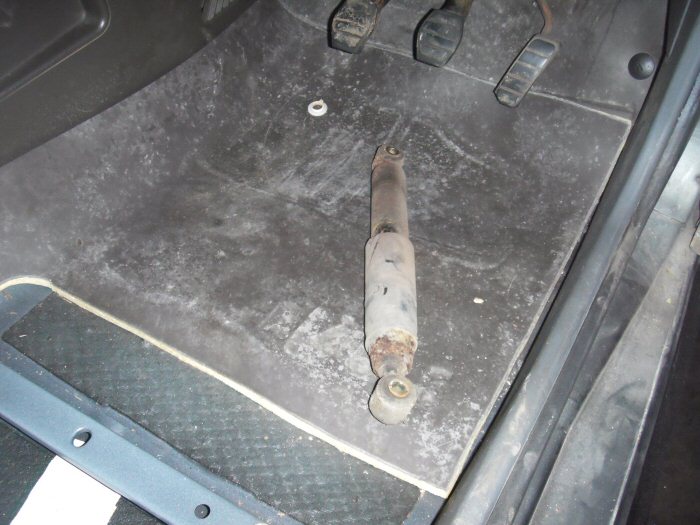
The next 3 pictures show the restored rear suspension on the driver's side,
with views under the wing...
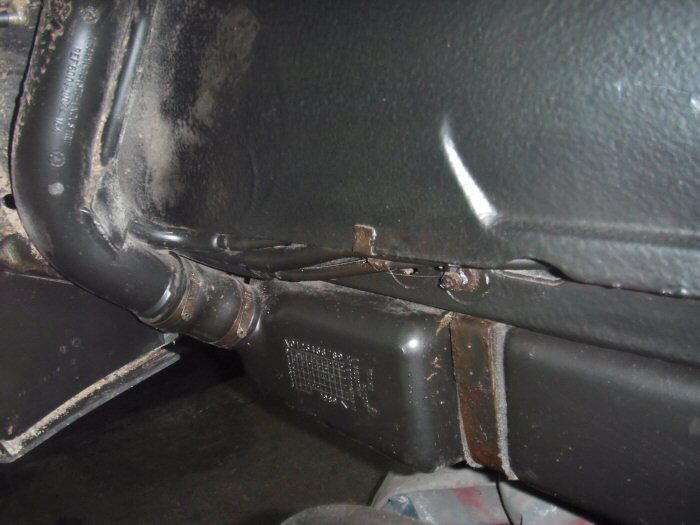
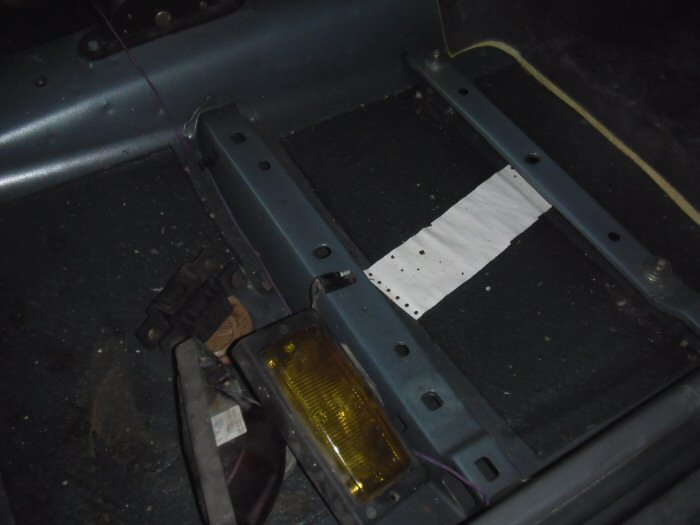
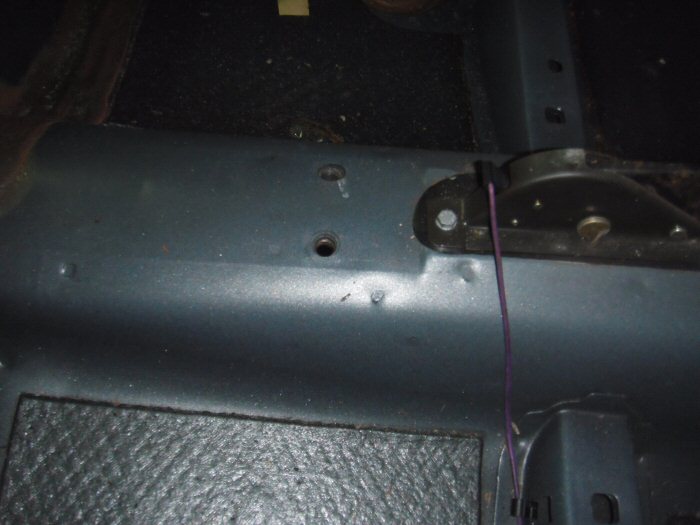
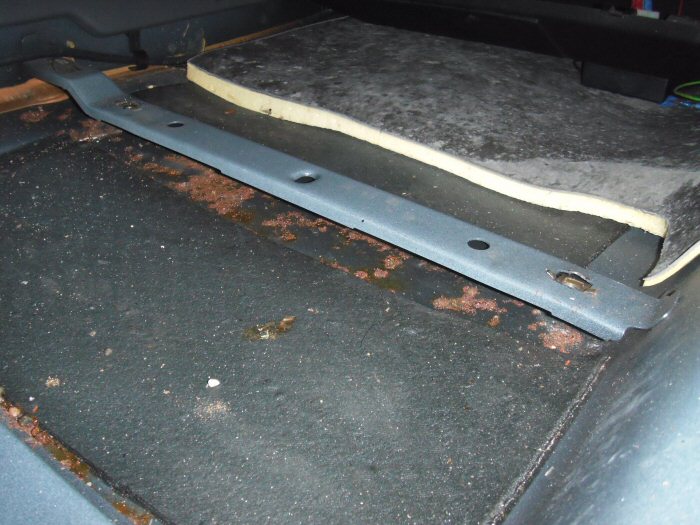
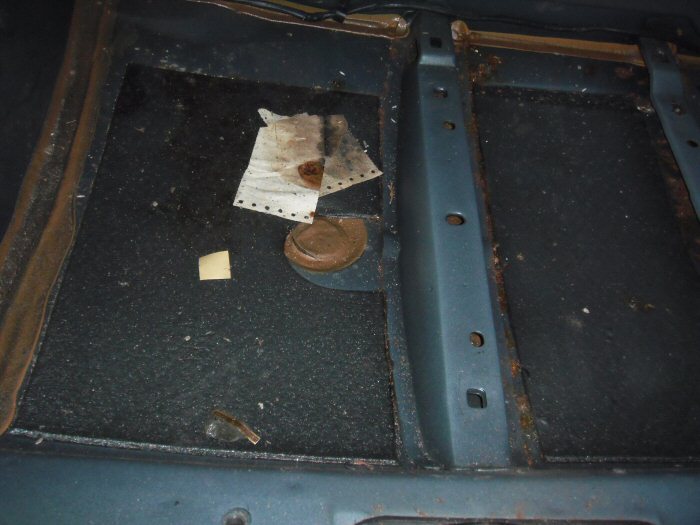
Now we come to the interior. Probably the biggest surprise of the whole resto
project. Basically, as the last three pictures show, there's only a small amount
of surface rust on the passenger side. Otherwise, it's all as sound as a bell!
On a scale of 1 to 10 of luck - guess where?
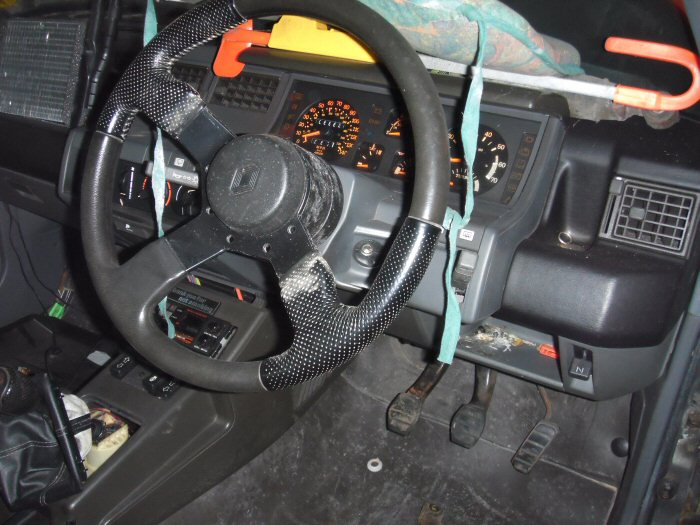
In the early pictures, the steering wheel looked like it had seen better days.
As this photo shows, that's been spared a replacement...
One other thing has been resolved. The bent driver's door is going to be
replaced with a brand new one - coming from France - the very last one?
By the time I pay a ton for second hand one, 60 quid plus for van hire and
80 quid or more in fuel, it works out at the same price.
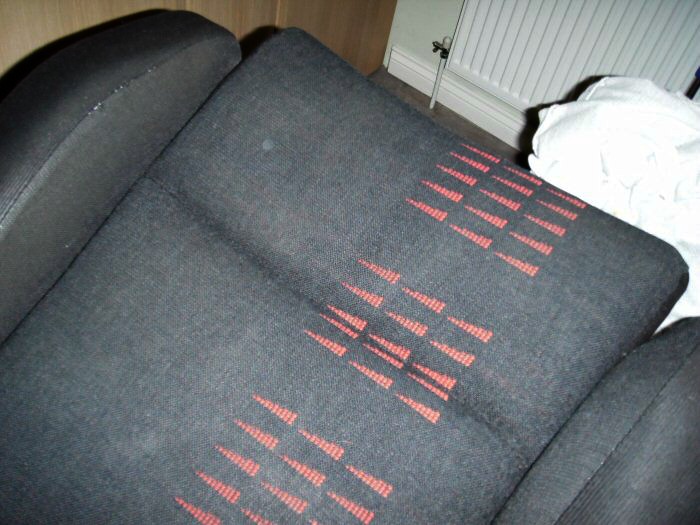
Also arrived are new floor mats, matching the carpet grey, with red banding.
Tia has also had a new travel pod ordered so she can travel in similar style
to that to which she has become accustomed in the Coupé. That'll also help
protect my beautifully cleaned seats.
Talking of the seats, the Scotch-Gard treatment tins arrived today and I'm
already half way through giving the seats a good coating. It looks like a wise
move because I may have dispersed the ghosting left behind by the mould.
Oh, and one last thing to report. I've managed to secure a full set of body
decals, so when we get to the point of re-spraying, the biggest onward cost
hurdle will have been jumped :thumb:
Regards,
Steve
Last edited by Lowiepete; 02-01-2014 at 22:12.
Coming along really well, the shell is certainly in good shape, even still got the renault headlight protectors on
Lowiepete liked this post
Godd progress, and a good base for Resto. Careful though the GT might get jealous!
Lowiepete liked this post
No No! The Coupé will be used as support car for the first few trips - just in case
Regards,
Steve

Loving this thread, always loads going on.
Really coming along nicely.
Lowiepete liked this post
Hello Folks,
It's getting to look a lot like... it's my birthday - all over again
More parts have arrived and a load more spending done too. The brand new
driver's door has arrived, with hinge kits and is all paid for. The brake calipers
have come back from blast-cleaning looking brand new and ready for primer.
I'm dead pleased with the wishbones purchase. It worked out that just the
two main bushes on their own would cost £24 a side, that's without the third
one that joins to the hub. Yet, for £65 I could purchase complete wishbones,
and these are the OE TRW ones to boot! Much appreciation from Karl too as
getting the old bits out requires much obscene language; allegedly...
I've also taken delivery of OE side panel graphics at slightly less than cost of
copies. This means that when the time comes, I'll be ensuring that the paint
will be getting some special attention.
I'm almost done with cleaning the carpet. Will give it another go before a final
clean with the Scotch-Gard foam. Speaking of which, the seats have now had
their SG treatment and have come up like new. All the ghosting marks from
the mould have totally disappeared
For my next pics I'll be doing a mockup of the interior with seats in position
and the new floor mats in place. I just need to source some locating buttons
for the new mats. (Anyone?) There is a single set supplied with the mats I
bought, but they don't look too sturdy, especially considering how I'm likely
to shuffle about with my unsteady gait.
I'm really getting quite cheesed-off with the flash on my camera! No matter
what I do, it either makes the seats look completely filthy when they are
really clean and sweet-smelling, or the pictures get covered in various size
reflection dots of indeterminate cause, or of course, both! Grrrrrrrrrr...
My lounge faces North so it's impossible to take photos in there without the
flash. If the weather is fine enough tomorrow, I might try again in the garden.
So, here's some pics, despite my cussin'...
Even the new mats look blue when they are very definitely grey!!
Passenger side of the carpet has yet to be finished with the steamer and
then all of it will be treated with Scotch-Gard... The 1980's style Renault
diamonds will go over the carpet locating clips.
Regards,
Steve
Last edited by Lowiepete; 07-01-2014 at 23:48.
Great job there fella.
Love the finish you done on the wheels. Very nice touch.
Lowiepete liked this post
More awesome work there Steve, and I can vouch for the seats, those pictures do not do them justice. Can't wait for the final assembly and looking forward to taking a peak if I may on Saturday.
The restored wheels are epic also - this will be one very nice example once done - not bad for a Grandad
Can't wait for the 4 day exterior detailing on this beasty
Lowiepete liked this post

Steve, you're like an obsessive 'cleaning pervert'
I honestly don't know how you have the patience for it but it certainly seems to pay off
I'm more of a 'bucket of soapy water' kind of guy which shows really.
Great work on ressurecting this car. It'll be something special when it's completed.
I may have just missed it but what size and brand tyres did you opt for in the end? And as for the stickers on the centre caps, they look great. A real nice touch I think.
Top work dude
Ross
Lowiepete liked this post
Many thanks for the generous comments guys
Hi Andy.
Yeah, that's if Karl or Jason are working on Saturday - car isn't on my premises atm.
+1 - but that probably won't be until after I take it off the road again next September.
Hi Ross,
Don't knock it - it's a combination of that and a dry, but well ventilated, garage that
means I have the car in such fantastic base condition. I've no doubt that you have some
similar patience - I reckon that's a given with these cars
Believe it or not, that's where I started too. Only thing is that I've always tended to go
for that "looked-after" look. If people didn't utter words like immaculate when I'd done,
then I'd not done the job properly. Old habits really do die hard, even when you have
disabled hands...
In its day this was a top of the range motor, so it isn't too difficult to restore it to its
former glory. At least, it defies all the nay-saying badge-snobs...
Thanks. I wish I could take a much more hands-on approach, but Karl is doing me proud!
I settled on Falkens size 185/60/13 which loses 10mm of overall tyre width, but only
about 6mm of tread from the standard tyres. I'm hoping that they'll be as good as those
I've fitted to my Coupé; I'm so glad to see the back of the Bridgestone Potenzas.
Regards,
Steve
"Steve, you're like an obsessive 'cleaning pervert' "
You're not wrong there Ross LOL, he tries to clean Fluffy when I popped over to sort an electrical problem out for him. I ran away.
Just to say - I had a quick butchers at Steve's 5 and I have got to say, this is a work of art, he's sparing no expense and it's coming along nicely.
You're a credit to the Club Steve.
Please don't park your car anywhere near mine when it's done please.
Lowiepete liked this post

Loving the dedication mate, great work
Lowiepete liked this post
Awesome awesome car.
Are the red stripes original?
Lowiepete liked this post
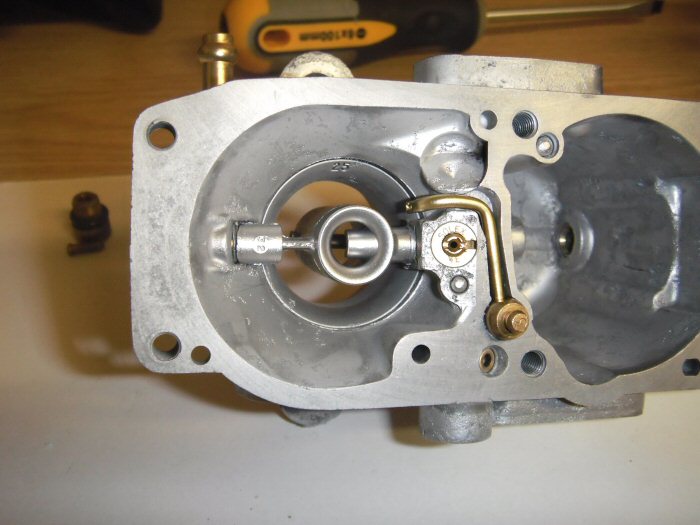
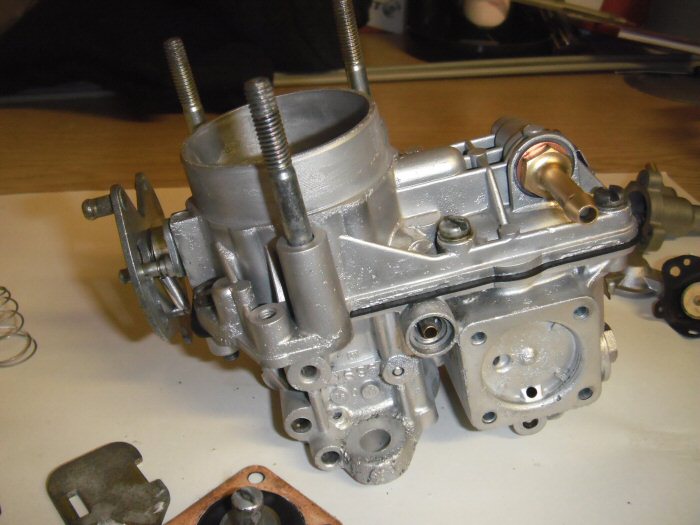
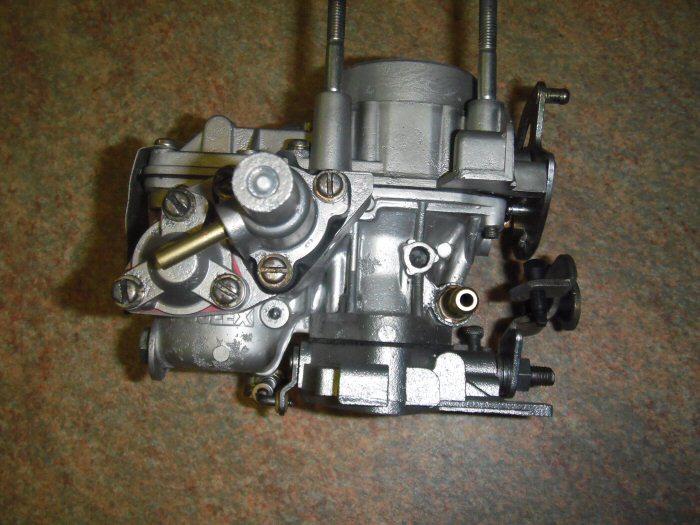
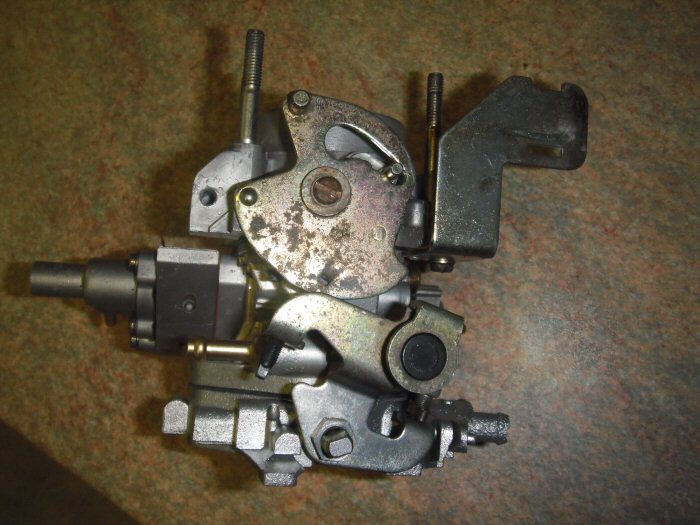
...it eventually turns out like this
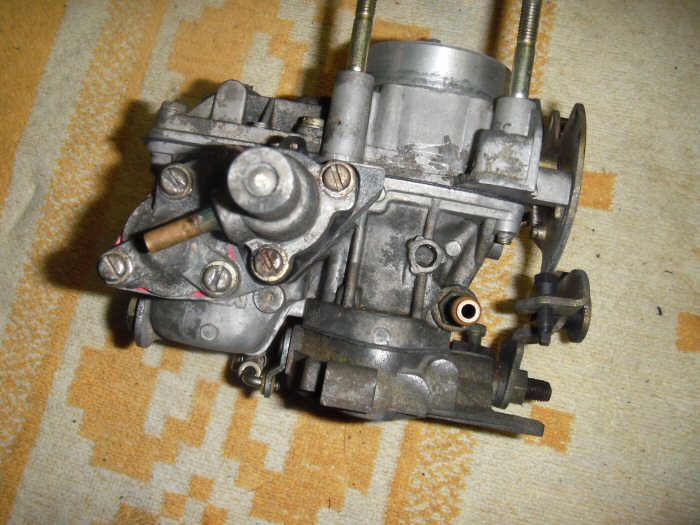
Actually, it has been a fascinating afternoon! After a few false starts, thinking
that I might need to send my carburettor away somewhere for cleaning, I
eventually landed upon Suffolk Blast Services, or better put, Darren. After an
initial enquiry when I had intimated that I'd rather like to witness the process,
an appointment was made for this afternoon.
Remember this..?
Well, that won't pass muster will it?
Having chatted to Darren, with me not really understanding the processes
involved, I had imagined that he was going to blast the outside clean first
and then take it apart for treatment in the ultrasonic machine. I did get a bit
confuzzled, but then that easily achieved by me just lately
Actually, no. We would need to completely disassemble the carb because he
needed to ensure that the water would flow freely through every tiny orifice
once he got it into the vapour blaster. Curiouser and curiouser...
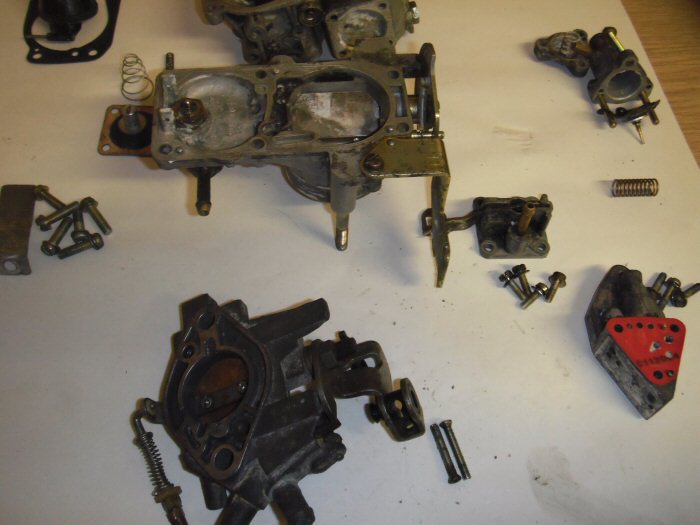
So, the dismantling began
All a tad grotty, both inside and out n'est ce pas?
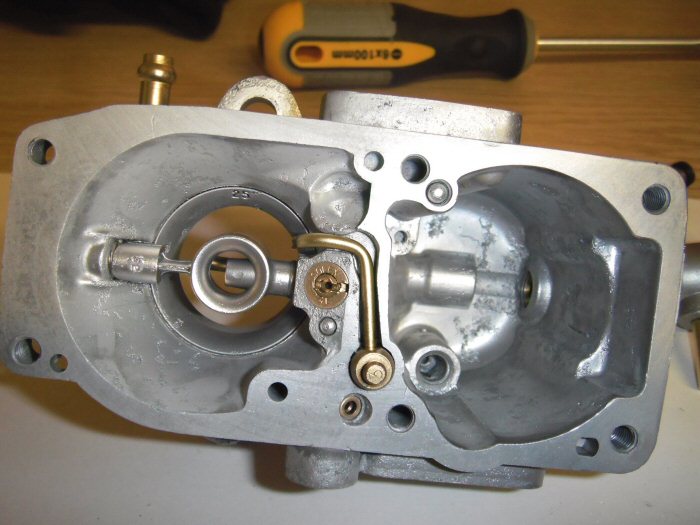
Then came something that was a complete revelation to me. Looking a like
a green robot with a glass screen, complete withwiper blade, the key machine
hove into view. I've managed to get one picture of the process...
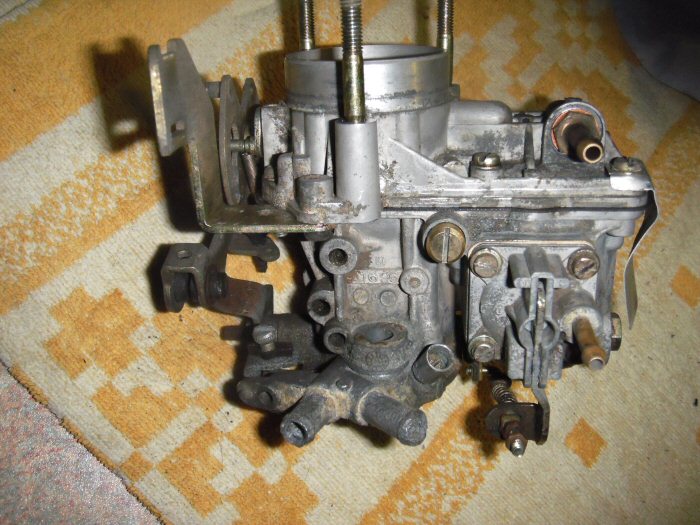
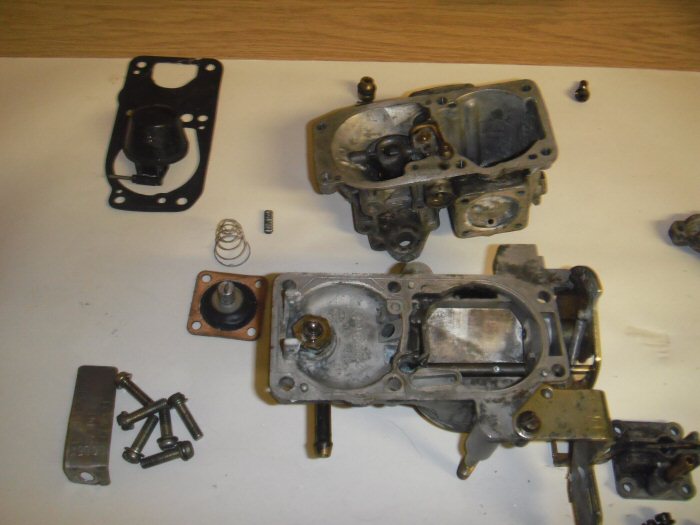
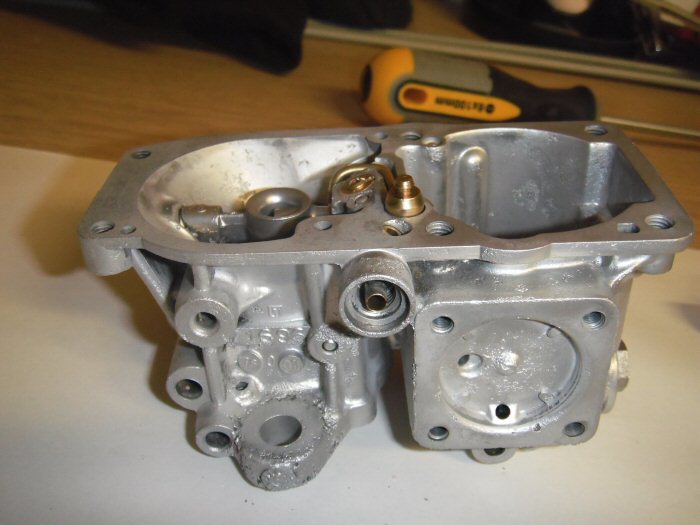
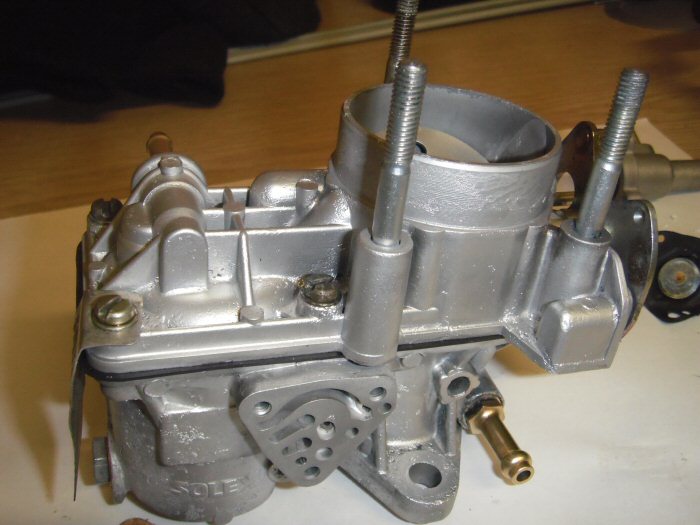
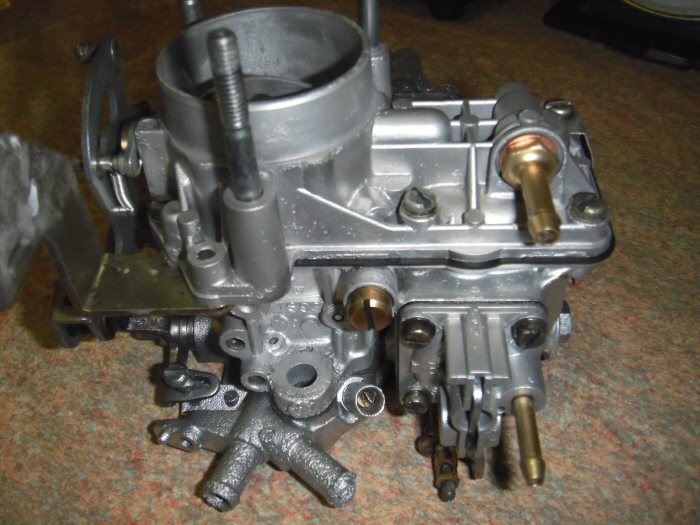
That's the underside of the main body, which came out looking like this, once
it had been thoroughly dried...
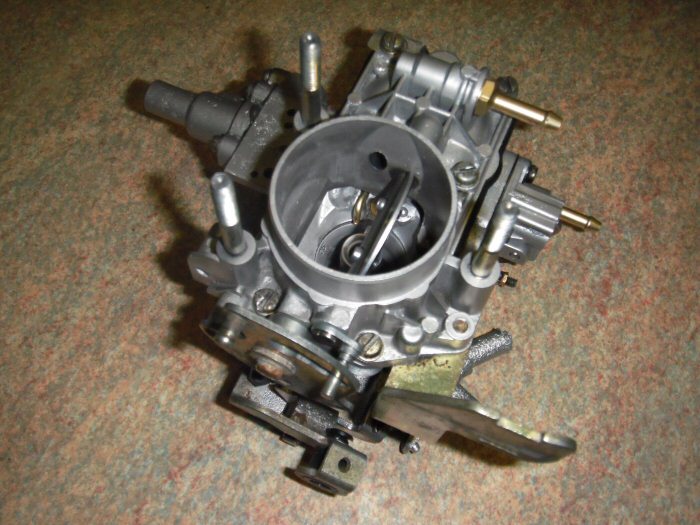
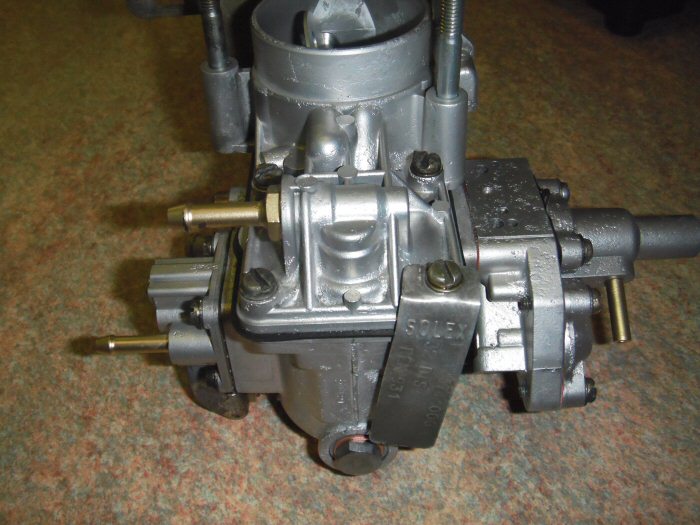
This is the accelerator jet assembly now cleaned...
Top and bottom now reunited...
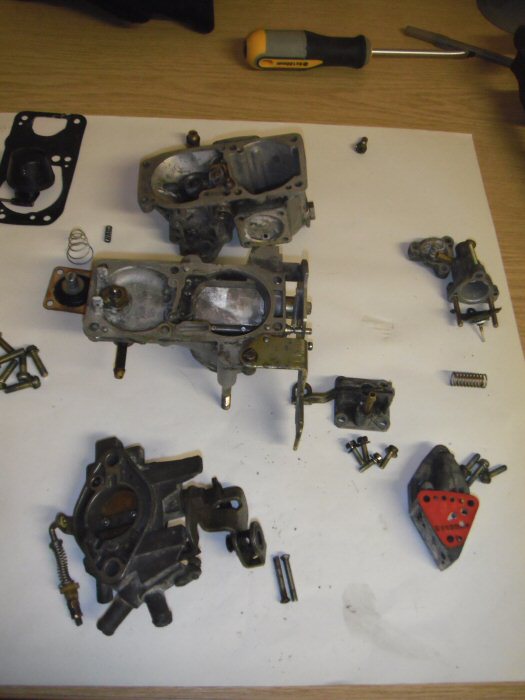
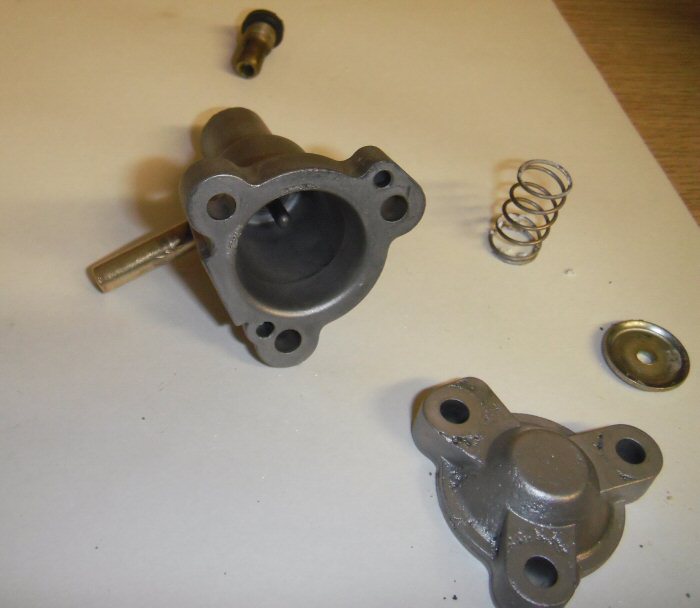
From that point, we both got a bit confused over which spring went where,
so all the remaining pieces were packed securely in the box I'd taken for the
purpose. The last thing I wanted was either a bit left over, or worse a
completely missing piece.
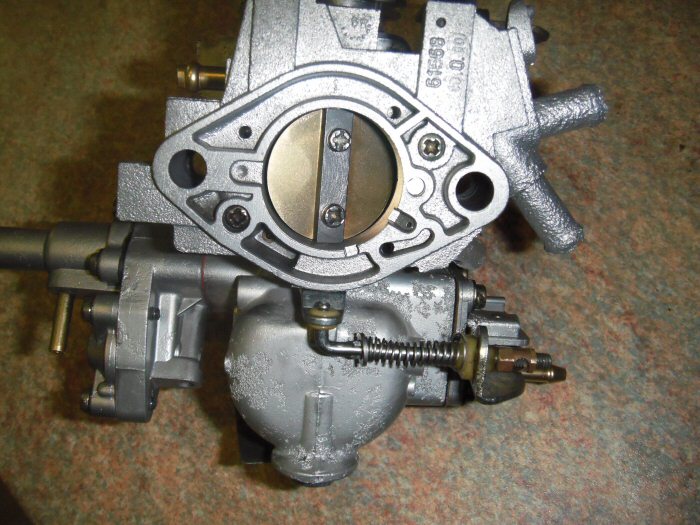
The remaining pictures show the fully reassembled carburettor. I'm completely
thrilled with the result. My thanks to Darren for his forebearance. Allowing me
to be involved meant a great deal to me
OK, am I allowed to get excited yet? You know that I am already, don't you?
Regards,
Steve

Just water? Pretty amazing that, though the zincs now deserve to be re-plated.
Lowiepete liked this post
Excellent that is. So how much was that process Steve?
Lowiepete liked this post
Extraordinary good value really - just £40
If you have it already stripped down and can ensure that there are no blockages for the
beads to gather in, then it'll be cheaper. Prices start @£25 in that case.
It's water, high-pressure air and tiny glass beads. I might enquire about the zinc replating...
Regards,
Steve
Last edited by Lowiepete; 14-01-2014 at 00:04.
Steve it's attention to detail like this, that has made me re read this thread time and time again. That carb looks a million bucks again! The only thing I might suggest to you is use a high pressure air gun (from an air compressor) over each piece before you reassemble, just in case there might be any small foreign bodies of glass.
What's the next step?
Lowiepete liked this post
Absolutely, that's why I was happy to pay Darren for his work. His attention to detail
was very self-evident! All the parts were blown through twice, once before a spell in
the drying oven, and again afterward.
What I've found is that it's the bike restorers who go with the specialist services.
Aerocoat I believe are #1 for them and Darren is well into 1950s scooters, as original
as possible!
What's next? Well, it's a refurb of the front suspension and brakes. Last time I went
round to see the car, the brake calipers were hanging out to dry in all their bright red
repainted glory.
There are bits off to Aerocoat, pulley wheel, springs and rocker box cover to do in red.
Tops off the suspension mounts are going too, to be done in black.
There's plenty yet to keep me poor - resto cost comes out at £3K so far...
Regards,
Steve

Great carb refurb, good resto price so far to considering the amount of effort and detail on everything that has been touched to date.
Lowiepete liked this post
Heheheheh, I did laugh out loud, but...
You've given yourself away... do you only do your own restorations half-ar5ed?
Shall I start a book?
As for the mud, I have my own source - the track to and from my garage. Puddles and mud
on wet days and a good'ol dust-bowl on dry ones. I was only thinking the other day...
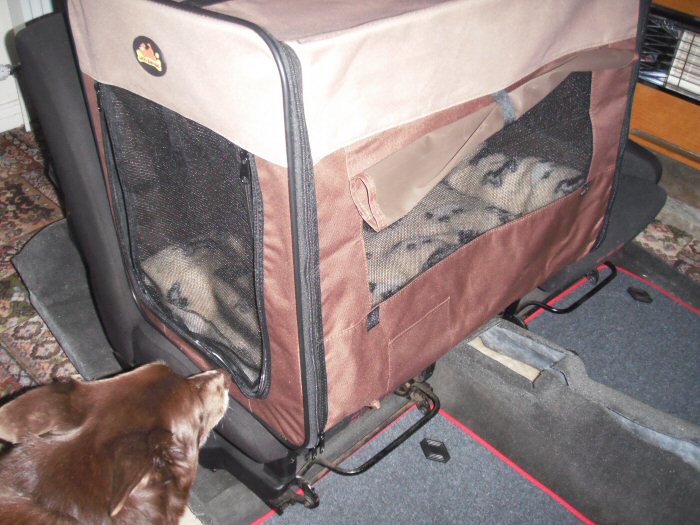
Oh, Tia's transport arrangements arrived today. She's already commandeered it...
Regards,
Steve
Last edited by Lowiepete; 14-01-2014 at 17:25.
That's awesome Steve.
Another awesome restoration! You'll be scared to drive the old girl at this rate.
Did you know if that red stripe was original from the car showroom?
Lowiepete liked this post
No. What happened was that the car was keyed - like no panel inc roof, back door and
bonnet left untouched, just weeks after I bought it. The car was resprayed at insurer's
cost, and they asked me if I'd like a coachline. Seemed to be all the rage of the day. The
red was selected to pick up the red motif from the colour combo of the seats. It'll be
replaced when I get the car repainted this coming October. I've already bought the tape
Regards,
Steve
Posting Permissions

 Reply With Quote