-
Moderator
South East Regional Rep

Service the Solex 32DIS Carburettor. With new photos.
Service the Solex 32DIS Carburettor
contributed by Rich Russell (Small additions and pics by Liam Roadnight)
This article describes stripping down, cleaning and rebuilding the carburettor found on the R5 GT Turbo. Renault 9 and 11 Turbos will be similar.
This is something worth doing on a high mileage car, as dirt will build up in the carb, reducing it's efficiency, and rubber diaphragms will split with age, potentially leading to fuel leaks or poor operation.
The most important thing to remember is to keep everything as clean as you can so you don't introduce more dirt than you remove. Take your time, and you'll find this isn't a difficult job to do.
You will need:
Webcon service kit for Solex 32DIS carburettor.
Carburettor cleaner spray.
Screwdrivers.
Spanners (6, 10, 11, 12, 13, 14mm)
Brass wire brush (don't use steel, it'll scratch the metal)
Cloths.
Gloves.
1. Remove the carburettor from the car. (disconnect the carb inlet elbow, accelerator and choke cables, fuel pipe, vacuum pipe from accelerator pump, vacuum pipe leading to boost compensation circuit, two coolant pipes, pipe from enrichment device)
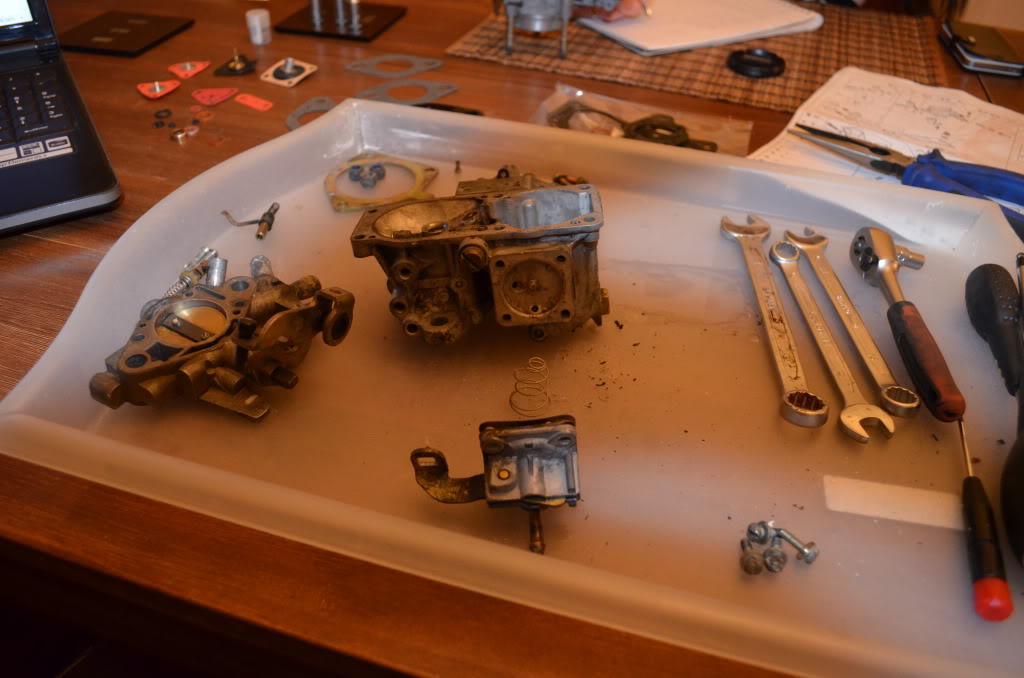
2. Make sure you have plenty of space and light - you don't want to lose any small parts during the procedure. Putting a light coloured cloth on the bench is a good idea as it stops things sliding or rolling away, and soaks up spills.
3. Set out the parts from the service kit, you won't need all of them, so there will be some left over at the end. It makes it easier to match which parts you can replace if you can see them all.
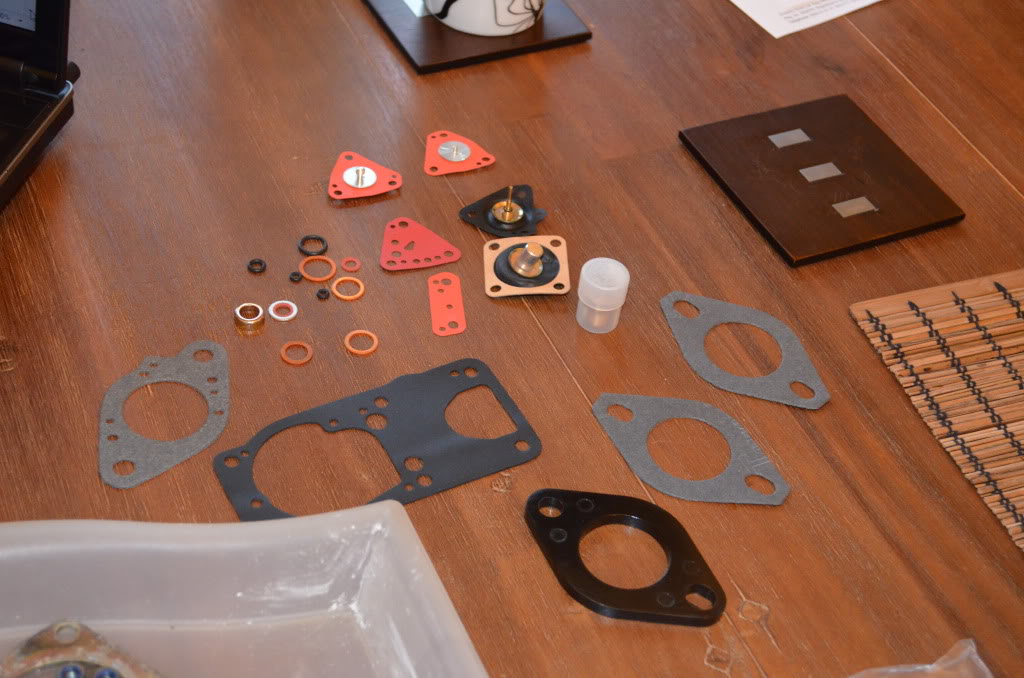
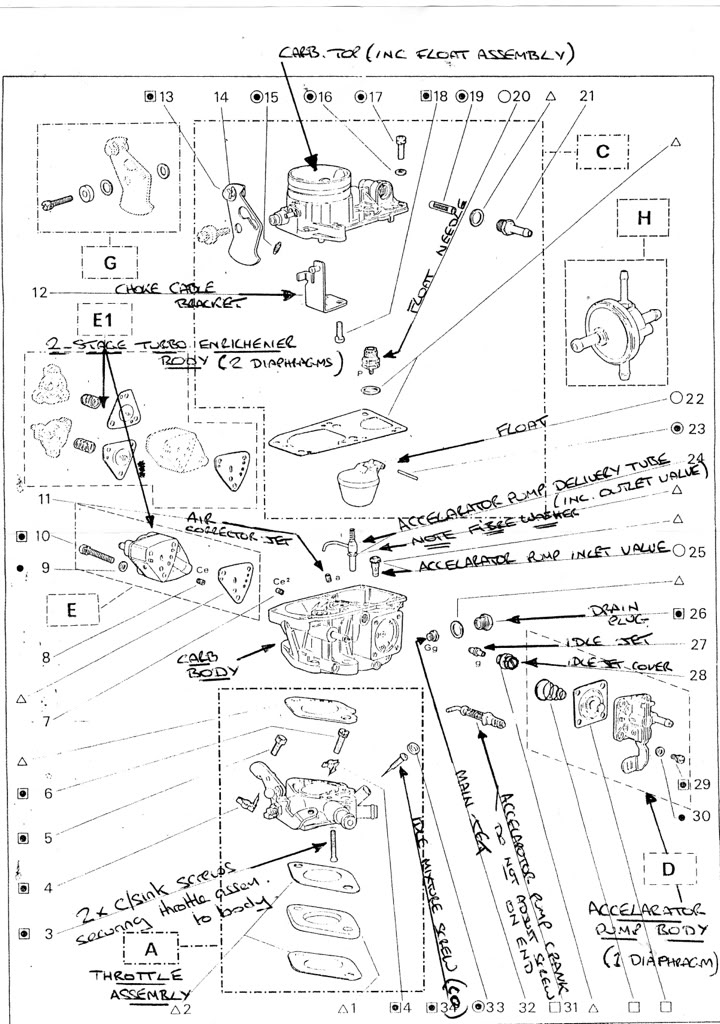
The diagram below shows all the parts you need. A good idea to familiarise yourself with it before you start.
4. Give the outside of the carb a bit of a clean with carb cleaner, brush and cloths - just take the worst off, so there's no huge lumps of grime and grease. You'll be cleaning more thoroughly as you dismantle things. It's worth having some petrol on hand to soak really stubborn deposits. As you remove parts from the carburettor, give them a clean up, taking care not to scratch or damage them.
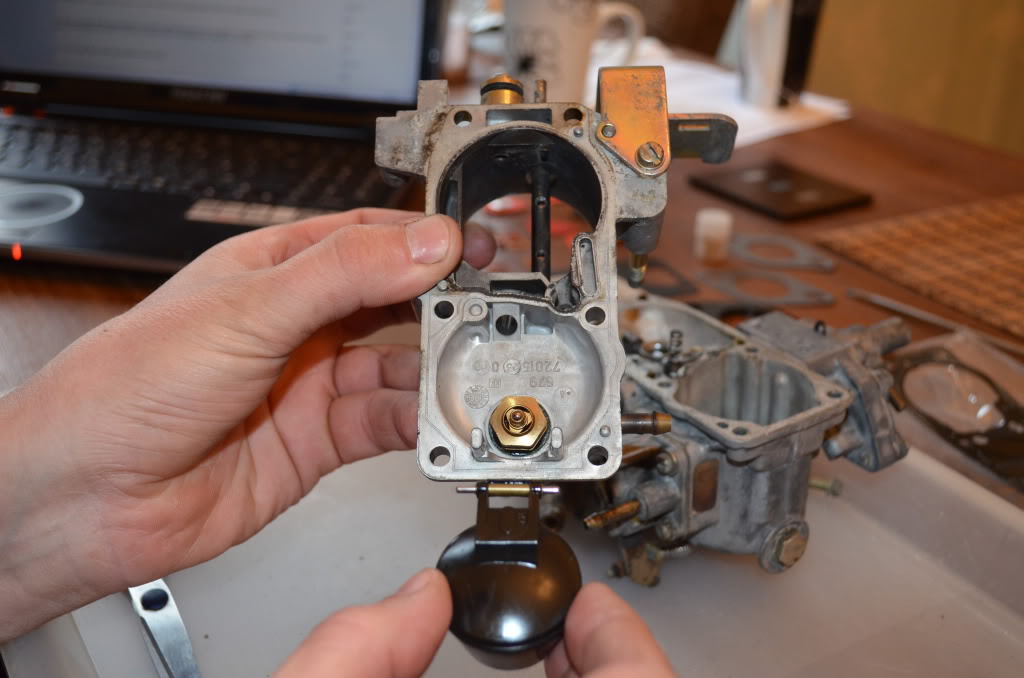
5. Undo the six screws on the top cover and carefully remove it - lift it straight up so you don't damage the float. Be careful, as the float chamber will probably be full of petrol. Tip this into a jar, and you can use it to help cleaning.
6. Undo the screw holding the choke cam on, and remove the cam. Give it a good clean.
7. Slide out the pin holding the float in place, and remove the float carefully. You can also remove the gasket.
8. Unscrew the fuel inlet pipe and pull out the small filter from inside the housing. Give them a clean.
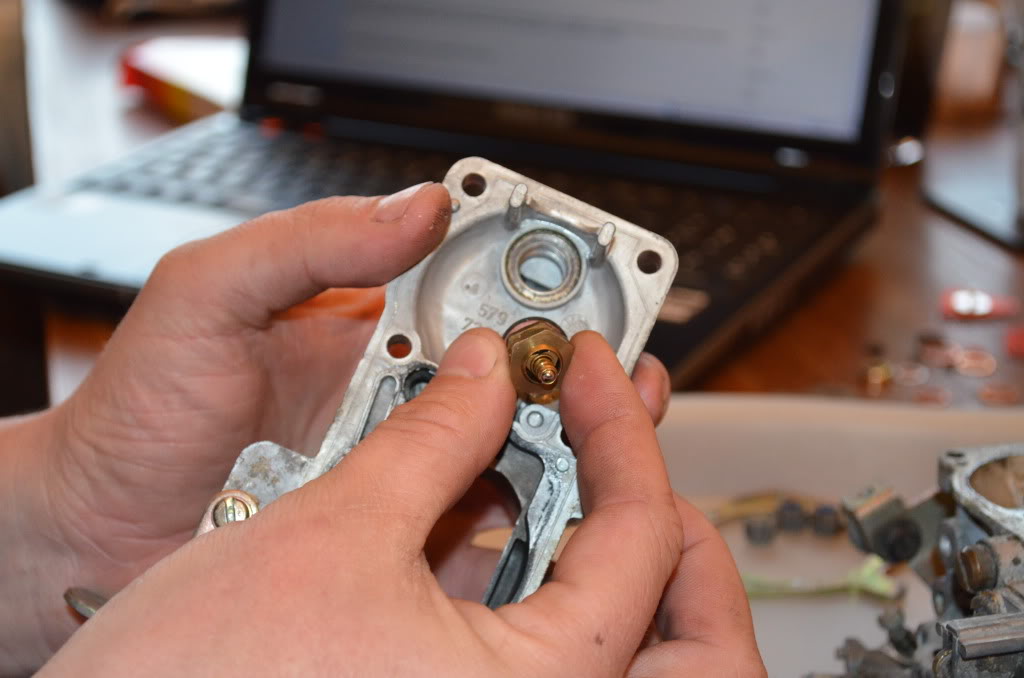
9. Unscrew the float valve, and remove along with it's copper washer.
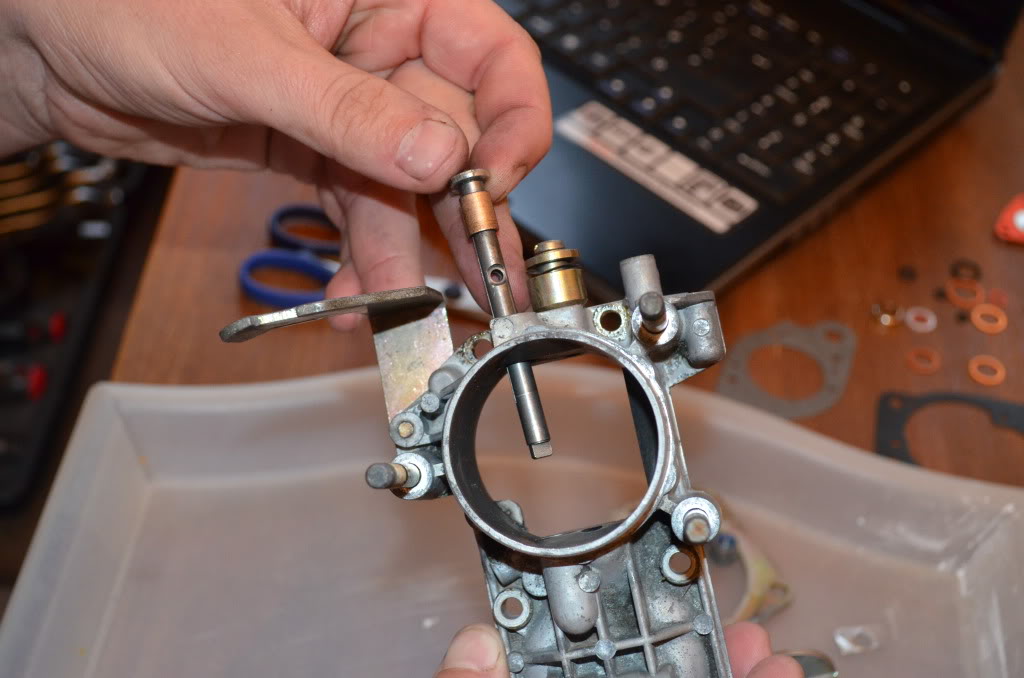
10. Undo the two screws securing the choke flap to it's spindle. These may be stiff, so be careful not to shred the heads. If you do - you can drill them out, clean up the threads with an M4 tap, and use new short M4 screws. Slide the choke flap out and clean it up.
11. Remove the spindle, and clean it up. Also remove the metal bracket that the choke cable fixes to.
12. Now you have all the moving parts out of the carb top section, you can give it a really good clean up with carb cleaner, petrol, wire brush and cloths. You can of course soak it in degreaser or paraffin if you wish.
13. Fit the new float valve and washer from the kit.
14. Refit the choke spindle and flap. Make sure you have the spindle the right way round. Use threadlock on the screws.
15. Refit the fuel filter and supply connection, using a new washer from the kit. Fit the new gasket, then the float and pin. Fit the choke cam, and the cable bracket. Set the top section aside.
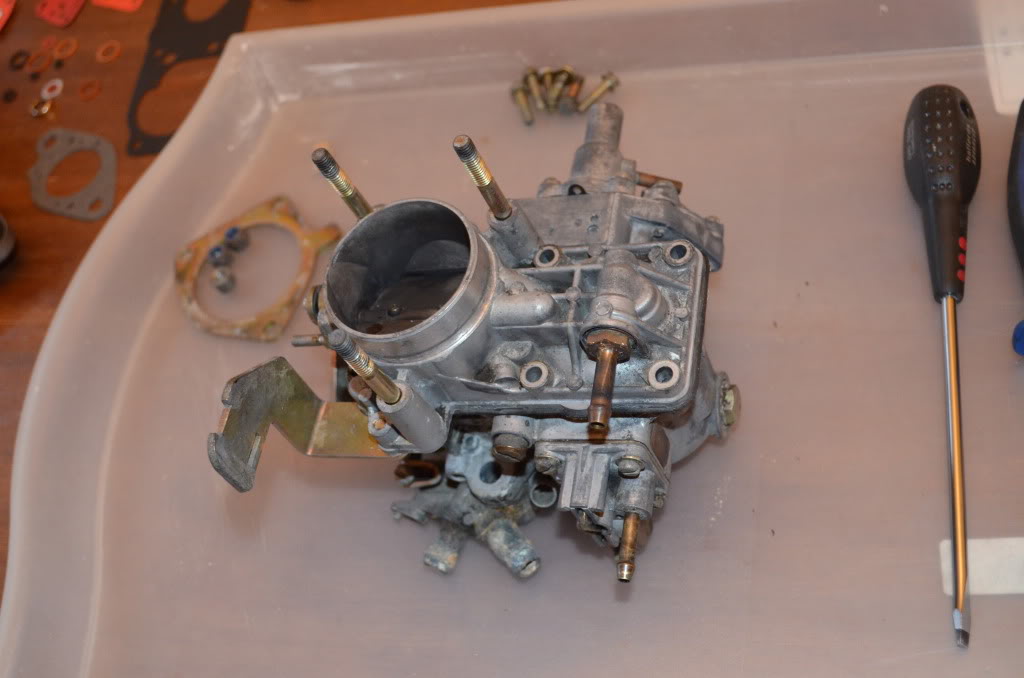
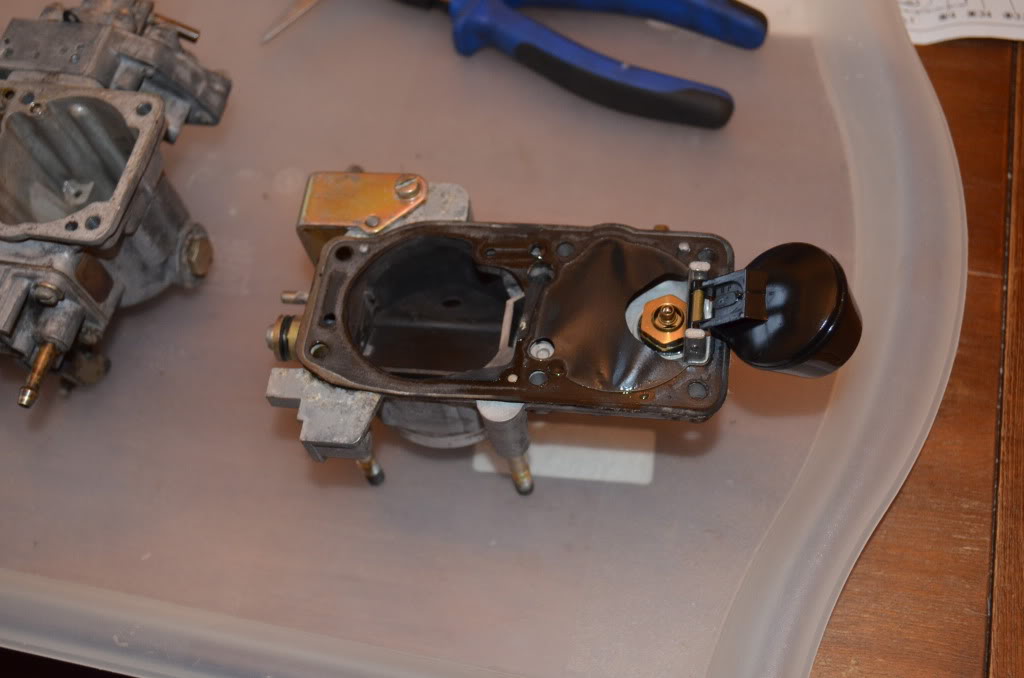
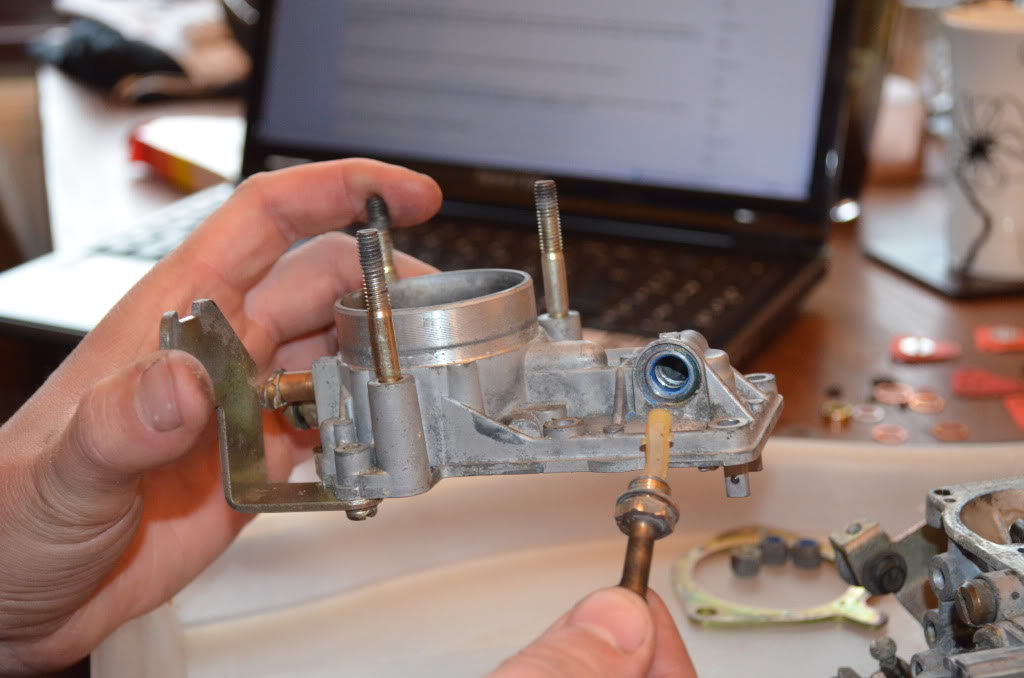
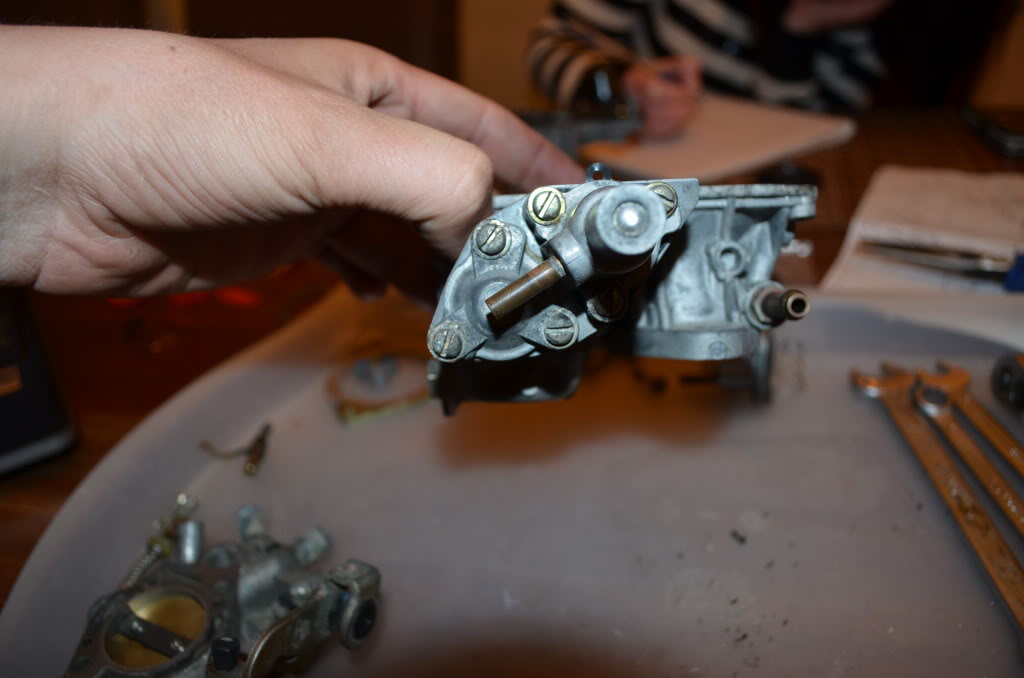
16. Take the bottom section of the carb now. Pull out the accelerator pump nozzle and clean it.
17. Undo the accelerator pump rod from the accelerator pump. Pull off any gasket stuck to the throttle assembly.
18. Undo the two screws on the throttle assembly, and remove it from the main body of the carb. Remove any gasket stuck to the top. You might need to carefully scrape it off with a knife - be careful not to scratch the metal.
19. Remove the throttle cam from the spindle. Note which way up it goes.
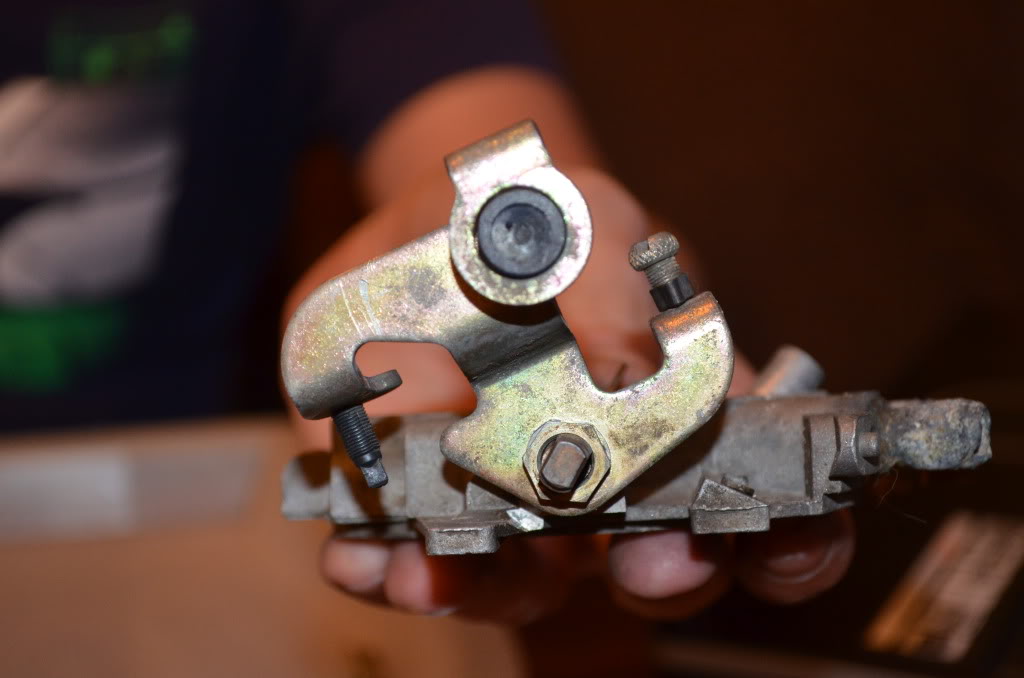
20. Undo the screws securing the throttle butterfly to it's spindle and remove it. Like the choke flap, the screws are easily damaged, but can be replaced.
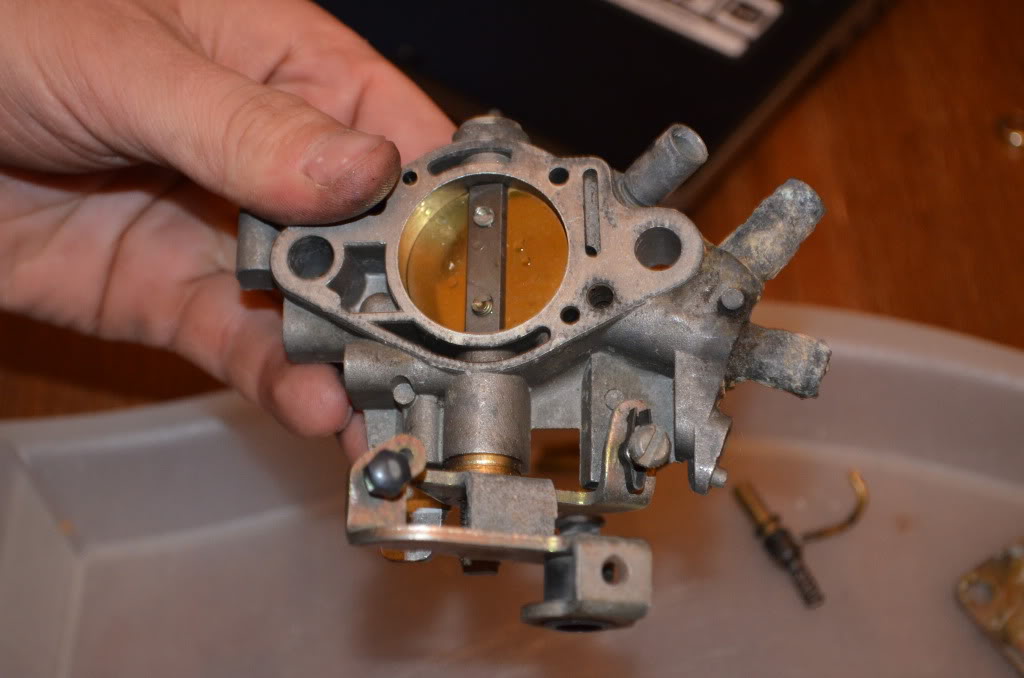
21. Remove the spindle and clean it. Be careful not to damage the seals, although new ones are available from Webcon if they look worn. Check the plastic bush inside the body, these can wear or split.
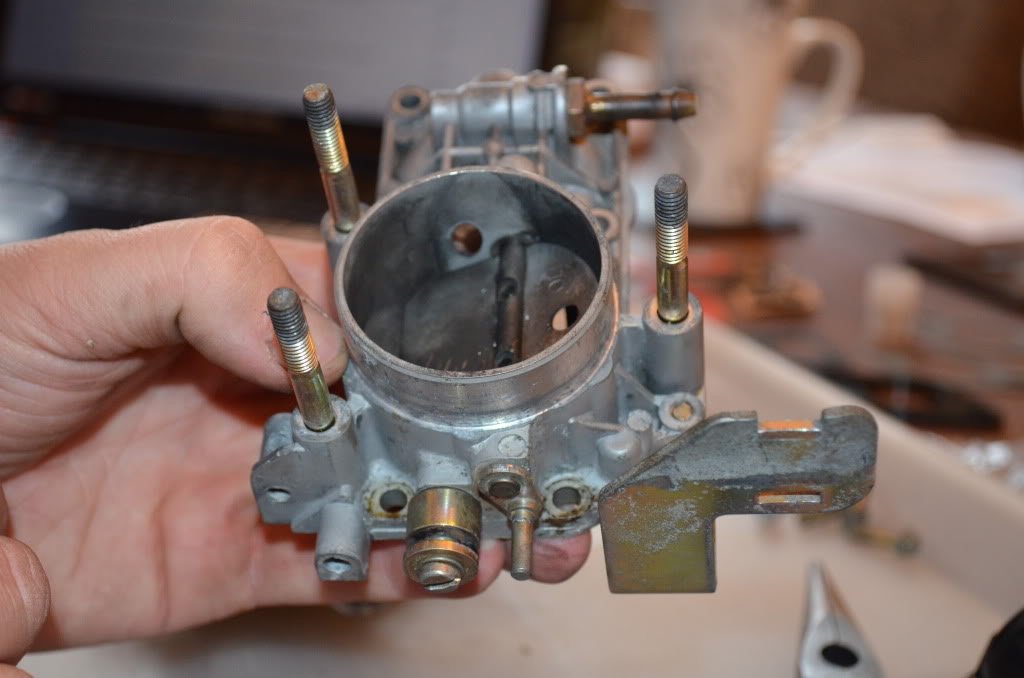
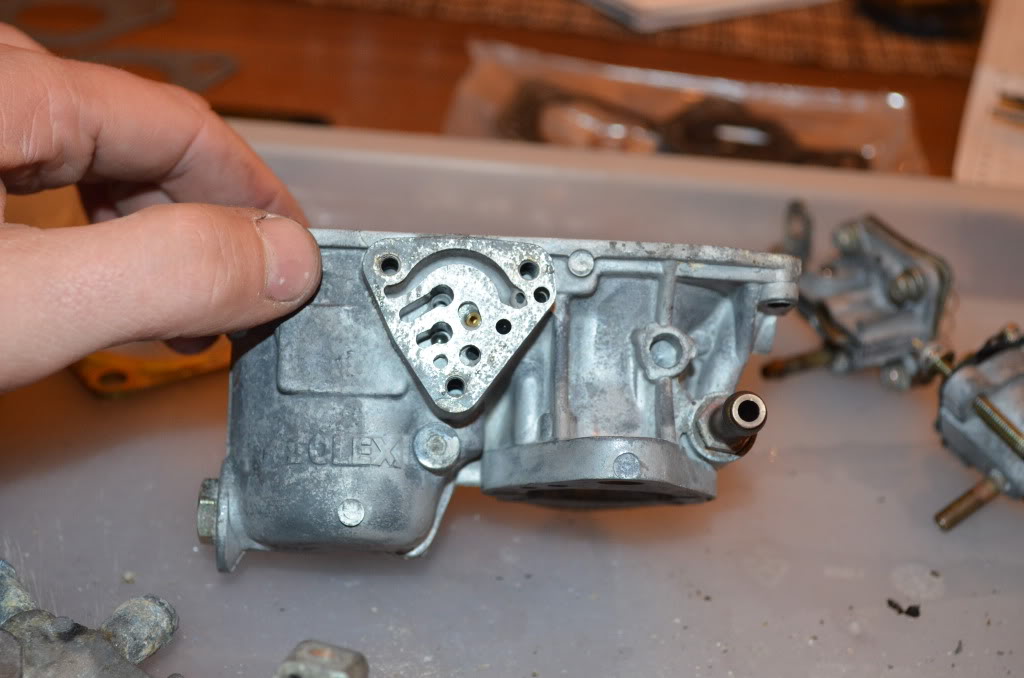
22. Give the throttle assembly body a good clean up. This tends to suffer from corrosion on the coolant connections, and a lot of oil spray from the rocker cover and breather pipe. If the engine has been suffering from hesitation, or has overheated in the past, it's worth checking the base for flatness.
23. Put the throttle assembly back together and set aside. Take the main body of the carb, and give it a really good clean up with carb cleaner or petrol, wire brush and cloth. Use threadlock on the throttle butterfly screws, as you don't want them falling out!
24. Undo the four screws holding on the accelerator pump body, and remove.
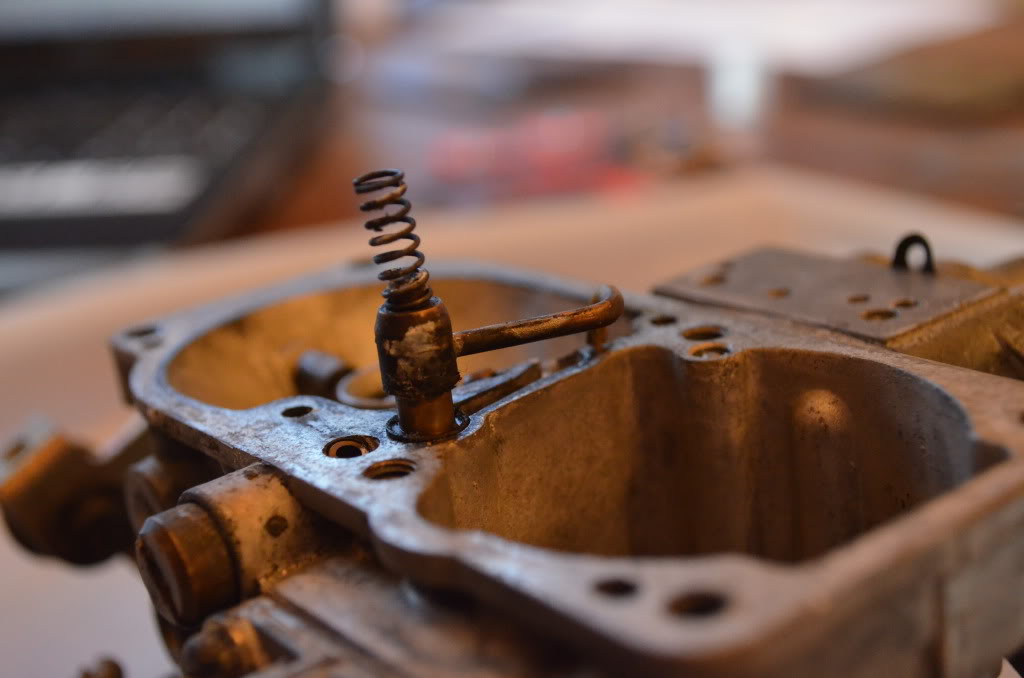
25. Remove the diaphragm and spring.
26. Undo the three bolts holding the enrichment device to the carb. Be careful as there are springs inside.
27. Remove the first part from the device, and remove the diaphragm and spring.
28. Undo the three bolts holding the second part, and remove the spring and diaphragm.
29. Remove the main part of the enrichment device from the carb, and remove the gasket.
30. Undo the large bolt in the bottom of the float chamber.
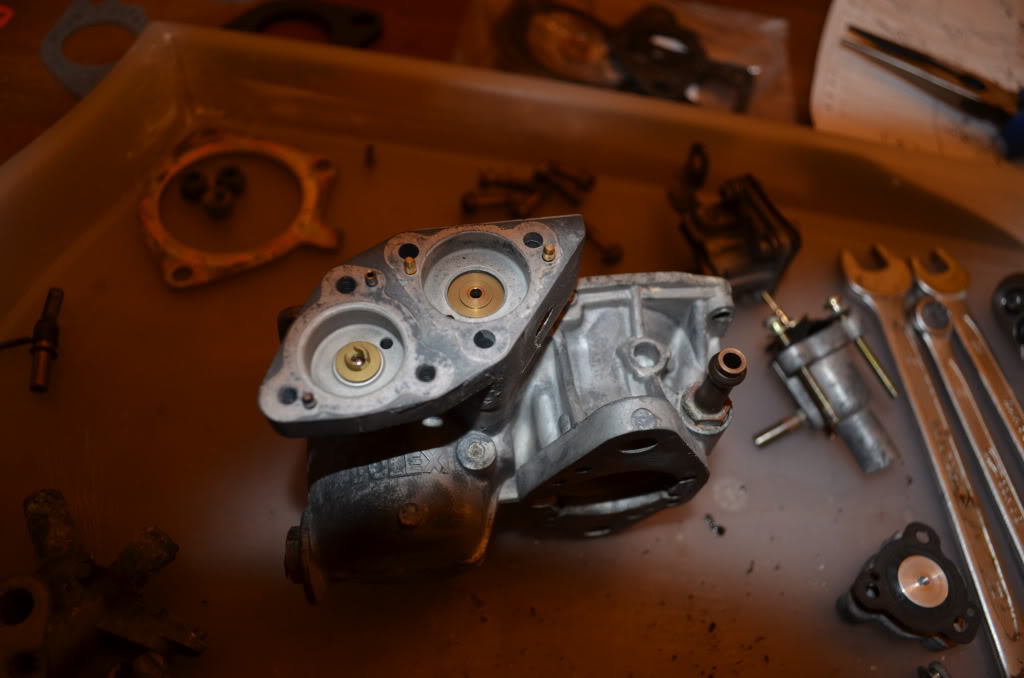
31. Remove the accelerator pump jet, and clean out any dirt (use the carb cleaner aerosol to blast it), then refit.
32. Remove the main jet and clean out any dirt, and refit.
33. Undo the large screw on the side of the carb.
34. And remove the idle jet. Clean out any dirt and refit, ensuring that the flat rubber seal is in good condition. This seal can be replaced with an equivalent size O-ring which should be petrol resistant, ie, made of Nitrile Rubber. If this seal is in poor condition (dry/perished etc) it may cause poor idle problems.
35. Remove the air corrector jet and clean - also squirt carb cleaner down the emulsion tube beneath to clean that out. You can pull the emulsion tube out by screwing a bolt into where the jet was and pulling hard. Refit the jet.
36. Remove the vacuum connection and clean up. Refit it. Also refit the float chamber bolt using a new washer.
37. Fit new diaphragms and gaskets from the kit to the enrichment device.
38. Refit it to the carb. Be careful not to twist or stretch the gaskets and diaphragms.
39. Refit the accelerator pump spring - note this goes the opposite way round to the original, as the replacement diaphragm has a smaller metal disc in the centre.
40. Fit the new diaphragm to the cover, and refit the accelerator pump to the carb.
41. Take throttle assembly and put the accelerator pump rod through the lever first, then use the new gasket and refit the assembly to the carb base with the two screws. Using a 5mm drill bit between the throttle butterfly and body, ensure that the accelerator pump is just fully compressed, then check the throttle moves smoothly and operates the accelerator pump when you move the cam.
42. Refit the accelerator pump nozzle, and have a final check that there's no dirt in the carb - blow through any holes with carb cleaner to flush anything out.
43. Refit the top section - be careful of the float and it's pin. You might find it easier to put the top section upside down on the bench and lower the main section onto it. Also be careful that the thin gasket isn't twisted or stretched as you do so.
44. Admire your shiny, clean carburettor. Then refit it to the car. Remember the float chamber is empty of fuel now, so it'll take a little longer on the starter the first time whilst it refills. Check the idle speed and mixture are still right - as you may need to adjust them as things have moved.
Also have a look this article: All about the 32DIS Carburettor for more information.
Remember that this is quite a special carburettor, it's made partly of magnesium, and totally sealed in order to cope with the high pressure and temperatures of the turbocharged 1.4 litre engine. It's worth keeping in good condition.
-
Moderator
South East Regional Rep
Re: Carb Rebuild Guide
Before anyone comments, I have rehashed the old rebuild article, changed the odd word and added my own pics from my carb rebuild.
I no way say I am an expert but I believe all the pics are correct.
-
Moderator
South East Regional Rep
Mods Attention
Can you add this pic to the carb rebuild guide in the articles section please? Its pretty handy as it has more detail on the 5mm drill bit adjustment
I stole it from Wallace's thread - sorry 
 Posting Permissions
- You may not post new threads
- You may not post replies
- You may not post attachments
- You may not edit your posts
-
Forum Rules


 Reply With Quote