Page 4 of 9 FirstFirst 123456789 LastLast
Results 151 to 200 of 431
  1. #151
    Member Woznaldo's Avatar
    Join Date
    Sep 2008
    Location
    Canberra, Australia
    Posts
    1,914
    Post Thanks / Like

    Re: Project Yellow Peril

    UPDATE

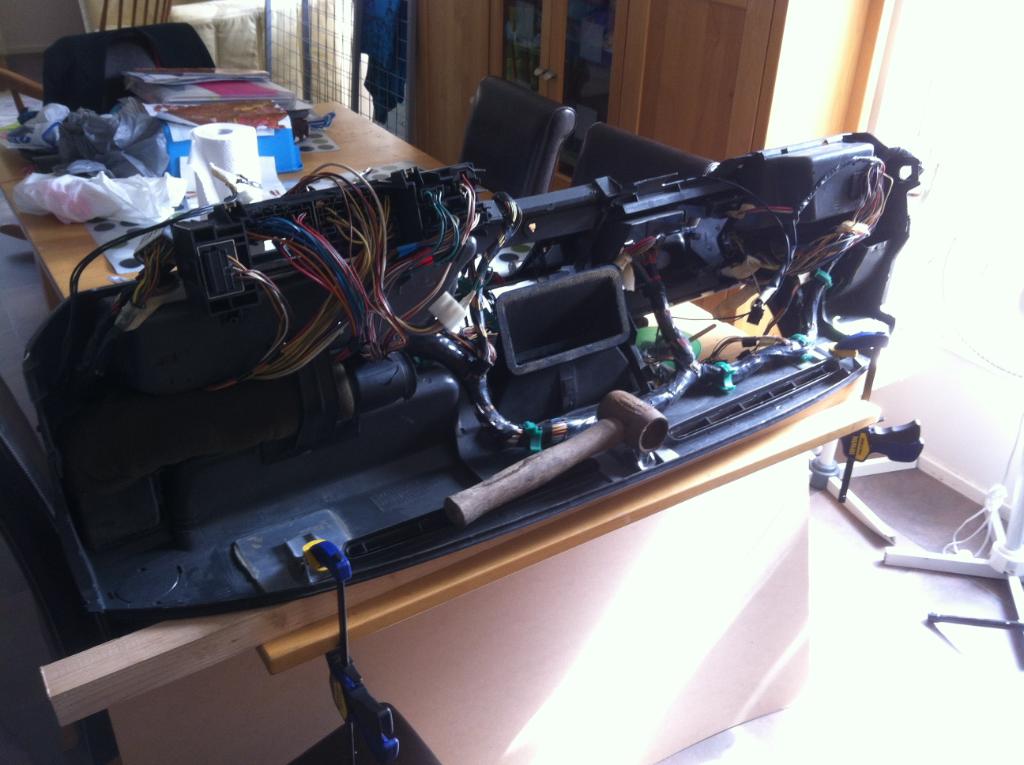
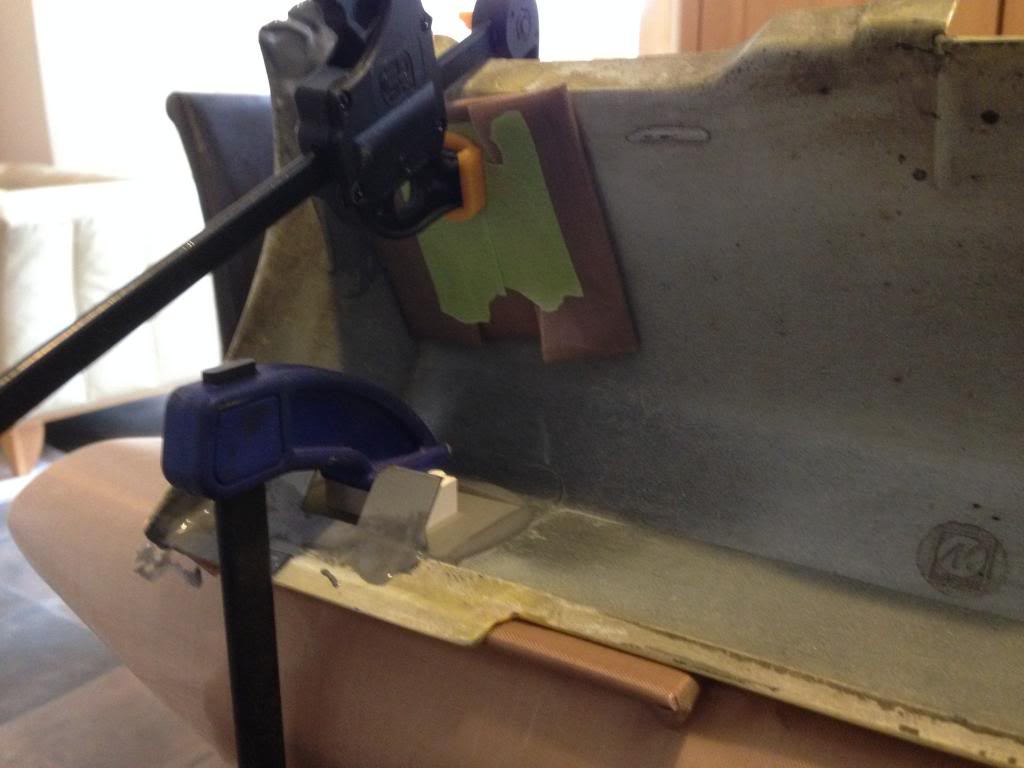
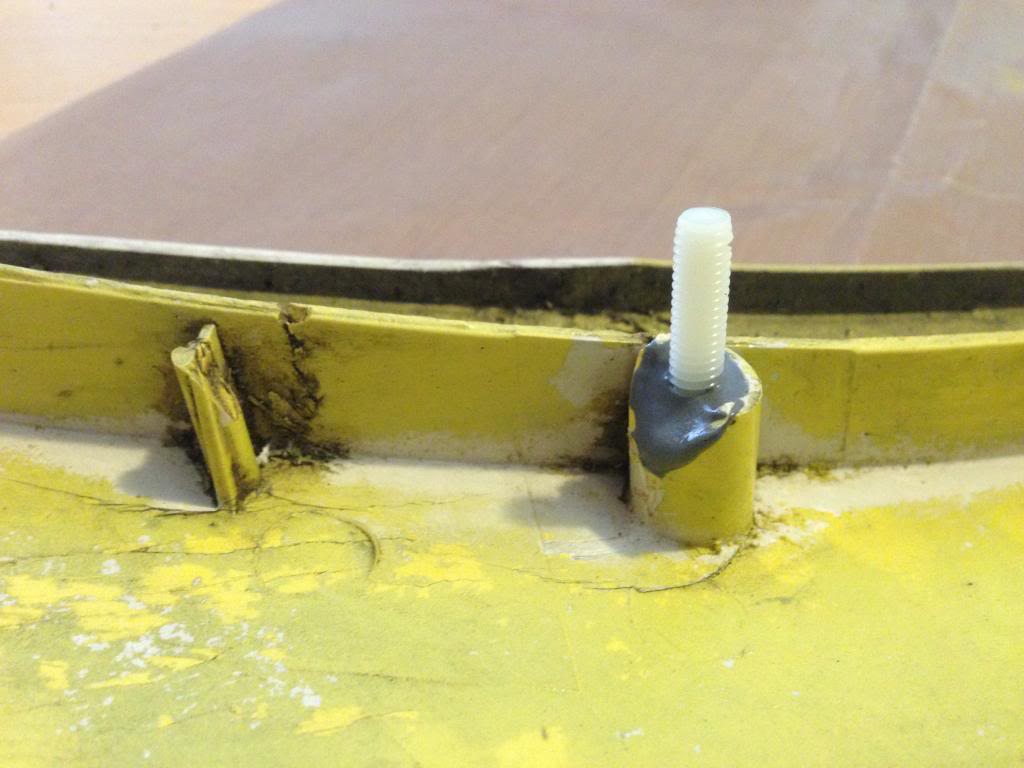
    I finally got the Dash Brackets finished and after all my planned bulkhead hole had been drilled, I put the Dash back in. Here's a couple of pics of the finished brackets:

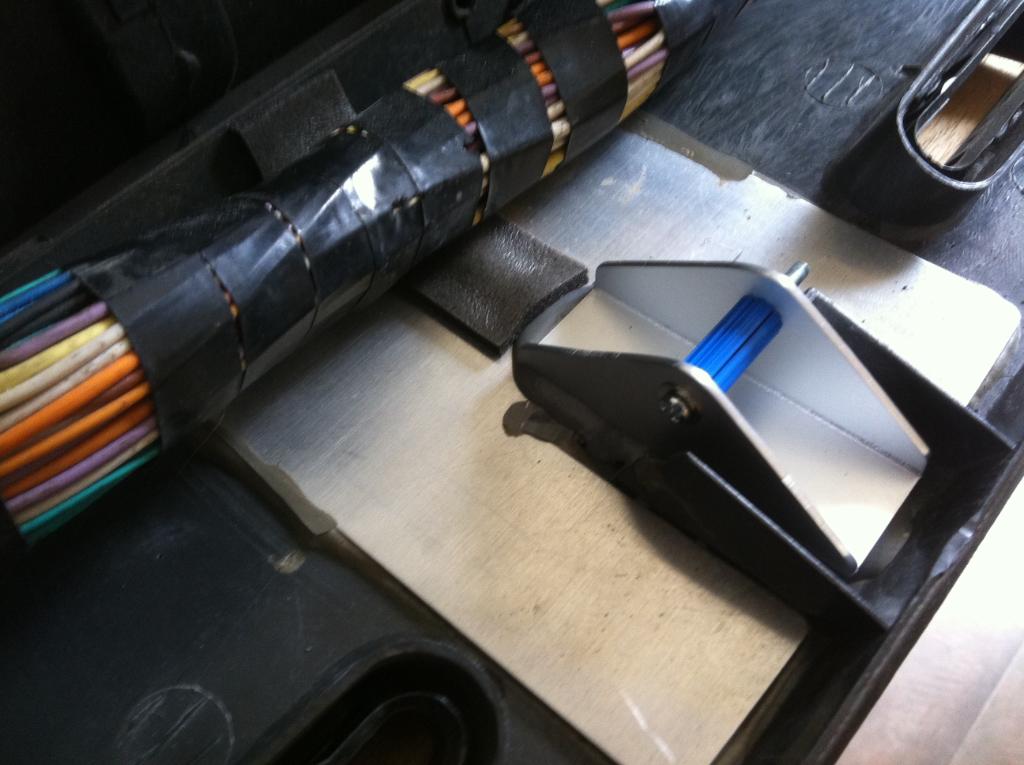
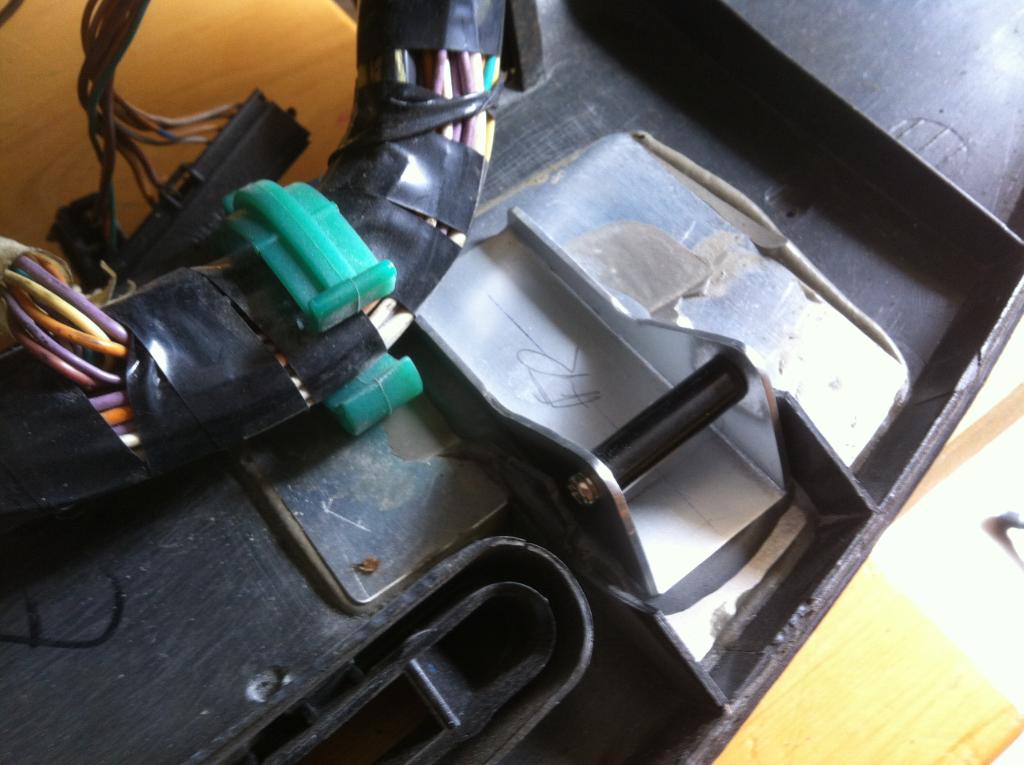
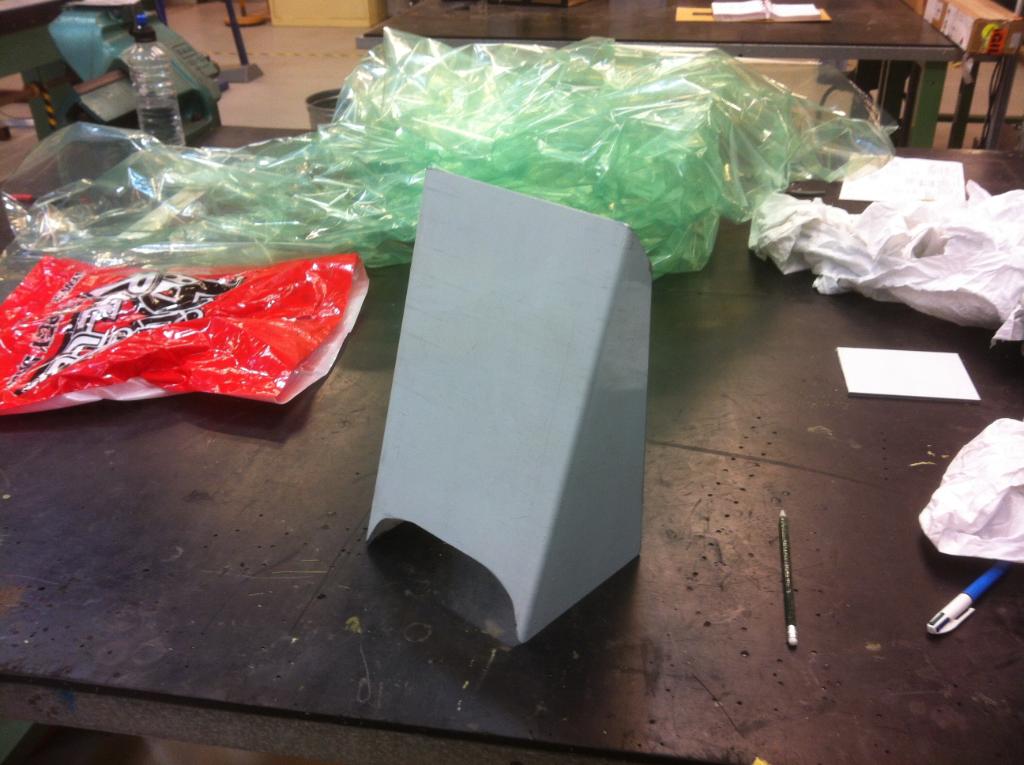
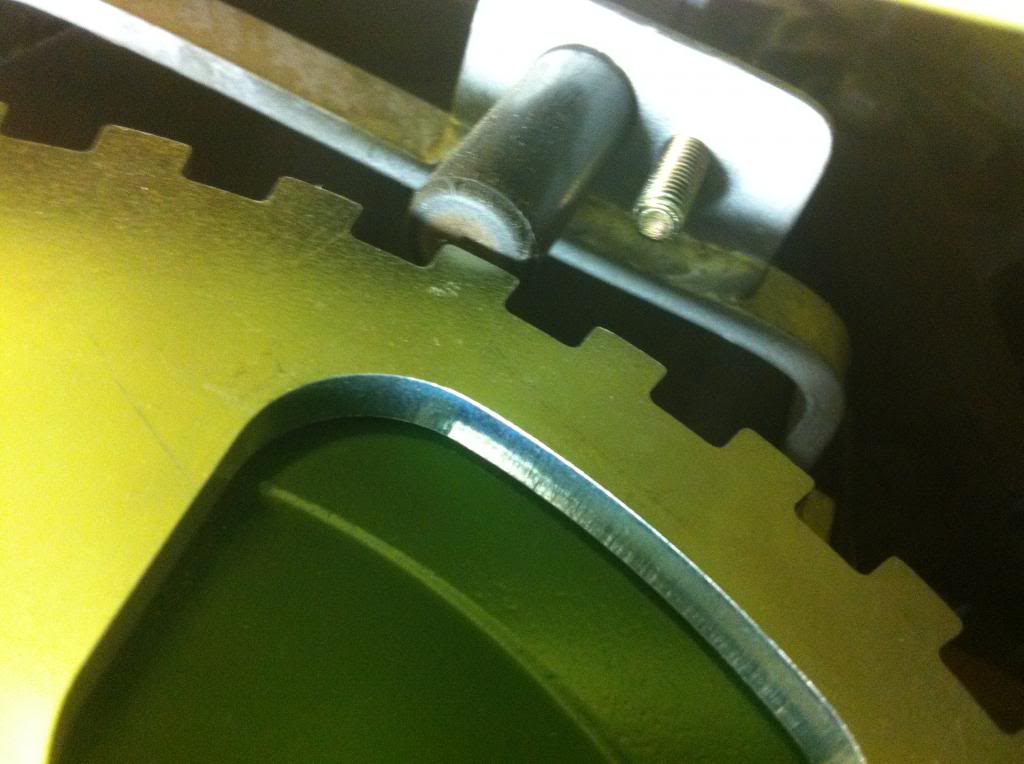
    All lined up an resin applied.


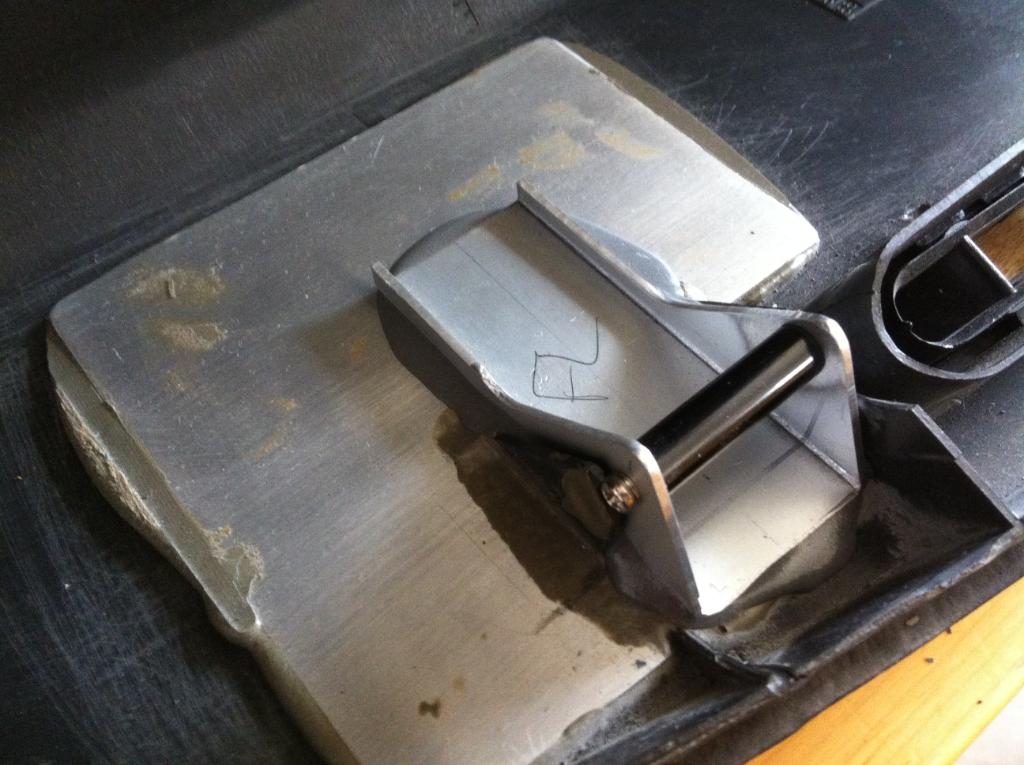
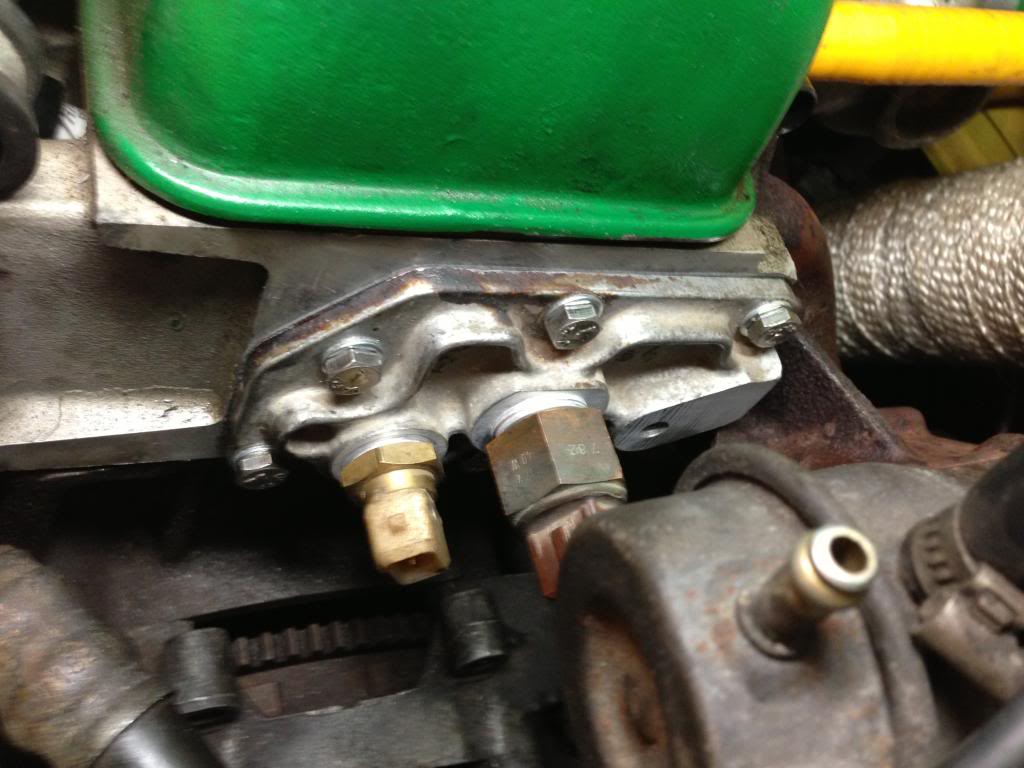
    Brackets after the resin has set.


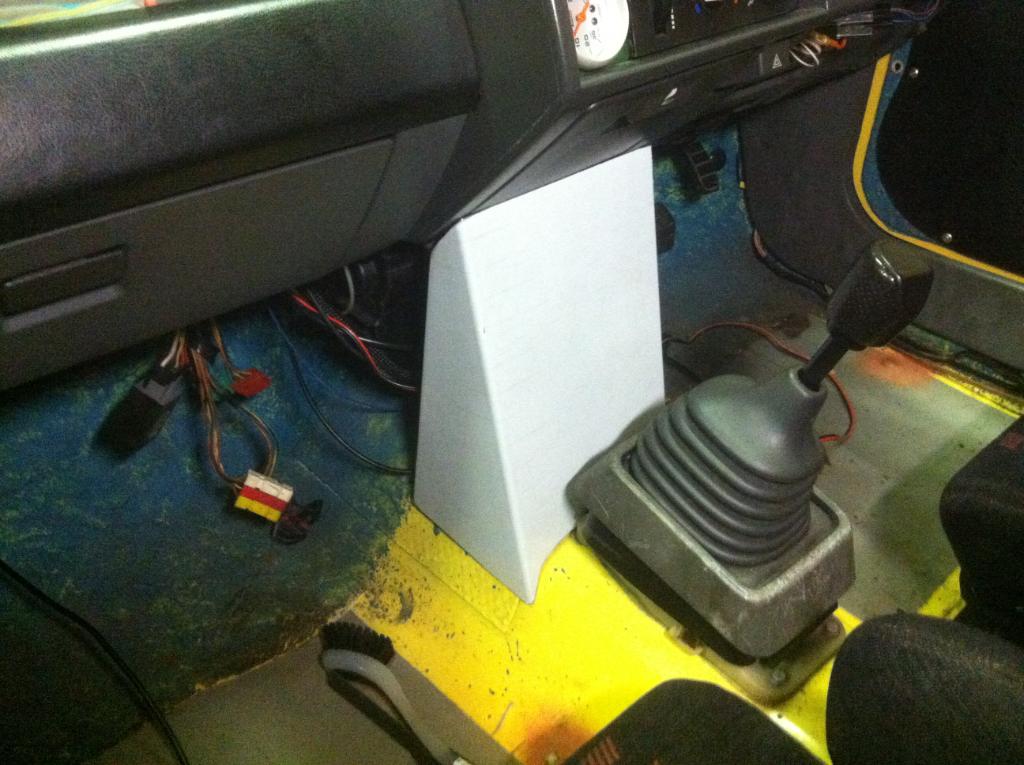
    The dash dropped into place with no problems and should be a bit more resilient.

    I've got my annual road worthy inspection coming up at the end of the month and the EFI won't be ready (waiting on parts) so I'll put the Carb back on but run the MegaSquirt ECU for ignition only as all the wiring is just about finished.

  2. #152
    Member Woznaldo's Avatar
    Join Date
    Sep 2008
    Location
    Canberra, Australia
    Posts
    1,914
    Post Thanks / Like

    Re: Project Yellow Peril

    My Leda Struts had been getting a bit too stiff before I took the car off the road for the EFI conversion, so I decided to pull them apart for a rebuild. After speaking with Roger at Leda he advised me that I would need to make a tool to remove the Top Gland Nut.

    Here's the tool:


    Once apart the reason for the stiffness was apparent! The Damper Piston Band was destroyed.


    I've had these struts since '95 and the design has been superseded now so I'll have to replace a heap of parts that have nothing wrong with them, which sucks! Still cheaper than replacements.

  3. #153
    Member Woznaldo's Avatar
    Join Date
    Sep 2008
    Location
    Canberra, Australia
    Posts
    1,914
    Post Thanks / Like

    Re: Project Yellow Peril

    I started whipping up a Centre Console that I could mount the Megasquirt ECU to. I need to tirm the top so it tucks under the dash and can be secure properly. Here's a couple of pics:


    I've also been making slow progress with the Leda Strut rebuild, mainly because work has taking up all my time. Roger at Leda has been an absolute legend with advice and parts, even sending some parts to me before he had my payment to make my timeline!

    I can't wait to get the struts back on now as it will be now like driving a new car! That said, I haven't touched the rear dampers yet.

  4. #154
    Member Woznaldo's Avatar
    Join Date
    Sep 2008
    Location
    Canberra, Australia
    Posts
    1,914
    Post Thanks / Like

    Re: Project Yellow Peril

    Here's a few pics of the Leda Strut rebuild:

    The rebuild parts.


    The Piston Rod Assembly dismantled.


    The Piston.


    The Foot Valve dismantled.


    One of the Foot Valve Springs. It should be absolutely clean....


    The holes in the Piston together with the holes, springs and shims in the Foot Valve are what set the damping specs.

    Just waiting for a few more bits and the assembly will start.

  5. #155
    East Midlands Regional Rep Os8472's Avatar
    Join Date
    Sep 2008
    Location
    Ragging the tits off my car :)
    Posts
    2,813
    Post Thanks / Like

    Re: Project Yellow Peril

    Good progress there fella, well done

  6. #156
    Non-member Coops's Avatar
    Join Date
    Oct 2008
    Posts
    883
    Post Thanks / Like

    Re: Project Yellow Peril

    loving the leda strip down

    also happy that your have been about since 1995 and only just getting rebuilt as I have ledas to pop onto mine soon, hopefully they'll pull a good 15 years of use too

  7. #157
    Member Woznaldo's Avatar
    Join Date
    Sep 2008
    Location
    Canberra, Australia
    Posts
    1,914
    Post Thanks / Like

    Re: Project Yellow Peril

    Small update:

    I have been busy with work and my recent Jag acquisition (see other marques) and have been slowed by various issues with my Leda Struts. Roger from Leda has been fantastic but, because the company has change hands a few times since I originally bought my Struts.

    The main issues have been design changes that have been superseded and inexperience on my part when stripping the struts down enough to ensure they are ABSOLUTELY clean. Any dirt or debris could get lodged under one of the Valve Shims and reduce or remove some of the damping effect.

    I've rebuilt and pulled the Struts apart again twice now and one of them still isn't working as it should. The adjuster is only making the Rebound harder and not both Bump and Rebound as it is on the other Strut. I've also broken my home made Gland Nut Tool and now have to repair before I can continue!

    I did find some time recently to finally fit and adjust my 'Scoff EFI-Parts' Trigger Wheel and adjust it for my Megasquirt Extra with EDIS set-up. I pulled the #1 Spark Plug out and inserted a non-metalic stick, which turned out to be a chop stick, as I don't have an extension rod for my DTI.

    Anyway, got the DTI all set up, with chop stick (complete with countersunk hole for positive location) and turned the Crank until I got TDC. I then 'locked' the Flywheel in position and re-checked the DTI.


    I then had to rotate the Trigger Wheel through 90 degrees so the missing tooth was ahead of TDC by 9 teeth (missing tooth being zero). Finally the Crank Pulley Bolt was torqued to 110Nm. I then un-locked the Flywheel and re-set TDC using the DTI set-up. The result showed that the Trigger Wheel is about half a tooth out but I will double check it with a timing light when the engine is running.


    Just waiting for the Struts to be completed and I can finally take the car off Axle Stands and fire her up!

  8. #158
    Motech Tony Walker's Avatar
    Join Date
    Sep 2005
    Location
    Parkgate Cheshire
    Posts
    3,848
    Post Thanks / Like

    Re: Project Yellow Peril

    Great read, ans some really usefull info on the struts

  9. #159
    Member Woznaldo's Avatar
    Join Date
    Sep 2008
    Location
    Canberra, Australia
    Posts
    1,914
    Post Thanks / Like

    Re: Project Yellow Peril

    Quote Originally Posted by Tony Walker View Post
    Great read, ans some really usefull info on the struts
    Tony, I've been taking lots of pictures during the rebuild that I will post once I have both Struts up and running, just to make sure I don't give anyone duff info.

  10. #160
    Motech Tony Walker's Avatar
    Join Date
    Sep 2005
    Location
    Parkgate Cheshire
    Posts
    3,848
    Post Thanks / Like

    Re: Project Yellow Peril

    thats great its allways going to be a minefield of different aged components, my coilovers are gaz but the principle/main components should be reletively similiar.

  11. #161
    Member Woznaldo's Avatar
    Join Date
    Sep 2008
    Location
    Canberra, Australia
    Posts
    1,914
    Post Thanks / Like

    Re: Project Yellow Peril

    I've done some mods to my front Wishbone to increase castor from advice given in this thread:

    https://www.rtoc.org/boards/showthrea...621#post298621

  12. #162
    Member Woznaldo's Avatar
    Join Date
    Sep 2008
    Location
    Canberra, Australia
    Posts
    1,914
    Post Thanks / Like

    Re: Project Yellow Peril

    Small Update:

    I've added the Cylinder Head End Plate from a Renault Alliance (got it when I bought the manifold) but, I had to remove some material to get clearance from the Exhaust Manifold. Here's the End Plate fitted together with it's CLT Sensor (little one) and CLT Switch (big one). I had to use two crush washers under the CLT Switch as it was hitting something in the head. Must be a slightly different casting to the Alliance Heads?


    In this one you can see the clearance between the End Plate and the Exhaust Manifold.


    In hind sight, I would have been better off welding a nut to the original End Plate as it's a lot easier to install. The casting webs make the Alliance one a right pain.

    I'm still having some running issues with my Megasuirt 1 (MS1) ECU running ignition only. It idles fine but isn't responding to quick rev throttle inputs but, already raised a thread on that so won't mention it anymore again here until it's sorted.

    Still working on the Struts but, hope to have them up and running soon.

  13. #163
    Moderator, Committee Trevhib's Avatar
    Join Date
    Sep 2008
    Location
    Derby
    Posts
    5,829
    Post Thanks / Like

    Re: Project Yellow Peril

    CLT - coolant temp?

    If so, why move away from the standard GTT setup Woz?

  14. #164
    Member Woznaldo's Avatar
    Join Date
    Sep 2008
    Location
    Canberra, Australia
    Posts
    1,914
    Post Thanks / Like

    Re: Project Yellow Peril

    I've never really trusted the standard CLT (coolant temp) Sensor and I've measured the resistance at three different temps on this one so that the ECU, and therefore tuning software, will have a more accurate temp reading.

    I might need to make up a little heat shield if I'm getting any heat soak from the Exhaust Manifold but, time will tell.

    I'll still use the standard CLT Sensor to run the temp gauge as it's just easier to do that.

  15. #165
    Moderator, Committee Trevhib's Avatar
    Join Date
    Sep 2008
    Location
    Derby
    Posts
    5,829
    Post Thanks / Like

    Re: Project Yellow Peril

    Interesting

  16. #166
    Member Woznaldo's Avatar
    Join Date
    Sep 2008
    Location
    Canberra, Australia
    Posts
    1,914
    Post Thanks / Like

    Re: Project Yellow Peril

    UPDATE:

    I've been doing a little more with the Leda Struts in an attempt to get them both up and running again. With some advice from Roger at Leda, I think the problem with 'no adjustment in bump' is related to fluid getting past the Foot Valve (FV). Here's a picture of the FV assembled with the new style Pin that uses a nyloc nut instead of being peened over a washer.


    This is the FV stripped down again for inspection:


    It would seem that the problem is the seal between the Hex Head of the Pin and the chamfer in the base of the FV:


    In this shot you can see a slight gap between the Hex Head and the Chamfer Seal of the FV:


    The solution would be to machine a flat on top of the chamfer by gently removing a little material and/or using a Shim Steel Washer under the Hex Head to assist it sealing on top of the chamfer.

    I'm trying to locate a suitable Shim Steel Washer and would need a 1/4" x 9/16" in .006"-.018" thickness. I would probably by 10 of them but, it's hard to buy in such small quantities.

    Hopefully this will solve the 'bump adjustment' issue and have me back on the road soon.

  17. #167
    Member Woznaldo's Avatar
    Join Date
    Sep 2008
    Location
    Canberra, Australia
    Posts
    1,914
    Post Thanks / Like

    Re: Project Yellow Peril

    Finally found some Shim Steel Washers in an assortment pack from eBay UK and I have fitted the washer to the Foot Valve. The Strut has been assembled and tested and I am pleased to inform you that the problem had been resolved!!!!

    Here's a pic of the Shim Steel Washer fitted to the Foot Valve:


    I can now throw the Struts back on the car and get her back on the road!

  18. #168
    Moderator, Committee Trevhib's Avatar
    Join Date
    Sep 2008
    Location
    Derby
    Posts
    5,829
    Post Thanks / Like

    Re: Project Yellow Peril


  19. #169
    Member Woznaldo's Avatar
    Join Date
    Sep 2008
    Location
    Canberra, Australia
    Posts
    1,914
    Post Thanks / Like

    Re: Project Yellow Peril

    Just when you think you're on a roll, fate smashes you in the teeth! Found some corrosion at the front of the LH Sill just behind the front wheel.


    Started tapping away, then went to town with my little Dremal.


    The main structural jacking point seems intact so not as bad as it could have been. The rest of the Sill is solid.


    I still need to keep peeling it back to get to some decent metal to weld to.....

  20. #170
    Member Woznaldo's Avatar
    Join Date
    Sep 2008
    Location
    Canberra, Australia
    Posts
    1,914
    Post Thanks / Like

    Re: Project Yellow Peril

    I have a Video Boroscope at work that I borrowed to have a look inside the Sill. Unfortunately, it was not good news.

    It seems like the vertical skin inside the Sill has several areas of corrosion along its entire length! The only repair available to me is to remove the old Sill, remove the inner vertical skin and replace both.

    The good new is that the other Sill is completely corrosion free.

    I think I need to give Mike a call........

  21. #171
    Member Woznaldo's Avatar
    Join Date
    Sep 2008
    Location
    Canberra, Australia
    Posts
    1,914
    Post Thanks / Like

    Re: Project Yellow Peril

    It's been a while, but I had to get some parts from UK and the shipping was going to hurt. I had to return to UK for a family funeral and thought I might as well use the baggage allowance to get the parts back.

    A big thanks to Mike for his friendly service. He every part I needed. Also, I must pass thanks to rich R5 for selling me his Williams Front Anti-Roll Bar, this means I'm getting close to having all parts need for my Widetrack conversion.

    Here's the parts all wrapped up, safely home in Oz.


    I haven't got my own welder and even if I did, it's been far too long since I used those 'skills' and would like to risk fluffing it up. So with that in mind I have handed over the task to a guy who has done some work for me before. I don't think it will be that cheap but at least it will be done properly. I dropped the car off at his place earlier today so he can chip away it over the next few weeks.

  22. #172
    Non-member Benjibrady's Avatar
    Join Date
    Jun 2011
    Location
    Bruton
    Posts
    747
    Post Thanks / Like

    Re: Project Yellow Peril

    The yellow peril is a feat of engineering brilliance, a credit to yourself.

  23. #173
    Member Woznaldo's Avatar
    Join Date
    Sep 2008
    Location
    Canberra, Australia
    Posts
    1,914
    Post Thanks / Like

    Re: Project Yellow Peril

    UPDATE:

    A little while ago I took the car round to a friend for a spot of welding to get the new Sill and Jack Pad thrown on. He did a great job, but only coating it with some anti-rust compound and primer. So, it was left to me to get the colour back on!

    This is how I got the car back.


    I refitted the door cleaned everything up and then masked it all.


    I threw down a few coats of Golden Wattle let it set then removed the masking. Not bad for a rattle can job!


    The Sill Extension was cracked and the attachment lugs had napped of in a few places so I did a bit of a repair and gave that a lick of paint too.


    Bracket repair


    Lastly was the Rear Arch Extension. The nuts were seized to the studs and just span out of the GRP. A stole an idea I saw on here a few years back using Nylon Nut and Bolt sets to replace the originals. Strong enough for the job and no more corrosion!


    All in all, I pretty happy with the result.

    Ran the car through the it's Roadworthy Inspection on Thursday and she flew though, so she's back on the road again!

  24. #174
    Member Woznaldo's Avatar
    Join Date
    Sep 2008
    Location
    Canberra, Australia
    Posts
    1,914
    Post Thanks / Like

    Re: Project Yellow Peril

    Oh, forgot to mention that I did the Castor Mod to my Front Wishbones, but I didn't know what it would look like until I refitted the Front Bumper. It gets close, but doesn't quite touch!


    I have to say that I don't really like the look, but I'm hoping for some epic turn in!

  25. #175
    Moderator, Committee Trevhib's Avatar
    Join Date
    Sep 2008
    Location
    Derby
    Posts
    5,829
    Post Thanks / Like

    Re: Project Yellow Peril

    Nicely done sir

  26. #176
    Member Woznaldo's Avatar
    Join Date
    Sep 2008
    Location
    Canberra, Australia
    Posts
    1,914
    Post Thanks / Like

    Re: Project Yellow Peril

    I just to the car to a local tyre place to have the alignment checked after the Caster Mods (re-drilling the outboard ball joint attachment hole), but he didn't really understand what I was trying to tell him.


    We got there(ish) in the end and the figures I have now are as follows:

    Front Toe: Zero
    Front Camber: LH -2.95, RH -2.90
    Front Caster: ??? don't know as he couldn't measure it...

    With the extra Caster (I'm going to guess at between 4 and 5 degrees?) -3 Deg Camber is probably a bit excessive!! I've got a track day of sorts on Wednesday (12 Dec 13) so I'll leave it for now.

    I did go for a blast before any adjustments and there was a marked improvement to the front end grip, especially during initial turn in. That was with -1 Deg Camber and zero Toe!

    I'll let everyone know how it goes on track, but will reduce the Camber to -2 after. Will probably go for 1mm of Toe out too.

    Thanks for reading.
    Last edited by Woznaldo; 08-12-2013 at 04:15.

  27. #177
    Member Woznaldo's Avatar
    Join Date
    Sep 2008
    Location
    Canberra, Australia
    Posts
    1,914
    Post Thanks / Like

    Re: Project Yellow Peril

    And just because I can....

  28. #178
    Non-member kial's Avatar
    Join Date
    Jan 2011
    Location
    Jersey, C.I.
    Posts
    211
    Post Thanks / Like

    Re: Project Yellow Peril

    Lovely job buddy. Keep up the work

  29. #179
    Non-member TNT ANDY's Avatar
    Join Date
    Sep 2008
    Posts
    2,614
    Post Thanks / Like

    Re: Project Yellow Peril


    I see you're adopting my spraying techniques Dave - I've done my passenger door and rear quarter just like that

    Jking aside - looking good.

  30. #180
    Member Woznaldo's Avatar
    Join Date
    Sep 2008
    Location
    Canberra, Australia
    Posts
    1,914
    Post Thanks / Like

    Re: Project Yellow Peril

    Thanks for all the comments guys.

    I've just got back got from a Track Day that I had at work. I wasn't sure how much of a difference the extra Caster would make, but I very pleased to say that it is a massive improvement! The front end grip was epic!

    Turn in was vastly improved and the balance between was front and rear was spot on!

    The day consisted of a series of different sprints which you queued up for (under a minute) and then hit at pace. The first was quite tight and then opened up a little towards the end. During this I could feel the front end just digging in and the back becoming mobile during lift off.

    The Aussies seemed to quite like my little 'upturned skip' and all commented on how well it 'looked like' it handled.

    I'm probably only running 15psi and 150bhp, but was still able to stay ahead of a RWD Skyline GTS with 400bhp, an HSV Commodore (like a Vauxhall Charlton with a big V8) running a Twin Turbo set up and 500bhp. I wasn't the fastest though. A mate had a S2 Lotus Exige that was a second quicker on the tight course, but about 5 secs quicker on a more open course later in the day.

    I also got a chance to give the Exige a blast and have to say that it was EPIC! Cost too much in Aus though.

    I'll try to get some pics up in the next few days.

    P.s. who's Dave?

  31. #181
    Member Woznaldo's Avatar
    Join Date
    Sep 2008
    Location
    Canberra, Australia
    Posts
    1,914
    Post Thanks / Like

    Re: Project Yellow Peril

    Well, not too much to add at this point other than a brake upgrade I'm doing as there were more options for the larger Discs.

    I've just gone for the 259mm Disc setup as used on R19 and Clio1 Valvers, except I got my Calipers from a Clio2 1.4 16v. I've got all the bits together and just giving the Calipers and Carriers a spray first then I'll throw it all together. So, the bits I've used are:

    Clio2 1.4 16v Calipers and Carriers
    DBA2352S 259mm Discs (the S on the end means they're slotted)
    Ferodo DS2500 Pads (FCP845H)

    I'll throw it all on over the next few days and get some pics up.

    I still plan on doing my widetrack conversion, but I'm still getting parts together. Specifically I'm going to need a Williams Clio Steering Rack and Williams/Valver Rear Beam. Once all the bits are here I'll change over to the 280mm Disc setup as I'll be running 172 Hubs.

  32. #182
    Member Woznaldo's Avatar
    Join Date
    Sep 2008
    Location
    Canberra, Australia
    Posts
    1,914
    Post Thanks / Like

    Re: Project Yellow Peril

    Here's a pic of the newly sprayed Calipers and Carriers for the 259mm Discs:


    I need to give the Pentagon Bolts a little refresh with some black paint, but then I'll be able to put them on.

  33. #183
    Non-member JP Racing's Avatar
    Join Date
    Apr 2009
    Location
    Ely
    Posts
    937
    Post Thanks / Like

    Re: Project Yellow Peril

    Just had a quick read through this thread there is some good info and work going on here keep up the good work and it looks good.

    I bet there aren't many gtts in Australia something a bit different

  34. #184
    Member Woznaldo's Avatar
    Join Date
    Sep 2008
    Location
    Canberra, Australia
    Posts
    1,914
    Post Thanks / Like

    Re: Project Yellow Peril

    There are a few knocking about and there's one for sale at the moment too! Probably about 10-15 max, if that. I know of at least five.

  35. #185
    Non-member Jeff Ninebar's Avatar
    Join Date
    Feb 2011
    Location
    Carshalton, Surrey
    Posts
    477
    Post Thanks / Like

    Re: Project Yellow Peril

    calipers look great, nice work!

  36. #186
    Moderator, Committee Trevhib's Avatar
    Join Date
    Sep 2008
    Location
    Derby
    Posts
    5,829
    Post Thanks / Like

    Re: Project Yellow Peril

    It's thinking man's GTT this car.

  37. #187
    Member Woznaldo's Avatar
    Join Date
    Sep 2008
    Location
    Canberra, Australia
    Posts
    1,914
    Post Thanks / Like

    Re: Project Yellow Peril

    Quote Originally Posted by Trevhib View Post
    It's thinking man's GTT this car.
    I think this car is trying my patience! Started to pull the old brakes off and found out that the LH Front Wheel Bearing is shot! I have had a few suspension knocks and have been trying to track them down, but wasn't expecting this!

    I've been trying to find a replacement bearing in Aus, but of course it is proving a lot harder than anticipated! I tried a few bearing suppliers, but none could give me what I wanted.

    I have since done a bit more net surfing and think I might be in with a chance, so will be heading back out tomorrow to see if things go my way!? If I can't pull it off soon I'll miss taking my GTT to a track day on Friday. Not a total loss as I'll just take my '98 WRX, but still not my preferred choice!

    Here's hoping........

  38. #188
    Member Woznaldo's Avatar
    Join Date
    Sep 2008
    Location
    Canberra, Australia
    Posts
    1,914
    Post Thanks / Like

    Re: Project Yellow Peril

    Here's one side (RHS) of the new brakes fitted to the car. I done a bit more of write up in the 'Cheap Brake Conversion' thread in the tech section so I won't go into detail here.


    Road test to follow once bearing is replaced and brakes bled.

    I also noticed that the Front Anti-Roll Bar Clamp (the big heavy thing in the middle of the bar) was contacting the subframe at what seems to be very limited travel and maybe have contributed to some of the suspension knocks I've been hearing. I can only guess at what it does, but I've removed it to get some extra travel.

  39. #189
    Moderator, Committee Trevhib's Avatar
    Join Date
    Sep 2008
    Location
    Derby
    Posts
    5,829
    Post Thanks / Like

    Re: Project Yellow Peril

    They look excellent. Ooh, rubbage on your inner wing from your wheels

  40. #190
    Member Woznaldo's Avatar
    Join Date
    Sep 2008
    Location
    Canberra, Australia
    Posts
    1,914
    Post Thanks / Like

    Re: Project Yellow Peril

    Quote Originally Posted by Trevhib View Post
    They look excellent. Ooh, rubbage on your inner wing from your wheels
    Yeah I'm really pleased with how they've turned out. I've got that rubbing on both sides. I don't want to run spacers and it only happens at extremes of lock, but annoying all the same.

    The quicker I get the widetrack conversion on the better! It will use all new brakes though, so I'll stick with this for a little while!

  41. #191
    Member Woznaldo's Avatar
    Join Date
    Sep 2008
    Location
    Canberra, Australia
    Posts
    1,914
    Post Thanks / Like

    Re: Project Yellow Peril

    Bob at CGB did a sterling service and got me two front wheel hub bearing kits to Australia for A$140 (GBP65). Yes, that means GBP45 to ship two bearing kits to Australia, but it did get here very quickly (normally a week plus).

  42. #192
    Member Woznaldo's Avatar
    Join Date
    Sep 2008
    Location
    Canberra, Australia
    Posts
    1,914
    Post Thanks / Like

    Re: Project Yellow Peril

    I picked up my hub yesterday complete with newly pressed in bearing and fitted everything back to car yesterday evening in fading light! All that was left was the brake bleed. Today I completed the bleed with the help of my 10 year old son (who did an awesome job!) and was able to double check all the torque loadings and lower the car to the ground.

    With the car all back together, I took the car out for a (careful) spin to both bed the brakes in and give them a good test too. As you would expect, the brakes felt a little vague to start off with, but with a healthy number of stops over a good 10 mins the feel started to come back as did the bite.

    Too early to pass final judgement, but initial impressions feel good. I'm driving to Brisbane over the weekend which is just under 600 miles (950km) so I'll have plenty of miles to get everything properly settled and give some better feedback.

  43. #193
    Member Woznaldo's Avatar
    Join Date
    Sep 2008
    Location
    Canberra, Australia
    Posts
    1,914
    Post Thanks / Like

    Re: Project Yellow Peril

    Brake update:

    Ok, I drove the car from Sydney to the Gold Coast (near Brisbane) which was fairly boring and took 7 hrs first day drive followed by 4 hrs the next day! A total distance of 850 km. The brakes performed well with a loaded up car, but I wasn't going to push it with all the gear in the back. Not for fear of dodgy brakes, but more because I didn't want the load joining me in the front!

    Anyway, once at my destination I was able to unload the car and go for a blast around some of the local mountain roads and have to say I'm very impressed. The initial bite is better than before and no signs of fade yet. If anything they have been getting better the warmer they get!?

    I'll take the old girl out again next weekend and try to push them a bit harder. The feel has been good too. At least as good as before if not better (one of my main concerns).

    Suspension update:

    I spoke to Gaz about their Mk1 VW Golf Adjustable Top Mounts as they looked like they might work better for my application than something from Compbrake, but I would need to have the Piston Rods machined first! It's a bit more work than I was hoping for, but might be worth it for the final result?

    I've also been speaking to Renault Power in Germany about their GpA Torsion Bars, but they're a little pricey. It's a shame as the suspension is one area I really want to develop, but there just isn't the same support at the Club Motorsport level in Aus.

    I might try a very well respected local firm that has had epic results in the World Time Attack Championship (WTAC). I've already sampled their entry level 'Blue Series' on my '98 WRX and love the results. The company is called Murry Coote Automotive (MCA) and they are very customer focused. I just don't know how much it will cost?

    More to follow.....
    Last edited by Woznaldo; 10-12-2014 at 11:24. Reason: add distance!

  44. #194
    Member Woznaldo's Avatar
    Join Date
    Sep 2008
    Location
    Canberra, Australia
    Posts
    1,914
    Post Thanks / Like

    Re: Project Yellow Peril

    OK, I continued with my research on the Top Mount/Camber Plate/Pillow Ball Mount and cam across something that I thought might fit the bill. They are actually made for a Toyota Celica ST162/164/185, but I asked the company if they could send me a paper template that I could print out to lay over the top of the Strut Tower and they provided a scale printable version!!

    They provide the best compromise of allowing for a DECREASE of Negative Camber (for future wide track), pushing the Strut Mount rearwards for extra Caster and fit within the Strut Tower with minimal modification.

    Now, the Strut Tower is going to need some modification, such as removing the pressed shoulder of the hole and drilling a few extra holes to allow for mounting and Camber adjustment.

    Here's a pic of the Top Mount and the Shouldered Sleeve to allow for my M14 x 1.5 thread on my Leda Struts.


    As soon as I get them fitted up I'll get some more pics up.

  45. #195
    Non-member wilton_warrior's Avatar
    Join Date
    Apr 2011
    Posts
    112
    Post Thanks / Like

    Re: Project Yellow Peril

    Realy liking the idea of this top mount design indeed

  46. #196
    Non-member
    Join Date
    Jul 2014
    Location
    Leicestershire
    Posts
    75
    Post Thanks / Like

    Re: Project Yellow Peril

    Love yellow cars, and i love this!

    Great read too!

  47. #197
    Non-member Matty's Avatar
    Join Date
    Aug 2014
    Location
    Longwick, Bucks
    Posts
    513
    Post Thanks / Like

    Re: Project Yellow Peril

    Nice build, lots of nice touches to the ecu install. :-)

    Is the long term plan to go efi?

  48. #198
    Member Woznaldo's Avatar
    Join Date
    Sep 2008
    Location
    Canberra, Australia
    Posts
    1,914
    Post Thanks / Like

    Re: Project Yellow Peril

    Quote Originally Posted by Matty View Post
    Nice build, lots of nice touches to the ecu install. :-)

    Is the long term plan to go efi?
    I say it almost every year, but hopefully I will throw the EFI manifold on over the Christmas break?.......

    I've got all the hardware except for the injectors, so I'll just get a set of 0280 150 0431 Bosch Red Tops for GBP60-70.

    I also need to make up a Throttle Body adapter to get pipe run sorted and clearing the bonnet.

    I've just got the car through the Aus equivalent to the MOT. It failed on loose seat mounts and the horn not working. I bought a set of Sparco seat runners and a universal Twin Air Horn. All good now! Toot toot!

  49. #199
    Member Woznaldo's Avatar
    Join Date
    Sep 2008
    Location
    Canberra, Australia
    Posts
    1,914
    Post Thanks / Like

    Re: Project Yellow Peril

    I pulled one of my Struts off today to see if I had enough available thread to go through the Camber Plate Bearing with the Coil Spring Top Hat in place. The bottom line is... ...there isn't . Here's a pic.


    I've also got an issue with the Strut itself, but will have to pull it apart to see what's what. I will order some new Piston Rods from Leda with longer threads and hopefully this will solve the issue with thread engagement.

    I also took the liberty to position the Camber Plate Base to see how far outboard and rear I could get it. Looks preety good for my 172 based Widetrack conversion!


    It's not exactly where I want it, but you get the idea.

    Hopefully I can get everything suspension sorted over the Christmas break.

    Woz

  50. #200
    Non-member Scoobykilla's Avatar
    Join Date
    Dec 2014
    Location
    Western Australia
    Posts
    78
    Post Thanks / Like

    Re: Project Yellow Peril

    New poster! (less than 10 posts)

    nice car and nice thread on it!!

    I know of 5 in Australia

    1) My newly aqquired red 1990
    2) yours.
    3) Pearl white in Perth.
    4) Black magic skeete (johns old one)
    5) the blue one for sale at the moment on Aussiefrogs (I nearly bought that).

Posting Permissions

  • You may not post new threads
  • You may not post replies
  • You may not post attachments
  • You may not edit your posts
  •