


Click Click Click Click Vroom
contributed by Ian Simpson
Does your starter sometimes just click a few times then work normally? Here is the likely cause and remedy....
The Cause
Provided your battery is fine the clicking on start is more than likely the connections to the starter solenoid being a bit corroded and causing the voltage to drop too much to allow the solenoid to fully operate.
Mine has been doing this for a year, through three starters and two flywheels. This week I measured the voltage drop across all the connectors from the battery to the starter, with the HT King lead un-plugged so it didn't start as the engine cranked as I turned the key to get current flowing through the solenoid, this is what causes the voltage to drop as it seems to be drawing about 33 Amps.
I found that it was often dropping to about 7 volts between the starter side of the connector under the engine coolant expansion bottle and the battery -ve terminal and the starter just clicked, sometimes it was making 9 volts and the starter turned.
It was 11.2V across the battery when not under load. With the immobiliser off and the ignition key turned to starter and the solenoid having gone click and the starter not turned, it lost 1.5 Volts between the battery and the large connector before the key barrel and lost another Volt across the key barrel (which I swapped for another which was the same) and the other approx 2V across the remaining connector blocks.
I don't know why the drop varied from key turn to key turn.
Without the solenoid operating as above, ie with the white wire to it un-plugged, the voltage was about 11, ie, no drop.
With the starter turning, the battery voltage its-self drops to maybe 9.6V. You would think this, given the above scenario, would cut the power to the solenoid but it doesn't.
The remedy
Is either to clean or replace all the contacts or, better, run a new, and large enough to cope with the 33 Amps, wire from the battery +ve terminal to a new 40 Amp automotive type relay which you install just before the under coolant bottle connector behind the left headlight.
Remove from the battery the -ve wire to chassis.
For access I removed the intercooler, air box, short boost hose and moved the coolant bottle.
Bear in mind that the new wire from battery +ve is not fused.
You can, if you can be arsed, remove the left front road wheel and plastic inner wing cover and run the wire through the scuttle panel drain hole and through the inner wing and out under the coolant bottle. Take car to protect or sheath this un-fused wire from long term chaffing and sharp metal edges.
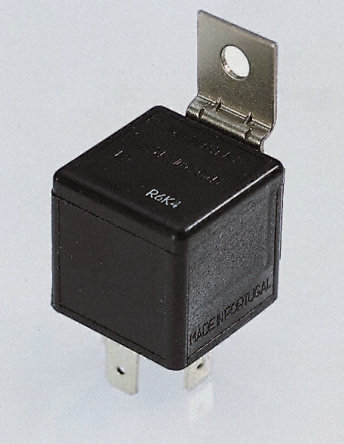
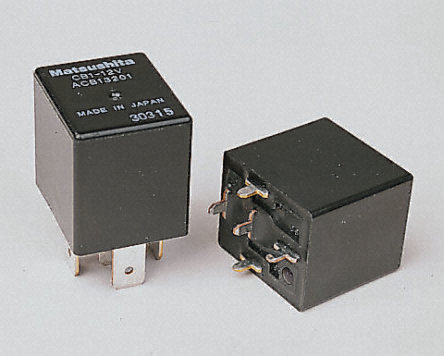
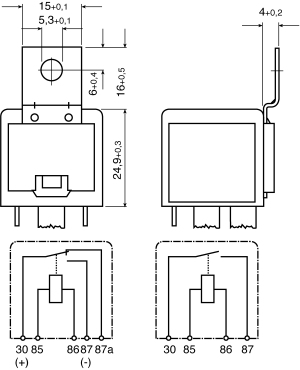
Solder the wire to the normally open contact of the relay. (contact numbered 87 in the diagram) A suitable relay can be bought from www.Maplin.co.uk, part number NO2AW, SPNO (Single Pole Normally Open contacts), 12V, 40A, automotive relay, £1.99inc.
Cut the large white wire a few inches back from the connector block and solder the end from the key barrel to either of the relay coil terminals. (85 or 86)
Solder the end that connects to the connector block to the centre contact of the relay. (30)
Get another new and thin wire, as it only carries small current, and join the remaining coil terminal (85 or 86) to a nearby chassis ground.
As it will get wet due to it's location, for long term anti corrosion reliability solder all the wires to the relay and then seal all the bare connections and any openings, such as the crack around the base of the relay to it's upper case, in loads of silicon sealer or something similar and position the relay nice and neatly avoiding getting sealer all over your fingers then everything you touch and everything those things touch.
Re-connect the battery, turn the ignition key and....
Hey Presto, bright flash, loud bang, smoke and telephone call to an auto electrician
Or your starter works better than ever every time.
And a BIG bonus is you car starts better than it ever did as no longer is large current being drawn through the highish resistance series of contacts and depriving the ignition ECU of it's voltage and current which are fed through the same series of highish resistance contacts, therefore allowing better sparking at starting.

and
Today, in Dec 2014, I was asked if I had more photos of this as it was confusing. No, I did it maybe 8 years ago, didn't have a digital camera back then, tried to describe everything as well as I could.
Reading it again now for the first time in years I can see why it might seem a bit confusing. It's not so difficult when you buy the relay and start to do the job, it becomes obvious, probably.
Basically, you run a new big red wire from the battery +, via a fuse, to the new relay that you fit just before the white multi pin connector behind the passenger side head light.
Then cut join the white wire that was feeding the white block, run both ends to specific contacts on the relay. Another wire earth the relay coil.
If you are able to take some pictures and they're any good, I might be able to use them in this article.
Addendum
While you're at it, there is another thing you can do to which may further enhance the ignition module functioning.
I haven't used the over boost ECU power cutting relay for some years. The ECU is fed via the relays normally closed contacts which includes the spade connectors in and out of the relay. After 15 years these are going to be somewhat corroded and not conducting at their best. With only 12 Volts and apparently 10 Amp pulses being drawn by the ECU this can cause something of a reduction in voltage and current and, ergo, a reduction in spark energy.
I seem to remember some years ago I measured 6 Ohms between the beige ECU +ve wire and the disconnected battery +ve lead. The ECU, as mentioned above, is supplied via the ignition key and all the connectors. So I decided to miss all of that out and simply fit a large wire from the Bat +ve to the ECU +ve, via a new 40 Amp relay, type as mentioned above.
Method
I unbolted and lifted out the ECU.
I removed the original relay and thin black wires that go through the rubber grommet in the scuttle panel to the boost switch, one that originates from the relay and one that returns to an earth in the taped loom which I partially un-taped.
I put the new relay where the old one was.
I soldered to the relay coil the old yellow ECU supply wire from the ignition key, soldered on a new thin black wire to the relay coil other pin and soldered the other end of that to the big black chassis connected wire that is located at the at the bolt on the front scuttle panel to which the battery -ve is joined.
I soldered the beige ECU +ve wire to one relay contact and soldered the new big red +ve wire from the battery to the other contact of this normally open single pole single throw relay, joining it's other end to the +ve terminal on the battery.
I managed to get the new red wire into the black plastic tube with the other battery outlet wire for abrasion resistance and neatness. I re-taped the loom. Think I applied silicone sealer or some insulation to the relay terminals. Re-fitted the ECU.
Result
Car did seem to start even better and I found it had gained an idle that was resistant to stalling, ie, the revs could drop very low but the engine keep on going. But the revs seem not to drop like they used to. Idle is more solid.
Ian S RTOC Profile


 Reply With Quote