Yessssss Goob!


Yessssss Goob!

YES!.... In true Goobie style, I'm bang on time with updates.Originally Posted by Goobie

As I've said, I'm a do-er and got some updates coming all this week starting with today, true to my word, end of march build has started again but more on what I've been doing the last week or two later, so for now onces I've uploaded pictures il show what's been going on today.
Oh, and I've added a index to page one, because I'm good like that and helps my O.C.D.

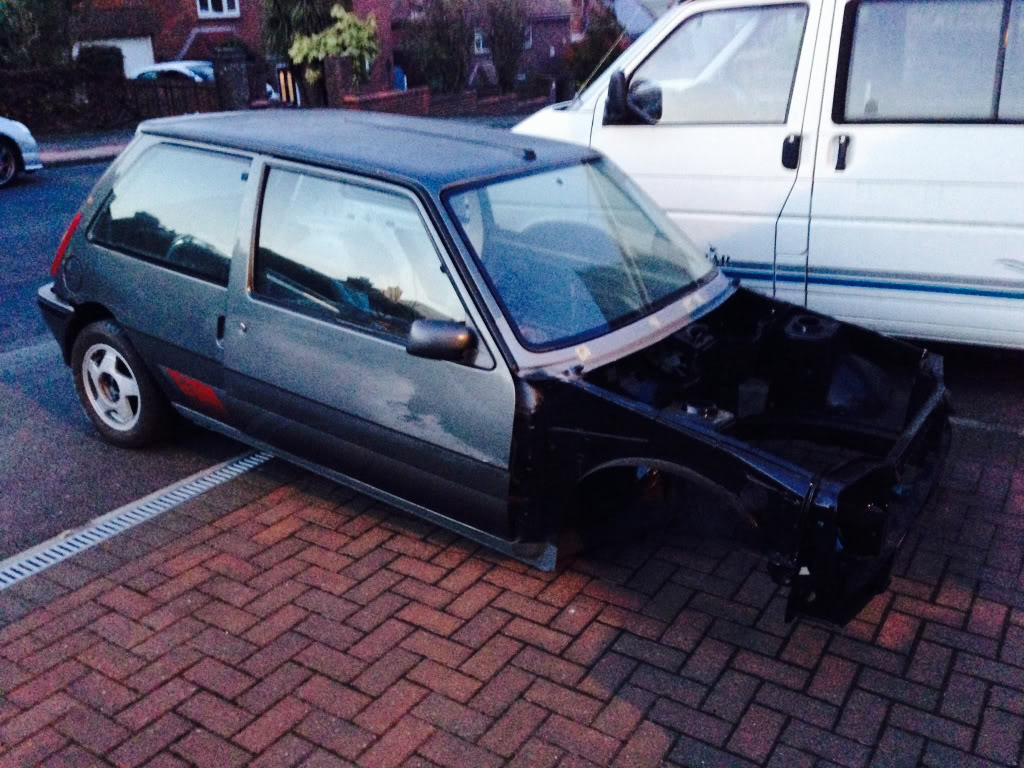
So, here we go.My shell seems to be in good shape and fixed the little nigglys last year, but it was playing on my mind what is hiding under the sills???
Yes, they look good and solid but some times that doesn't always mean in a year or two of real road use being that I live next to the beach with salty sea air that they won't start rotting out after having full respray, so decided to future prove my shell (mainly because I can) and cut them off.

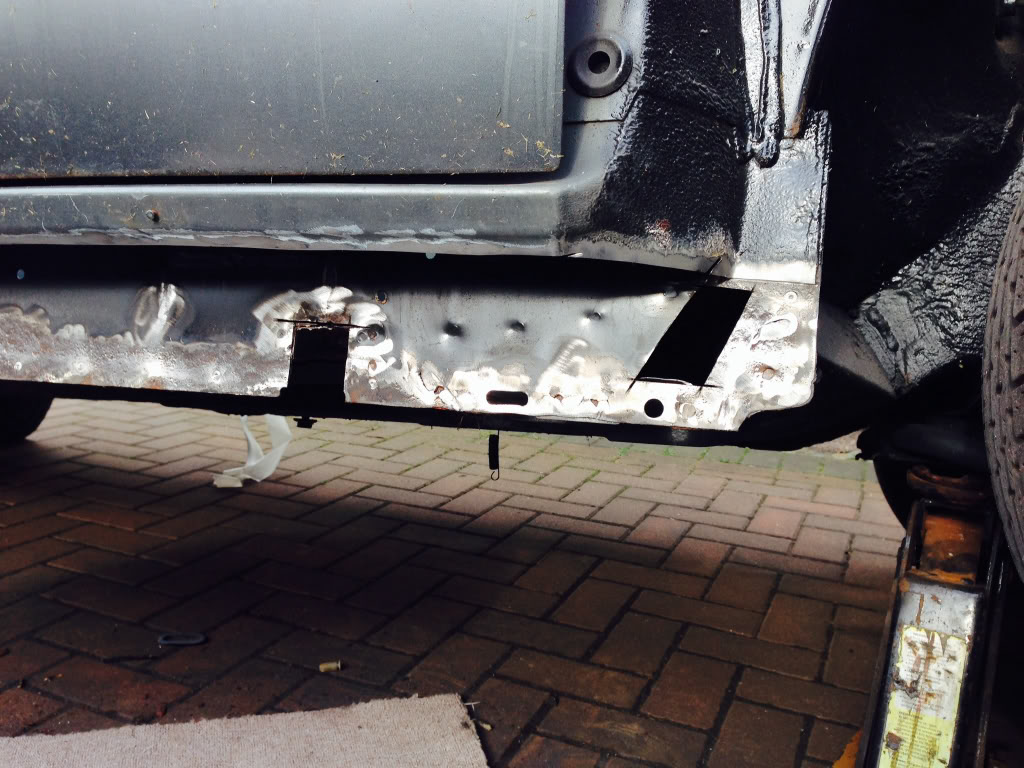
Ordered a pair off outter sills and inner I got off Ashy (Cheers buddy.) so I'm prepared for the worse, as rather have them and not need them then the other way round. So, got chopping them off today with some help.
Well, not bad atall as I already knew, but the usual surface rust lurking from between the bottom of the sill where water can splash up etc, quick go over with the wire brush shows all is solid.So all in all, no need for the inners sills in the end. Had a good look up and in and everything is all good to trim up the outter sill and weld on.

Got the new sill, messured it up, trimmed off the top half, check fit ment, all good!
Zinc primer the back and away we go.

Was so happy working away and to be getting things done, forgot to take more pictures.
Got other things to that I'm working on for it, pictures to follow once complete, WATCH THIS SPACE!
Looking good bud, I've got to do the exact same thing. I too am planning on cutting and welding my new ones on below the skirt level. Did you have any problems with blowing through? Although from the pics it doesn't appear so
Good work Goob! Looking good mate. My 5 be finished now, so maybe a dogging sesh Brighton way in the summer
Funny you should mention that as I was expecting it todo that, but not even one, using a different welder, but doubt that has anything todo with it.
As its in such good condition I was able to get away with chopping it so low, makes it a much easier job as you can see in the pictures.
Waiting to see your new sneaky updates you've been keeping secret! I could be wrong, but knowing you there be another set of alloys in there some where.
Chop chop.
Yeah mate there's a few little tweaks been made
I'll get some pics up once it's had a good valet and detail
Today was drivers side time to be cut off and checked etc. And good thing to as wasn't as pretty, just goes to show you never know what's hiding no matter how good it looks and sounds on the outside. Anyway, off it came and was faced with this.

Out come the trusty wire wheel and angle grinder for a clean up and left me with a couple rot holes that got chopped out then made a couple plates to weld back in.

Out come the welder and away we go.

Following on, crazy sanding and wire wheel session up and down the inner sill then nice thick zinc primer coatings, trim sill to suit, tack'd it on and....... Welder gas run out.

MORE BODY WORK........
Well, two things, when I first rubbed this down and stone chipped it I overlook the fact that bare metalling the underside and just spraying only stone chip over it is a bit of a no no!Also, I didn't really bother with the seam seal and left that when burning the 24 years old underseal off. So, turns out for many reasons I should of put some sort of base coat/rust protection on first then the stone chip etc.
Anyway, no major problem (kinda.), as where I've been welding in roll cage box sections, new seat rails, sills, drilling old ones out and spot weld hole filling blar blar, it's burnt off areas and wants stripping back and welds flatting anyway.
I forgot what a nasty job this is, and this time I've not got a ramp and fancy body shop tools.
Round two wire wheeling, this time I've strip all seam sealer to.

This is the mess just from that section!

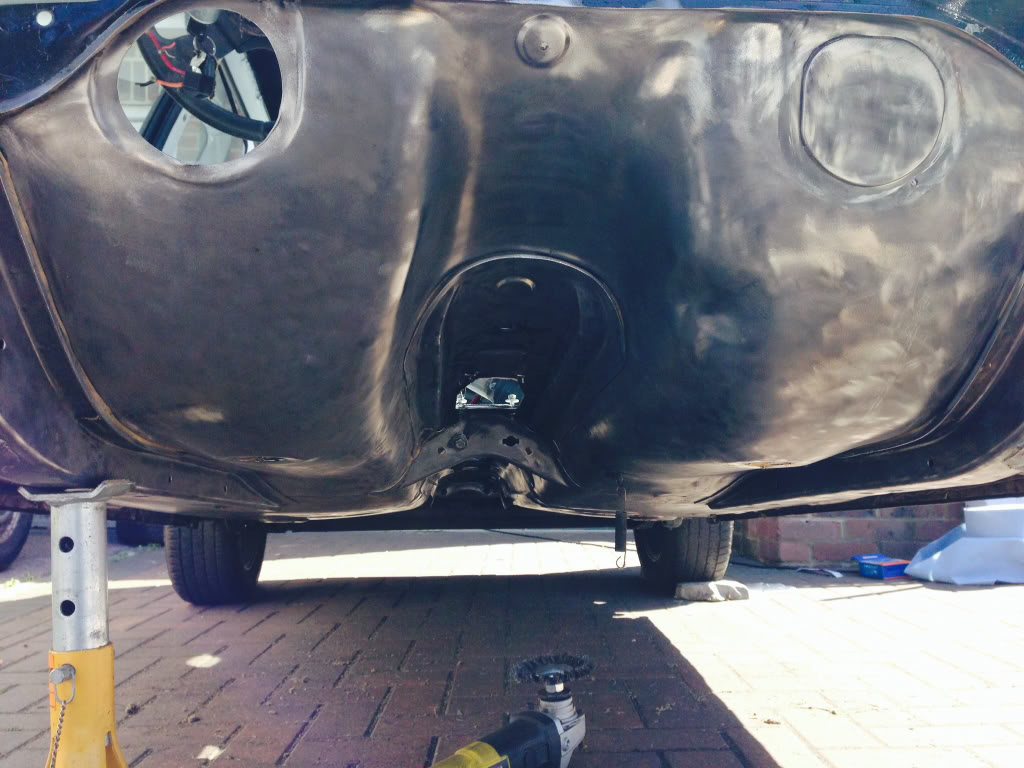
I did a lot more, but was at it solid and got to dark after I finish to get any decent pictures, I say finished, but really I only got as far as the whole front underside, just got the rear fuel tank area and boot floor left, then onto the wheel arches, oh the joy!
Can't help but feel I'm going backwards at times as this is now how it sits and I'm back doing jobs I've already done. BUT, if you want things done right, I guess some things aren't worth cutting corners. The car so light, I picked up the front and could move it round like a wheel barrel and wheeled it back into the garage like this. Next need to take the t-bar off, AGAIN, so I can get in everywhere properly and possibly give that another coat as it's off. Saying that, I reckon I could just pick the whole thing up once the rear taken off if get some one to lift the other side.
Good work and a good job you realised about putting something over the bare metal before it's to late. I am in the middle of this myself under the front arches, I burnt most of it out then got the wire wheel on it with the angle grinder. Google's and ear defenders are a must.
Oh my... This really is getting boring now. I've been keeping track of the grinding hours, I'm at 11 hours so far and I'm still not attacking the wheel arches or the whole rear upper section yet.
Some areas are just not easy to reach or get into, but at same time I think maybe I'm just being to o.c.d.?
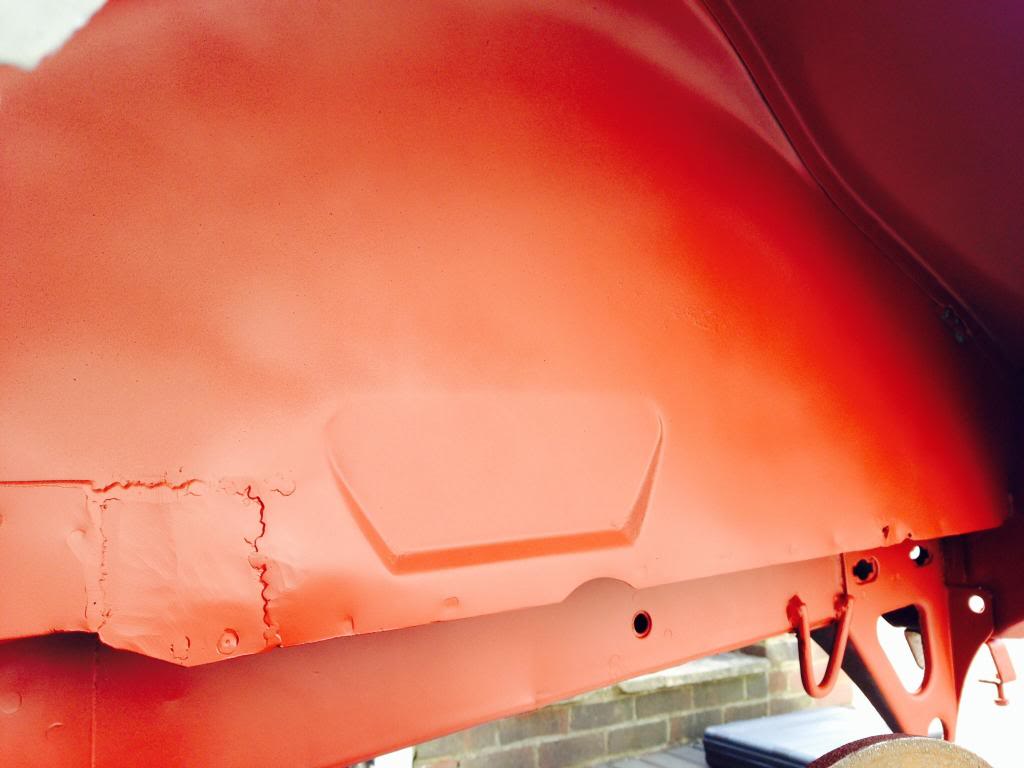
Anyway, took the subframe etc off to get on with the front curve section, gave that a good going over and gave it a couple thin coats of red oxide for now, still more todo, but not good leaving it all bare in a damp-ish garage etc, looking good so far tho.
You should leave it that colour
You know what, it actually does look pretty smart, the camera not "jazzing" the colour up, it is that strong and bright.
But, I've spent the penny's on aload of 3M cans and got them ready and waiting. Just all this time consuming process is taking its toll, not forgetting I'm still yet to seam seal the lot once I'm finishing grinding and coating it all and that before I apply the stone chip over EVERYTHING!
Attacked the front passenger wheel arch today, 3 and a half hours to grind this out!

Couple mid way pictures.

Pretty please with it even tho this is one nasty job todo. But as you can see, all solid.

Dam it, wrong picture. Anyway, forgot to take final picture before giving it a coating. But that arch is now done, next will be seam seal it all and stone chip, but I'm waiting till I've finished the whole car then do the seam sealant all at once etc. Whole arch in total took me just short of 4 and half hours, so one down, three to go........


It amazes me, these days so many of the projects on RTOC are fully-blown restos. It's great that folk are saving cars that would have otherwise been destined for scrap in the very near future. A lot of skill and dedication out there
Have to agree Trev.
I don't think when I started this just how far I was going to end up going, I have stripped down, taken off and removed everything apart from the doors and boot lid!
And with that said, I will be removing them in a week or two so I can get the inside painted. Will just be the bare shell rolling around on a trolly!
Have you considered seam welding the shell whilst its stripped back so much?
I see I've been getting a lot of hits so the main photo bucket hit its limit (using two accounts.) again, need to remember to split accounts when loading up, main pictures will be back up in two weeks when it resets.
Yes I have entertain the idea a few times,
Plus, for a road going car I think it will be just that bit to stiff if I doonce you add the fact I got Coilovers, polly bushes, meaty welded roll cage big box sections with four fixings on each foot!
Although, I've still got a way to go yet on the underside, and you've got my brain ticking now thinking about it.
Got more grinding done, three and half hours on the drivers side arch, still more todo on this arch but got to 6pm so decided it was best stop as getting a lot of noise complaints now.Should of got this sand blasted or something!


Ha I was going to say your neighbours must friggin love you
I've had four neighbours complain, not good when one of them is a copper and the other a solicitor!

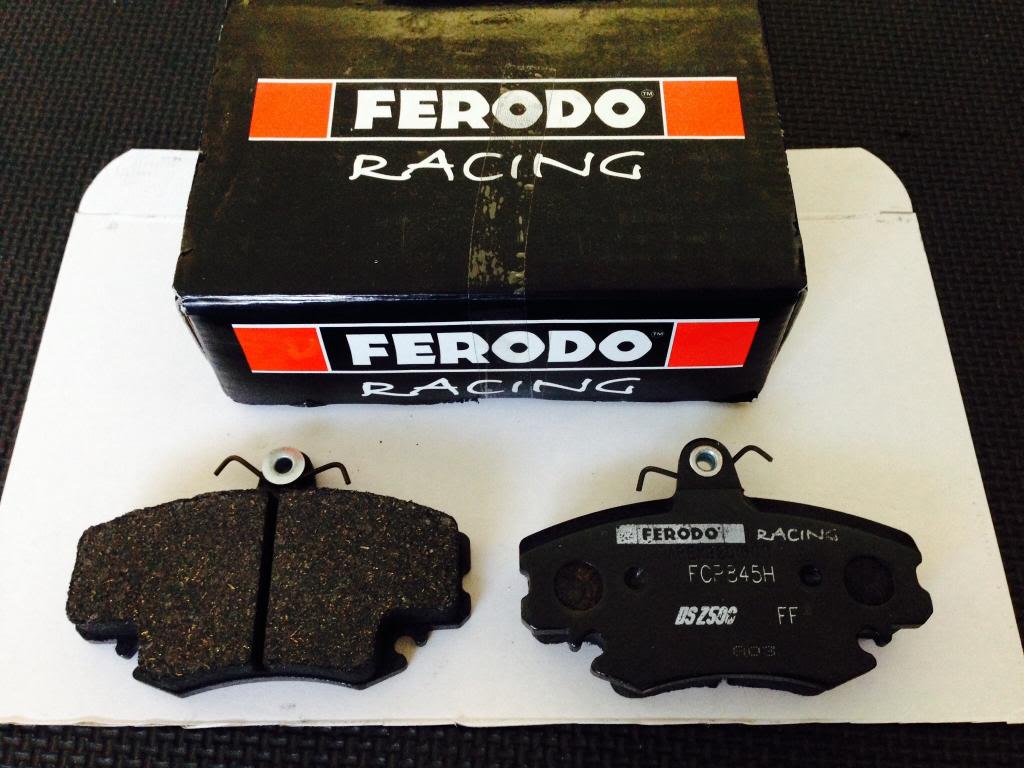
As I've said, I've still been buying bits and bobs here and there but not really posted up any, but here couple bits that's popped up last week. Got a full set of Ferodo DS2500 pads, bag'd myself a pair of 3 month old rear calipers and top condition campus plastic door card without the speakers holes for a bargain tenner!


Top work mate
Finished off the front wheel arch, bolted the sub frame etc all back on, wheel'd it out the garage to turn it around and back in and up on axel stands to attack the rears...........
Was flat out, so no picture of the front but I can tell you if it helps you sleep better, it looks the same as the other front arch pictures.
Moving on... Started the rear arch, got a lot off for two hours of grinding, so pretty pleased with that. Still got to get in all the tricky areas then that side done.
QUE PHOTO............

Only found two little sneaky cover up bodge jobs whilst at it, as I said, I've covered this myself but didn't strip the sealant off last time, hence another reason for me doing this job again. Anyway, back on topic, if you see areas that look like they gotton carried away with sealant, it most likely mean there some thing hiding/cover up underneath and here a fine example of that!
At the rear small area, this will be easy to fix.
And here I knew I was in for a treat as was rather large lump of it that I'm still digging out! This section will be a bit tricky to fix, but no major drama. Picture does make it look worse than it is, but good solid when giving it a good stabbing and not rusted on other side when pealing it back which would explain why didn't noticed it when I was doing the sill as all good from the other side etc.
Apart from that, the rest is golden.

Update, kinda.
Well after nagging/borrowing a welder etc I decided it was time to update my tool collection some more and bagged myself a decent welder.I was genuinely only just looking as been trying to get a decent second hand jobbie, but managed to blag myself a decent price.
Watch this space for some more fabricated one offs, can't wait!

Check you out
Already on it.
Just ordered a pimping joker printed mask off eBay to.
I can see a list of things I wanna weld with it growing already.

151te a very good welder! I've had one for about 10 years ish, never let me down and produces good results
Grind, grind, grind...
That's now three wheel arches down and one to go, CANT WAIT!

Cheers mate, got good review everywhere I've look'd.
Got my gangster welding mask today to, came with welding gloves, hat and carry bag.
Il edit this post for better pictures tomorrow.

Last edited by Goobie; 01-05-2014 at 20:19. Reason: Better pictures.
Top work mate. Coming along nice!!! Get it on the road already!!

I love reading this. It's great!
And keep chucking those photos on. Never too much
Posting Permissions

 Reply With Quote